

If you’re hunting for a spooktacular treat that’s easy to make and absolutely delightful, then you are going to LOVE this Witch Hat Brownie Pops Recipe. I’ve made these for Halloween parties and my family can’t get enough—they’re cute, chocolaty, and fun to eat! Whether you’re baking with kids or want a festive dessert that doubles as a party favor, this recipe hits all the right notes. Keep reading, and I’ll walk you through everything you need to make these magical brownie pops shine!
Why You’ll Love This Recipe
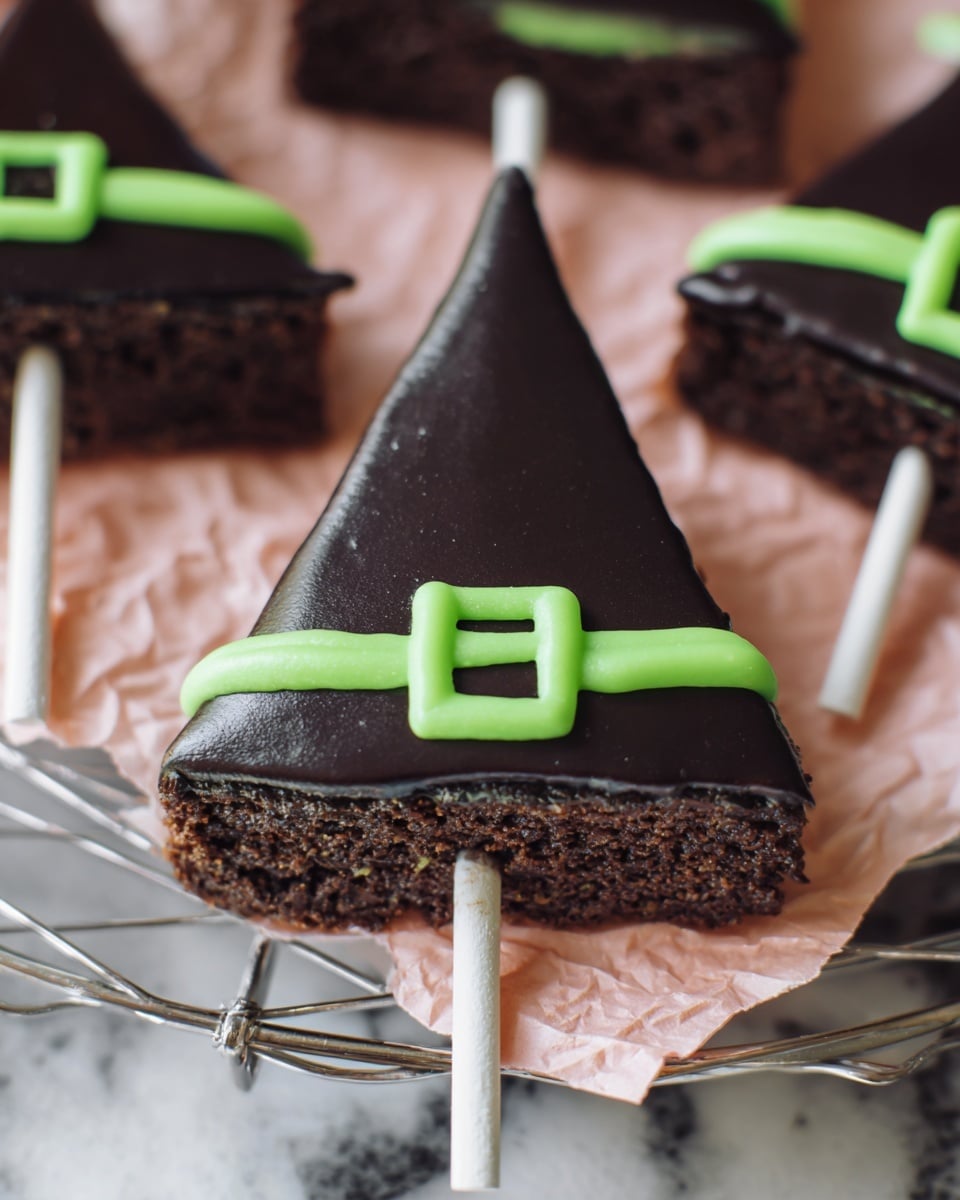
- Super Festive and Fun: These brownie pops look like witch hats—perfect for Halloween or themed events!
- No Fancy Tools Needed: You can whip them up with simple kitchen staples and easy-to-find ingredients.
- Kids Love Helping Out: Decorating with icing and gum pieces makes it a fun activity for little hands.
- Perfect Bite-Sized Treats: Easy to serve, share, and store—ideal for parties or casual snacking.

Ingredients You’ll Need
All the ingredients come together to create rich, fudgy brownies topped with luscious, dark frosting. The black gel coloring makes these pop visually, and the shimmer icing gives that little magical sparkle you won’t want to skip.
- Brownie Mix: I usually grab Duncan Hines Family 13×9 size for that classic chocolate flavor and great texture.
- Eggs: These bind everything together and give the brownies their dense, chewy feel.
- Water and Oil: Keeps the brownies moist without being greasy.
- Americolor Gel Paste (Black): This gel is key for achieving that rich black color—don’t substitute with liquid food coloring, it won’t be as vivid.
- Confectioners’ Sugar: For the smooth, sweet frosting that contrasts nicely with the dark brownie.
- Dark Cocoa Powder: Gives the frosting a deep chocolate flavor that matches the brownies perfectly.
- Butter: Softened butter creates creamy frosting texture and richness.
- Milk: Adjusts frosting consistency—don’t add too much or it’ll be runny.
- Vanilla Extract: Adds depth and balances the chocolate.
- Skewer: Handy for poking holes to insert the straw “sticks.”
- Paper Party Straws: Serve as the sturdy handles for the brownie pops—plus, they’re colorful!
- Square Bubble Gum Pieces: A fun and edible detail for the hat buckle.
- Shimmer Gel Icing: This is the magic finishing touch for drawing the hat brim—adds sparkle and detail.
Variations
I always encourage making recipes your own! The Witch Hat Brownie Pops Recipe is no exception. Whether you want to try different frosting flavors or swap out decorations to match your theme, it’s easy to customize.
- Frosting Flavors: I tried mint extract once instead of vanilla for a cool twist—my family went crazy for it!
- Decorations: Instead of bubble gum, use candy eyeballs or mini chocolate chips for a spooky effect.
- Diet Swaps: Use gluten-free brownie mix and dairy-free butter alternatives for allergy-friendly treats.
How to Make Witch Hat Brownie Pops Recipe
Step 1: Bake the Perfect Black Brownies
Start by preheating your oven as directed on the brownie box. Line two 8-inch round cake pans with parchment paper and grease them well to prevent sticking. Mix the brownie mix with eggs, water, oil, and those drops of black gel paste. Make sure you stir the black coloring evenly to get an intense color—this is what sets the spooky tone! Pour the batter evenly into the pans and bake for about 25-30 minutes. Keep an eye on the middle; it shouldn’t be squishy or too soft, or the hat shape won’t hold up later. Let the brownies cool in the pans for 5 minutes before transferring them to a rack to cool completely.
Step 2: Whip Up Dark Fudge Frosting
While the brownies are baking, mix confectioners’ sugar and dark cocoa powder in a large bowl. Cream in softened butter until it becomes smooth. Gradually whisk in milk, then vanilla extract and black gel paste. The frosting should be thick enough to hold its shape when piped—if it’s too thin, add a little more sugar; too thick, add a splash of milk. Pop it in the fridge for about 30 minutes to let the colors deepen and the frosting firm up a bit.
Step 3: Shape, Assemble & Decorate Your Witch Hats
Cut each cooled round brownie into 8 equal triangular “hat” slices. Use a skewer to poke a hole near the top center of each piece—this is where the straw handle will go. Gently insert a paper party straw into the hole; it should feel snug without cracking the brownie. Fill a piping bag with your dark frosting and outline each triangle to create a halo “rim” on the hats; this acts like a dam to hold the fill. Pipe frosting inside the outlined area and smooth it out with an offset spatula or knife. After the frosting sets a bit, draw a straight line across the bottom to mimic the brim using shimmer gel icing. Finally, add a gum piece on top like the buckle—you’re almost done! Let everything dry for a little while before serving.
Pro Tips for Making Witch Hat Brownie Pops Recipe
- Use Gel Coloring for Vibrant Black: Liquid food coloring never gave me the deep black I wanted—gel paste does the trick beautifully.
- Don’t Overbake Your Brownies: They set better if you pull them out right when a toothpick comes out mostly clean—avoiding dryness helps keep the pops sturdy but tender.
- Chill Your Frosting Before Piping: It makes it easier to pipe sharp edges and keeps your hat shapes nice and neat.
- Be Gentle When Inserting Straws: Use the skewer for a precut hole to prevent breaking the brownie and ensure a solid handle.
How to Serve Witch Hat Brownie Pops Recipe
Garnishes
I love to keep garnishes simple so the witch hats themselves shine, but the shimmer gel icing adds a perfect magical sparkle. Sometimes, I sprinkle edible glitter around the serving tray for an extra enchanted vibe. If you want to get playful, colorful sprinkles or mini candy pumpkins make for festive alternatives—just be sure not to overwhelm the clean lines of the hats.
Side Dishes
These Witch Hat Brownie Pops are decadent enough on their own, but I like pairing them with a glass of cold milk or a steaming cup of hot cocoa for the full cozy experience. For Halloween parties, a bowl of candied popcorn or spiced apple cider fits perfectly alongside to balance the rich cocoa flavors.
Creative Ways to Present
One year, I displayed the brownie pops standing upright in a pumpkin-shaped foam block covered with sparkly black fabric—that presentation was a total hit! You could also arrange them on a tiered cake stand like a haunted forest, or wrap individual pops in clear cellophane tied with ribbons for party favors. Kids especially love unwrapping their own mini witch hats.
Make Ahead and Storage
Storing Leftovers
I store leftover Witch Hat Brownie Pops in an airtight container in the fridge to keep the frosting firm and the brownies fresh. They usually stay delicious for about 3-4 days, but honestly, they rarely last that long at my house!
Freezing
If you want to make these ahead and freeze, go for it! I freeze them after they’re fully decorated and the frosting is set. Wrap each pop individually in plastic wrap, then place them all in a freezer-safe container. When you’re ready, thaw overnight in the fridge to keep their shape and taste.
Reheating
Usually, these brownie pops are best served cold or at room temperature. However, if you want to warm one up, I suggest a quick 10-second zap in the microwave—just enough to soften the brownie slightly but not melt the frosting completely.
FAQs
-
Can I make Witch Hat Brownie Pops Recipe without the black gel coloring?
While you can skip the gel coloring, the iconic look comes from that deep black shade. If you leave it out, the brownie pops will look like regular chocolate hats instead of spooky witch hats, but they’ll still taste delicious!
-
What if I don’t have shimmer gel icing?
You can substitute with regular colored gel icing or even melted white chocolate tinted with black gel paste. The shimmer just adds a fun sparkle, but the recipe works without it.
- Can I use other types of straws for the brownie pops?
Paper party straws are best because they’re sturdy, food-safe, and come in fun colors. Avoid plastic straws as they might melt or not hold up well inside the brownie.
-
How do I prevent the brownies from cracking when inserting the straw?
Use a skewer to carefully pre-poke a hole where the straw will go to minimize cracking. Insert the straw gently and avoid forcing it too hard.
Final Thoughts
I absolutely love how this Witch Hat Brownie Pops Recipe brings together simplicity and festiveness in one bite-sized treat. When I first tried making them, I was amazed at how impressed my guests were with such a straightforward recipe. Whether you’re new to baking or a kitchen pro, these pops are foolproof, playful, and perfect for creating sweet memories—especially around spooky seasons. Give it a try, invite some friends, and enjoy the magic of baking these enchanting brownie hats together!
Print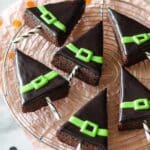
Witch Hat Brownie Pops Recipe
- Prep Time: 10 minutes
- Cook Time: 25 minutes
- Total Time: 35 minutes
- Yield: 16 pops
- Category: Dessert
- Method: Baking
- Cuisine: American
Description
Create festive Witch Hat Brownie Pops perfect for Halloween or themed parties. These rich, black-colored brownies are baked in round pans, cut into triangles, and decorated with dark cocoa fudge frosting to resemble witch hats, complete with shimmery brim lines and bubble gum pom-poms on top.
Ingredients
Brownies
- 1 box Duncan Hines Family 13×9 size brownie mix
- 3 eggs
- ¼ cup water
- ½ cup oil
- 4-6 drops Americolor gel paste, black
Fudge Frosting
- 2 cups confectioners’ sugar
- ¼ cup dark cocoa powder
- 3 tablespoons butter, softened
- 5 tablespoons milk
- ½ teaspoon vanilla extract
- 6 drops Americolor gel paste, black
Other Items
- 1 skewer, to make holes
- 16 paper party straws
- 16 square bubble gum pieces
- 1 tube shimmer gel icing
Instructions
- Preheat & Prepare Pans: Preheat your oven as directed on the brownie mix box. Grease and line two 8-inch round cake pans with parchment paper, also greased to prevent sticking.
- Mix Brownie Batter: In a mixing bowl, combine the brownie mix, eggs, water, oil, and 4-6 drops of black gel paste color. Mix thoroughly until fully incorporated.
- Bake Brownies: Divide the batter equally between the two round pans. Place them on the middle rack of the oven and bake for 25-30 minutes until a toothpick inserted comes out mostly clean and the center is firm.
- Cool Brownies: Allow the brownies to cool in the pans for 5 minutes, then carefully remove them and transfer to a cooling rack to cool completely.
- Prepare Fudge Frosting: In a large bowl, whisk together confectioners’ sugar and cocoa powder. Add softened butter and mix until crumbly. Slowly add milk while mixing to reach a thick but spreadable consistency. Finally, add vanilla extract and 6 drops of black gel paste, mixing well. Chill the frosting in the refrigerator for about 30 minutes to deepen the color and stiffen it.
- Cut Brownies into Triangles: Cut each cooled round brownie into 8 equal triangles, making a total of 16 hats.
- Insert Straws: Using a skewer, poke a hole in the center of each brownie triangle. Remove the skewer and insert a paper party straw in each hole to serve as the hat’s stick.
- Pipe Frosting Outline: Fill a piping bag with the chilled frosting, using either a small tip or by cutting a small hole at the corner. Pipe a hollow triangle outline along the edges of each brownie piece to create a dam for the filling.
- Fill Frosting Centers: Flood the inside of each piped triangle with more frosting, smoothing with a knife or offset spatula to create an even surface. Let the frosting set slightly.
- Add Brim Decoration: Using the shimmer gel icing, draw a straight line across each hat near the base to mimic a hat brim.
- Top with Bubble Gum: Place a square bubble gum piece at the peak of each hat as the finishing touch. Allow the icing to dry before serving.
Notes
- Ensure brownies are fully cooled before decorating to prevent melting or sliding of frosting.
- The black gel paste color can be adjusted to achieve desired darkness.
- Use parchment paper in pans for easier removal and cleaner edges on brownies.
- Chilling frosting helps it hold its shape better when piping.
- For a gluten-free version, use a gluten-free brownie mix.
Nutrition
- Serving Size: 1 brownie pop (approx. 70g)
- Calories: 230
- Sugar: 18g
- Sodium: 140mg
- Fat: 12g
- Saturated Fat: 6g
- Unsaturated Fat: 5g
- Trans Fat: 0g
- Carbohydrates: 28g
- Fiber: 1g
- Protein: 2g
- Cholesterol: 30mg

