
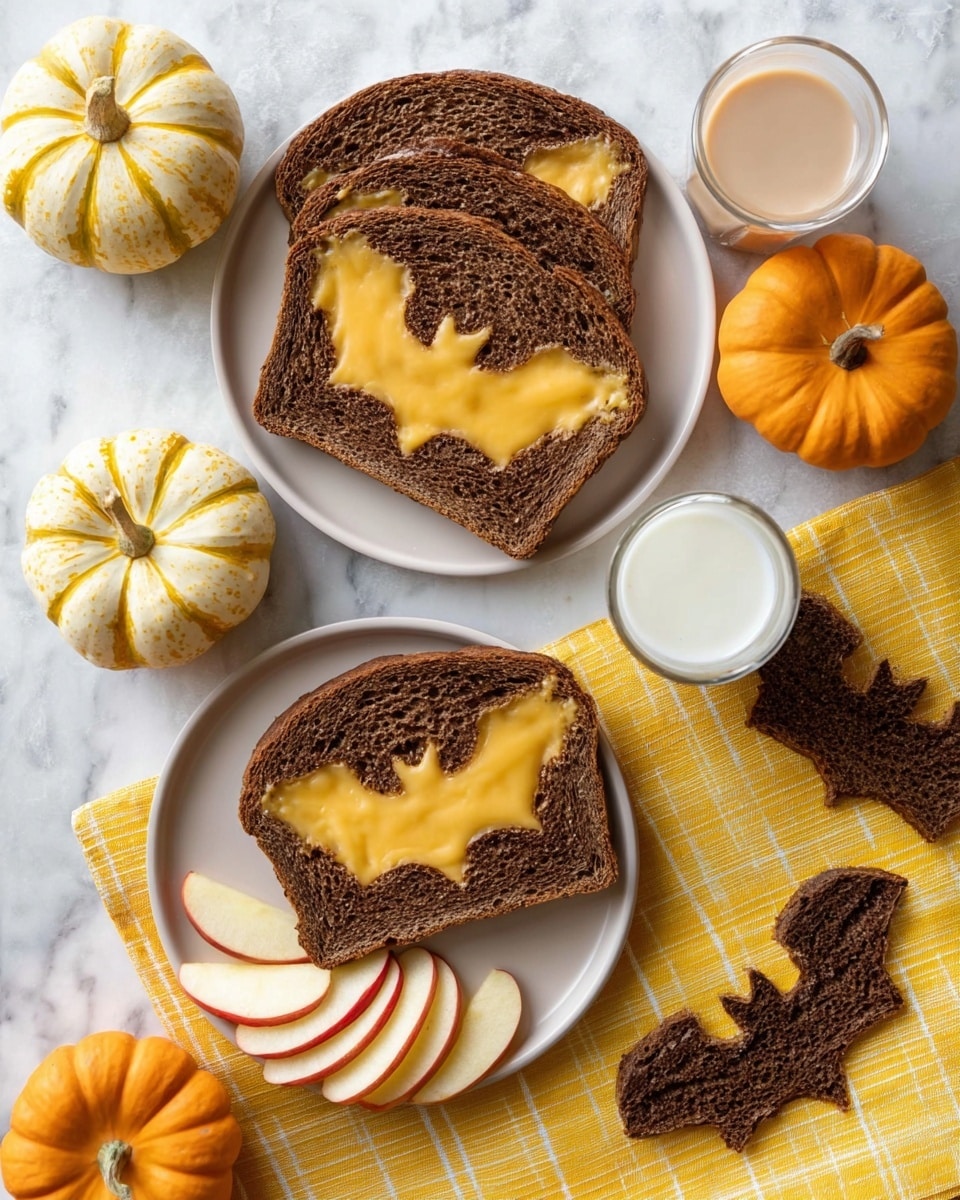
If you’re hunting for a fun and festive twist on a classic, you’re going to adore this Spooky Grilled Cheese Recipe. It’s not just your everyday grilled cheese — this one comes with a playful Halloween vibe that’s bound to delight kids and grown-ups alike. Whether you’re prepping for a spooky brunch or just want a sandwich with some seasonal flair, this recipe is fan-freaking-tastic and super easy to make. Trust me, once you try it, you’ll find yourself making it every October!
Why You’ll Love This Recipe
- Super Simple: It’s quick to make with just a few ingredients and minimal prep.
- Fun and Festive: The Halloween-themed shapes make it perfect for family gatherings or kids’ parties.
- Delicious Classic Flavor: Rich cheddar and hearty pumpernickel combine for comfort food with a twist.
- Versatile Snack: Great for a quick lunch, a snack, or even an easy dinner when you’re short on time.

Ingredients You’ll Need
To make this spooky grilled cheese, I like to keep it simple with classic ingredients that work beautifully together. Using pumpernickel bread not only adds a rich, slightly tangy flavor but also gives your sandwich a deep, dark look that’s perfect for the Halloween vibe.
- Butter: I prefer unsalted butter so I can control the saltiness, but salted works too for a little extra flavor.
- Pumpernickel or Dark Rye Bread: The denseness helps hold the cheese and cutouts nicely without falling apart.
- Cheddar Cheese: Sharp cheddar melts beautifully and adds a punch of flavor that contrasts the bread perfectly.
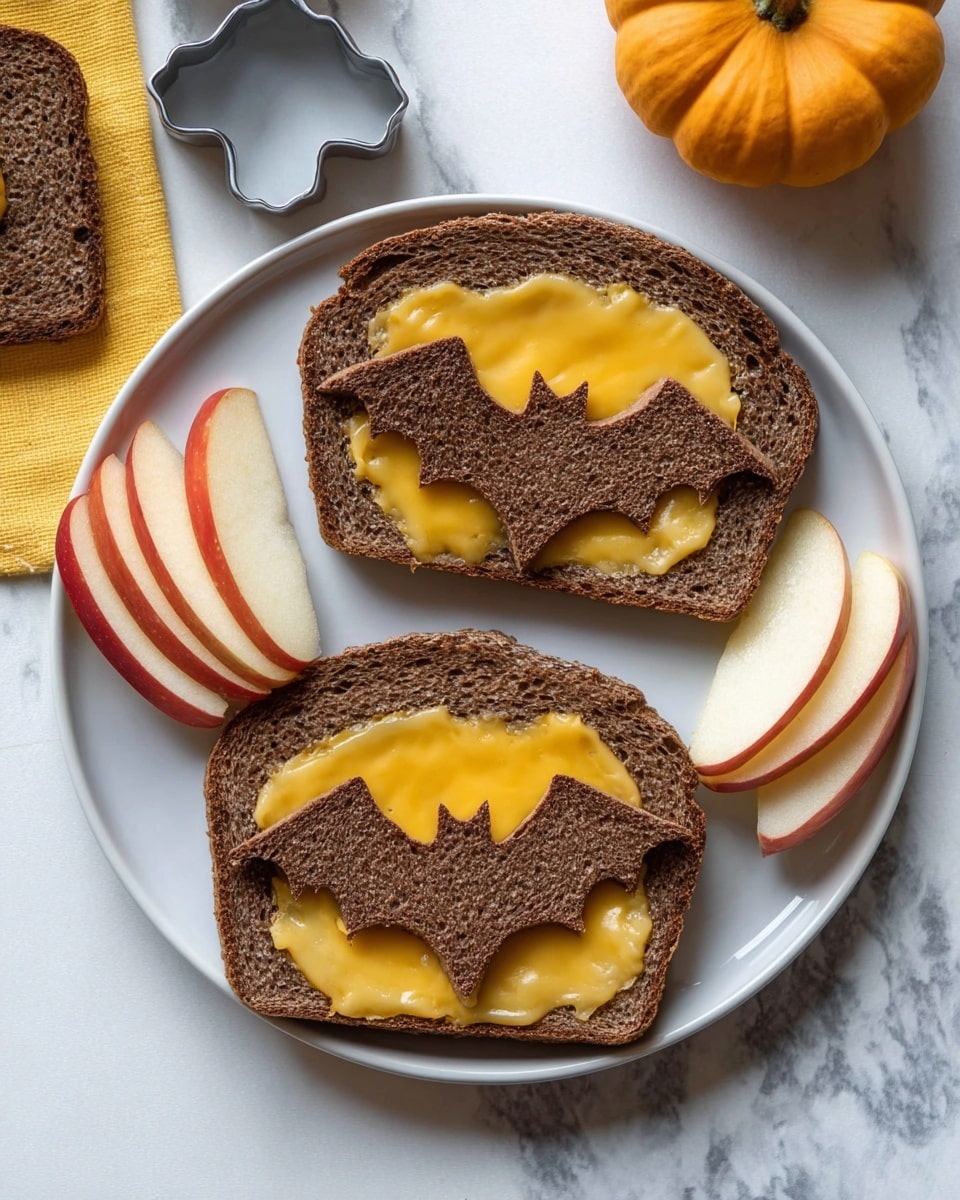
- Halloween-Themed Cookie Cutter: This is the secret weapon for making your grilled cheese spooky and fun — pumpkins, ghosts, bats, whatever you find!
Variations
I love how you can make this Spooky Grilled Cheese Recipe your own. You can swap cheeses or breads and still keep all the Halloween fun intact — it’s your playground! Here are a few twists I’ve tried or thought would be great.
- Variation: Adding a thin slice of apple or pear inside the grilled cheese gave it a lovely sweet crunch — my family was totally surprised by how good it was!
- Vegetarian Variation: Load up with sliced tomatoes or sautéed mushrooms to make it even heartier without meat.
- Cheese Swap: If sharp cheddar isn’t your thing, try mozzarella for an ooey-gooey stretch or pepper jack for a little spicy kick.
- Gluten-Free: Use your favorite gluten-free bread and still get that spooky sandwich fun going strong.
How to Make Spooky Grilled Cheese Recipe
Step 1: Craft Your Spooky Shapes
Start by taking four slices of your pumpernickel or dark rye bread and pressing your Halloween-themed cookie cutter into the center of each slice. I like to press down firmly and wiggle it a bit to ensure clean edges — no one wants a wonky ghost! Save the cut-out centers and the whole slices; they’ll both get grilled and layered.
Step 2: Heat and Butter Your Skillet
Place a skillet or griddle over medium heat and add enough butter to coat the bottom. I’ve learned that medium heat keeps the bread from burning while giving the cheese time to melt perfectly. Don’t rush this step — patience pays off here!
Step 3: Grill Your Bread to Golden Perfection
First, place the cut-out pieces and the full slices onto the buttered skillet. Let them cook for about 3 minutes until the bread edges are golden and crunchy. This method ensures your “spooky” frames are toasty and flavorful.
Step 4: Layer Cheese and Assemble
Flip the whole slices over, then quickly place a slice of cheddar on top while the heat is still on them. Follow by topping with the un-cooked cut-out bread piece to form a sandwich with a little “window.” Cook another 3 minutes until the cheese melts deliciously and everything is golden brown.
Step 5: Serve Immediately
The magic of this Spooky Grilled Cheese Recipe is best enjoyed fresh off the pan while the cheese is still oozy and the bread crisp. Cut into halves or triangles, and watch everyone’s eyes light up!
Pro Tips for Making Spooky Grilled Cheese Recipe
- Use Medium Heat: Low heat makes the cheese melt slowly, high heat burns the bread — medium hits the sweet spot every time.
- Butter Both Sides: Butter the outside of the bread slices for that perfect golden crust and buttery flavor.
- Press Lightly: When assembling, gently press the sandwich so the cheese melts evenly but don’t squish your spooky shapes out of place.
- Make It Ahead: Cut your spooky shapes in advance and keep them covered to save time on the day of your party.
How to Serve Spooky Grilled Cheese Recipe
Garnishes
I like to sprinkle a little smoked paprika or chili powder on top for a hint of color and spice — it adds some flair without covering the fun shapes. For a real Halloween touch, add tiny edible eyes on the cheese “windows” using mustard or black olive bits. Kids love it!
Side Dishes
Pair your spooky grilled cheese with a warm bowl of tomato soup for a classic combo, or try it alongside a crisp apple salad to balance the richness. For a real indulgence, sweet potato fries with a touch of cinnamon make a fantastic partner.
Creative Ways to Present
One of my favorite ways to present these is on a platter lined with lettuce or kale “grass,” scattered with candy corn or mini pumpkins for a festive party vibe. You can also stand the sandwiches upright using small skewers, so the spooky cutout faces really pop.
Make Ahead and Storage
Storing Leftovers
If you happen to have leftover spooky grilled cheese sandwiches (which is rare at my house!), wrap them tightly in foil and store in the fridge up to 2 days. I found they keep well if reheated properly, but the crispy edge won’t be quite as perfect the next day.
Freezing
Freezing grilled cheese is tricky because of the bread texture, but if you want to prep in advance, freeze each sandwich before cooking. Then cook directly from frozen in the skillet — adding a minute or two to melt the cheese thoroughly. It’s not quite as good as fresh, but it works in a pinch!
Reheating
I recommend reheating your leftover Spooky Grilled Cheese Recipe in a skillet over low-medium heat. Cover the pan to trap steam and help the cheese soften without drying the bread. Avoid microwaving if you want to keep that crispy crust intact.
FAQs
-
What kind of bread is best for Spooky Grilled Cheese Recipe?
I highly recommend pumpernickel or a dark rye bread because their sturdy texture and deep color really enhance the spooky effect and stand up well to grilling. But you can experiment with any bread you love!
-
Can I use other types of cheese for this recipe?
Absolutely! Sharp cheddar is classic and melty, but mozzarella, Swiss, or pepper jack can all work. Just pick a cheese that melts well and suits your flavor preferences.
-
How do I keep the cut-out shapes intact while cooking?
Make sure to press your cookie cutter firmly to get clean edges, and cook the cut-outs separately before assembling the sandwich. Handling gently and cooking over medium heat also helps keep their shape crisp and intact.
-
Can I make this recipe dairy-free?
You sure can! Use a plant-based butter for grilling and dairy-free cheese slices that melt well. The flavor profile changes a bit, but it’s still tasty and festive.
-
How long does it take to make the Spooky Grilled Cheese Recipe?
From start to finish, it usually takes about 8 minutes — just 2 minutes prepping your cut-outs and 6 minutes cooking. Perfect for quick, themed snacks or meals!
Final Thoughts
Honestly, this Spooky Grilled Cheese Recipe is one of those little kitchen joys I look forward to every fall. It brings together nostalgia, creativity, and deliciousness all in one bite — and who can resist that? I love sharing it with friends and family because it sparks smiles and conversation. Give it a try, have fun with the shapes, and enjoy the simple pleasure of gooey cheese and buttery, toasty bread with a spooky twist!
Print
Spooky Grilled Cheese Recipe
- Prep Time: 2 minutes
- Cook Time: 6 minutes
- Total Time: 8 minutes
- Yield: 4 sandwiches
- Category: Main Dish
- Method: Frying
- Cuisine: American
Description
A fun and festive grilled cheese sandwich perfect for Halloween, featuring cheese melted between dark rye or pumpernickel bread with spooky cut-out shapes.
Ingredients
Ingredients
- Butter, enough for cooking
- 8 slices pumpernickel or dark rye bread
- 4 slices cheddar cheese
Instructions
- Prepare the bread: Using a Halloween-themed cookie cutter, cut out the centers from four slices of bread to create spooky shapes.
- Heat the skillet: Place a griddle or skillet over medium heat and melt an adequate amount of butter to coat the surface.
- Cook the bread pieces: Place both the cut-out center pieces and the whole slices of bread in the skillet and cook for about 3 minutes to toast them slightly.
- Assemble the sandwiches: Flip the whole slices of bread, then place a slice of cheddar cheese on top. Next, top the cheese with the corresponding cut-out bread piece.
- Melt the cheese: Continue cooking the assembled sandwiches for another 3 minutes or until the cheese is melted and the bread is golden brown.
- Serve: Remove from heat and serve the spooky grilled cheese sandwiches warm for a fun Halloween lunch or snack.
Notes
- Use a non-stick skillet for easier cooking and cleanup.
- Experiment with different types of cheese for varied flavor.
- Make sure to butter the skillet well to prevent sticking and achieve a crisp texture.
- Use any Halloween-themed cookie cutters to create fun shapes.
- Serve with tomato soup for a classic pairing.
Nutrition
- Serving Size: 1 sandwich
- Calories: 350
- Sugar: 3g
- Sodium: 600mg
- Fat: 20g
- Saturated Fat: 10g
- Unsaturated Fat: 8g
- Trans Fat: 0g
- Carbohydrates: 28g
- Fiber: 3g
- Protein: 15g
- Cholesterol: 40mg


