
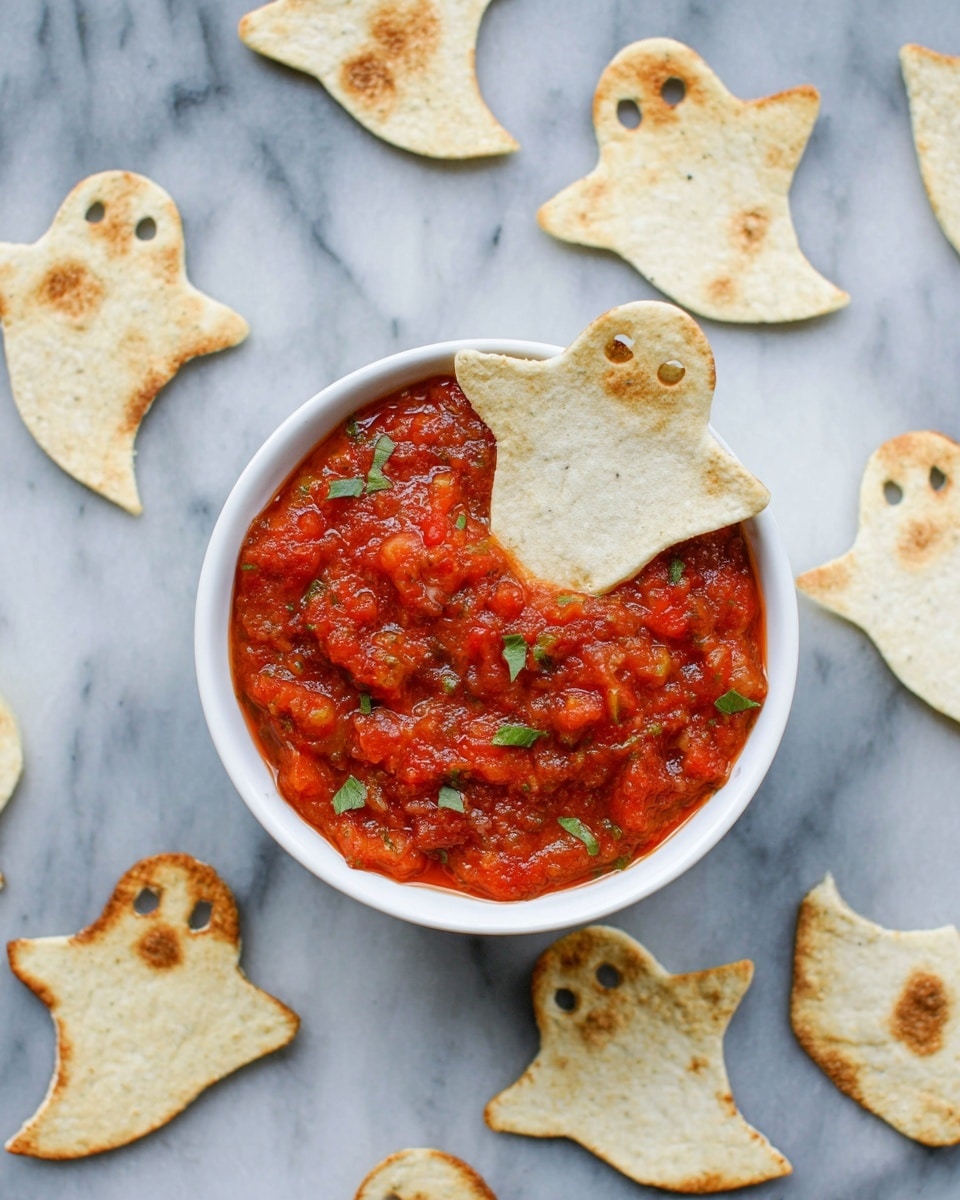
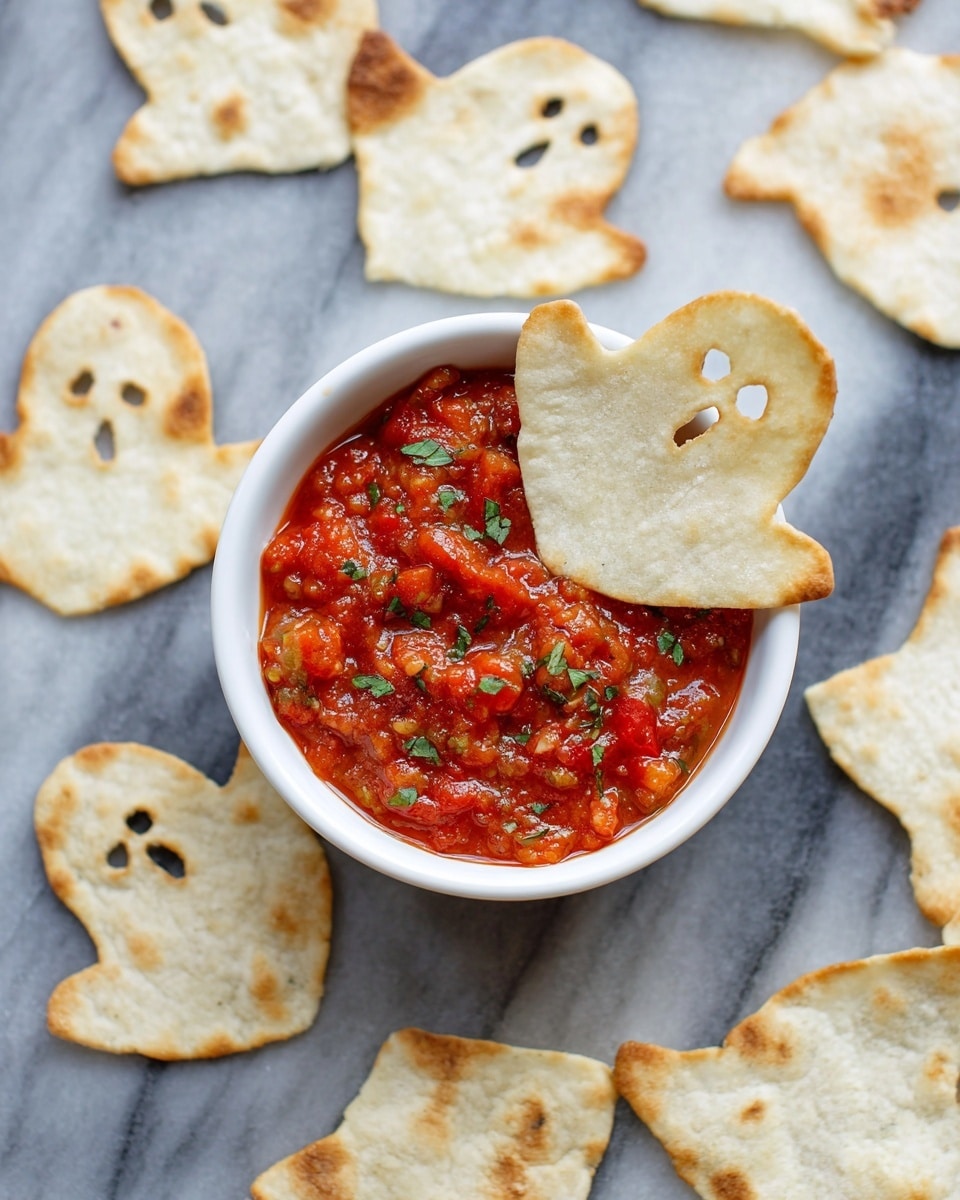
If you’re looking for a fun, festive snack that’s perfectly on-theme for spooky season, you’ve got to try this Spooky Baked Halloween Chips Recipe. I absolutely love how these little ghost-shaped chips turn out crispy, light, and just salty enough to be totally addictive. Whether you’re prepping for a Halloween party or just want a seasonal snack to munch on while binge-watching your favorite horror movies, this recipe is fan-freaking-tastic—and super easy to make!
Why You’ll Love This Recipe
- Festively Fun: The ghost shapes add a playful Halloween vibe that’s great for kids and adults alike.
- Simple Ingredients: You only need a handful of pantry staples—no scary supermarket hunts required.
- Quick and Easy: From start to finish, it takes about 15 minutes, perfect for last-minute snackers.
- Healthier Twist: Baking instead of frying makes these chips lighter without sacrificing crunch.

Ingredients You’ll Need
For this Spooky Baked Halloween Chips Recipe, the ingredients are straightforward and easy to find. The beauty here is that the flour tortillas provide a neutral base that crisps up like a dream, and the oil spray keeps things light and crispy—plus the salt brings everything home.
- Flour tortillas: Choose gluten-free or grain-free if needed; they should be fresh to achieve the best crispness.
- Avocado or olive oil spray: I love using pure avocado oil spray for a clean flavor and light touch.
- Salt: Just a sprinkle to enhance the flavor—sea salt works beautifully here.
- Halloween cookie cutter: A ghost-shaped cutter is perfect, but any spooky shape you love will do!
Variations
I love that this Spooky Baked Halloween Chips Recipe is flexible—you can easily customize it based on your pantry, dietary needs, or just your craving for some extra flair. Feel free to play around with shapes, seasonings, or dipping sauces to make it your own.
- Shape swap: I once swapped the ghost cutter for pumpkins and bats, which was a huge hit at my office Halloween party!
- Seasoned salt: Try sprinkling a bit of smoked paprika or garlic powder with the salt for a flavor boost.
- Chip base: I’ve also experimented with grain-free tortillas, which held up just as well when baked—great for gluten-free friends.
- Dipping sauces: Don’t stop at salsa—guacamole, pumpkin hummus, or even a spooky black bean dip are amazing partners.
How to Make Spooky Baked Halloween Chips Recipe
Step 1: Preheat and Prep for Success
Set your oven to 375°F (190°C) and lightly grease a cookie sheet—this prevents sticking without adding extra oil. I like to keep everything ready before I start cutting, so the chips go straight into the oven without delay, helping them crisp perfectly.
Step 2: Cut Out Your Ghostly Shapes
Take one tortilla at a time and use your Halloween cookie cutter to punch out ghost shapes. You’ll get about 5-6 chips from each one, depending on your cutter size. I learned early on to place the cutters closely together so I could minimize waste and squeeze out every last ghost!
Step 3: Oil, Salt, and Ready to Bake
Arrange your ghost cutouts on the prepared cookie sheet and lightly mist them with avocado or olive oil spray. Don’t skip this step—oil is what turns these chips golden and crispy rather than dry and tough. Then sprinkle a pinch of salt over the top while the oil is still fresh on the surface.
Step 4: Bake to Crispy Perfection
Bake in your preheated oven for 5 to 7 minutes. Keep an eye on them starting around the 4-minute mark, especially the first time you try this recipe. You want them crisp but not burnt, and every oven’s a little different—I found that once the edges start to turn a light golden brown, they’re ready. Let them cool for a few minutes before serving; they only get better as they crisp up while cooling.
Pro Tips for Making Spooky Baked Halloween Chips Recipe
- Tortilla Freshness Matters: Using fresher tortillas means better cracking and crispiness—stale ones might crack too easily or taste off.
- Minimize Waste: Arrange cookie cutter shapes tightly, but save scraps! Re-roll and cut again so nothing goes to waste.
- Watch Your Oven: Ovens vary, so keep a close eye on the chips toward the end of baking to prevent burning.
- Oil Application: If you don’t have spray oil, brush the oil on lightly for an even coating—too much oil makes chips soggy.
How to Serve Spooky Baked Halloween Chips Recipe
Garnishes
I love sprinkling a little extra flaky sea salt or even a pinch of smoked paprika over these chips just before serving. It adds an extra pop of flavor and looks super festive. A few little carved tiny pumpkin or ghost-shaped cheeses nearby also make for an adorable touch.
Side Dishes
My go-to pairing includes salsa (classic choice), homemade guacamole, or—my absolute fave—Pumpkin Taco Soup for a cozy, Halloween-inspired combo. You can also try queso dip or black bean dip to keep that spooky vibe going.
Creative Ways to Present
For parties, I like serving these chips standing up in shot glasses filled with dip or laying them neatly in tiered trays with little Halloween figurines scattered around. It really amps up the festive spirit and gets everyone talking about these cute ghosty snacks!
Make Ahead and Storage
Storing Leftovers
If you have leftovers (and you might because these are addictive), store them in an airtight container at room temperature. I’ve found they stay reasonably crispy for about 2 days before losing that fresh crunch.
Freezing
I haven’t had great luck freezing these chips because they tend to become a bit soggy after thawing. I recommend making fresh batches for the best texture, but if you freeze them, toast them lightly in the oven to crisp back up.
Reheating
To reheat, pop the chips back into a 350°F oven for 2-3 minutes. This quick warm-up helps bring back that crispy texture I love. Avoid microwaving unless you want soggy ghosts!
FAQs
-
Can I make Spooky Baked Halloween Chips Recipe with corn tortillas?
Absolutely! Corn tortillas can work, but they may crisp up faster and can break more easily, so watch them closely while baking. They also give a nice corn flavor which is great if you prefer that over flour tortillas.
-
What if I don’t have a Halloween cookie cutter?
No worries! You can cut the tortillas into simple triangles or strips and then decorate your serving bowl or platter with Halloween decor to keep the spooky vibe. Or use a knife to freehand any shapes you like—it’s less precise but just as fun.
-
How long do these chips stay fresh?
Stored in an airtight container at room temperature, they stay fresh and crispy for about 2 days. After that, they tend to soften, but a quick reheat in the oven can help bring some crunch back.
-
Can I use flavored oil sprays?
Yes, flavored oils like garlic or chili could add an interesting twist! Just be mindful of the flavors pairing well with your dips and the overall Halloween theme.
Final Thoughts
Making this Spooky Baked Halloween Chips Recipe always feels like a little celebration in my kitchen. I love how simple ingredients transform into festive, crunchy bites that everyone—kids and grown-ups alike—go crazy for. If you try it, I’m pretty sure you’ll find it a new favorite Halloween snack to keep on rotation every year. So grab your cookie cutter, preheat that oven, and get ready for some serious spooky snacking fun!
Print
Spooky Baked Halloween Chips Recipe
- Prep Time: 5 minutes
- Cook Time: 7 minutes
- Total Time: 12 minutes
- Yield: 4 servings
- Category: Snack
- Method: Baking
- Cuisine: American
- Diet: Gluten Free
Description
These Spooky Baked Halloween Chips are a fun and festive snack perfect for the Halloween season. Made from flour tortillas cut into ghost shapes and baked until crispy, they make a delightful treat served with salsa, guacamole, or seasonal soups. This recipe is easy to prepare, gluten-free friendly if using gluten-free tortillas, and offers a healthier alternative to traditional fried chips by baking with a light spray of avocado or olive oil.
Ingredients
Chips
- 4 flour tortillas (gluten-free or grain-free, as needed)
- Avocado oil spray or olive oil spray, for misting
- Salt, to taste
- Halloween ghost-shaped cookie cutter
Instructions
- Preheat Oven: Preheat your oven to 375 degrees Fahrenheit (190 degrees Celsius) and lightly grease a cookie sheet to prepare for baking the chips.
- Cut Tortilla Shapes: Working with one tortilla at a time, use the ghost-shaped cookie cutter to cut out ghost-shaped chips. Aim to get about 5-6 ghosts from each tortilla by placing the cuts as close together as possible to minimize waste.
- Arrange on Baking Sheet: Transfer all the cutout ghost tortilla shapes onto the prepared baking sheet in a single layer, ensuring they have enough space to crisp evenly.
- Oil and Season: Lightly mist the ghost-shaped chips with avocado or olive oil spray, then sprinkle them lightly with salt to taste.
- Bake: Bake the chips in the preheated oven for 5-7 minutes until they are crisp and lightly golden on the edges.
- Serve: Remove from the oven and allow to cool slightly. Serve with your choice of salsa, guacamole, or a warm seasonal soup like Pumpkin Taco Soup for a festive treat.
Notes
- Use 100% avocado oil or olive oil spray without additives or propellants for the best flavor and health benefits.
- If you cannot find oil sprays, you can brush the chips lightly with oil using a pastry brush and also brush the baking pan to avoid sticking.
- These chips are best eaten fresh for maximum crispiness.
- Try to cut shapes close together to reduce tortilla waste.
Nutrition
- Serving Size: 1 serving (1 tortilla worth of chips)
- Calories: 110
- Sugar: 0.2g
- Sodium: 150mg
- Fat: 4g
- Saturated Fat: 0.5g
- Unsaturated Fat: 3g
- Trans Fat: 0g
- Carbohydrates: 18g
- Fiber: 1.5g
- Protein: 2g
- Cholesterol: 0mg


