
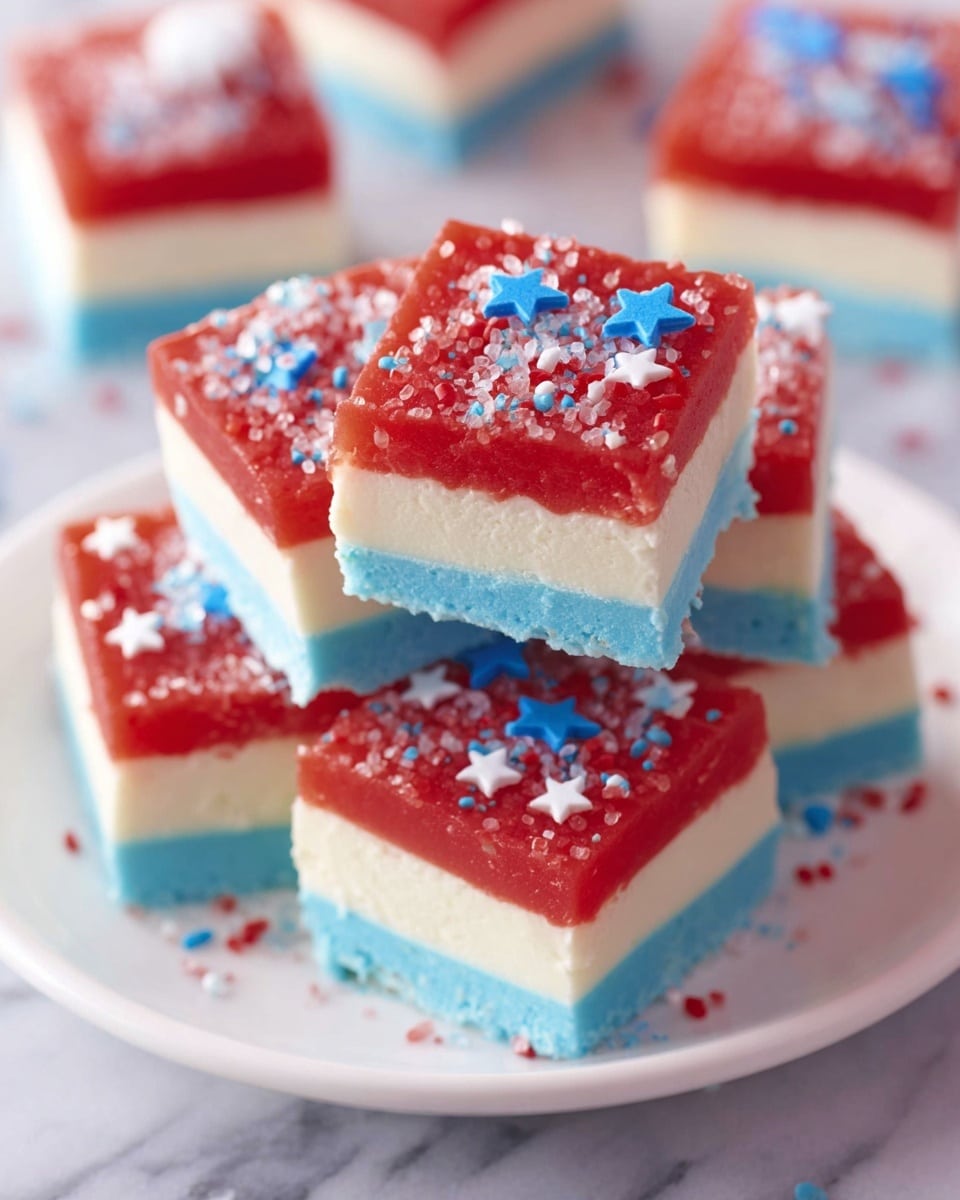
Nothing says celebration like a sweet treat that’s just as fun to make as it is to eat. That’s why I’m excited to share this fan-freaking-tastic Red, White & Blue Fudge Recipe with you! It’s a creamy, colorful delight that’s perfect for any patriotic holiday or summer party. When I first tried this fudge, I was amazed at how easy it came together—and the patriotic layers? Such a showstopper on the dessert table. Stick with me, and you’ll be slicing up this pretty, luscious fudge before you know it.
Why You’ll Love This Recipe
- Simple Ingredients: Uses pantry staples you probably already have on hand, making it super easy to whip up last minute.
- Customizable Colors and Layers: You can swirl for a pretty marbled effect or keep bold, solid layers—either way, it looks amazing.
- Perfect Texture: Creamy, smooth, and melts in your mouth every time, thanks to the marshmallow creme and white chocolate.
- A Crowd Pleaser: My family goes crazy for this, and it always disappears fast at potlucks and BBQs.

Ingredients You’ll Need
This Red, White & Blue Fudge recipe balances sweetness and creaminess perfectly. The blend of white chocolate chips and marshmallow creme gives it that luscious fudge texture you want, while the food coloring adds vibrant patriotic flair.
- Sugar: Provides classic sweetness and structure; I recommend using granulated sugar for the best texture.
- Butter: Adds richness and smoothness, so don’t skip it!
- Marshmallow Creme: This is the secret to that soft, creamy texture—you’ll want to get the fluffy, spreadable kind.
- Evaporated Milk: Gives depth and creaminess without extra water content that can mess up the fudge.
- White Chocolate Chips: These melt smoothly and complement the marshmallow’s sweetness perfectly.
- Red and Blue Food Coloring: Use gel-based for vibrant color without watering down your fudge.
- Red, White, and Blue Sprinkles (optional): Adds festive crunch and visual appeal—totally optional but I love them for extra fun.
Variations
I love how this Red, White & Blue Fudge Recipe is a blank canvas—you can tweak colors, add flavors, or switch up toppings to fit your occasion or taste buds.
- Add a Twist of Flavor: Try adding a hint of peppermint extract for a refreshing kick, or vanilla bean paste to deepen the flavor. I once made a lemon version with yellow food coloring that was a hit for summer birthdays.
- Make it Vegan: Substitute butter for coconut oil and use dairy-free white chips to switch it up.
- Nutty Addition: Fold in chopped toasted almonds or pecans for texture—my family loves this crunch contrast.
- Sprinkle Swap: Use edible glitter or crushed freeze-dried berries instead of sprinkles for a fancy upgrade.
How to Make Red, White & Blue Fudge Recipe
Step 1: Prepare Your Pan and Bowls
Line a 9×9-inch baking dish with parchment paper, and give it a light spray with non-stick cooking spray. This simple step ensures your fudge will lift out easily later—it’s a must that I never skip. Grab three medium-sized bowls as well; you’ll be dividing the fudge mixture to create your patriotic layers.
Step 2: Cook the Sugar Mixture
Add the sugar, butter, and evaporated milk to a large saucepan over medium heat. Stir occasionally—don’t wander off because it can quickly catch on the bottom. Once it reaches a boil, keep it lightly boiling for 5 minutes while stirring constantly to avoid burning. This step is crucial for that perfect fudge consistency.
Step 3: Add Marshmallow Creme and White Chocolate
Remove the saucepan from heat and immediately stir in the marshmallow creme and white chocolate chips. Keep stirring until the mixture is silky smooth and everything is melted together. This part always feels like magic to me—it reminds me of why fudge is such a great indulgence.
Step 4: Color and Layer Your Fudge
Divide the fudge mixture evenly into your three bowls. Add red food coloring to one bowl and blue to another, mixing each until you get vibrant colors. Leave the last bowl white. Pour the blue mixture into your prepared baking dish first, spreading it evenly. Layer the white fudge on top, followed by the red. If you want that marbled effect, grab a butter knife and gently swirl the layers together. Otherwise, keep them as clean stripes. If you’re using sprinkles, now’s the time to sprinkle them on top for an extra festive look.
Step 5: Chill and Slice
Let your fudge cool at room temperature for 20-30 minutes, then pop it into the fridge for at least 1 hour to firm up completely. When it’s chilled, you’ll get perfect clean slices that hold their shape beautifully. Trust me, this wait is totally worth it!
Pro Tips for Making Red, White & Blue Fudge Recipe
- Use Gel Food Coloring: It gives you vibrant colors without thinning your fudge, which I discovered after a few watery attempts with liquid food coloring.
- Constant Stirring at Boil: Stir every second during the boiling stage to stop the sugar from burning and prevent graininess.
- Layer Cooling Trick: If you’re impatient like me, chill each layer for 10 minutes before adding the next to keep distinct stripes.
- Cutting Clean Fudge: Use a hot knife (dip it in hot water and dry before slicing) for perfect, smooth fudge edges without crumbling.
How to Serve Red, White & Blue Fudge Recipe
Garnishes
I like to finish off the fudge with red, white, and blue sprinkles for that extra festive sparkle. Sometimes I add mini edible stars or even crushed peppermint candies for a fun crunch and holiday vibe. If you want to keep it simple, a light dusting of powdered sugar looks charming too.
Side Dishes
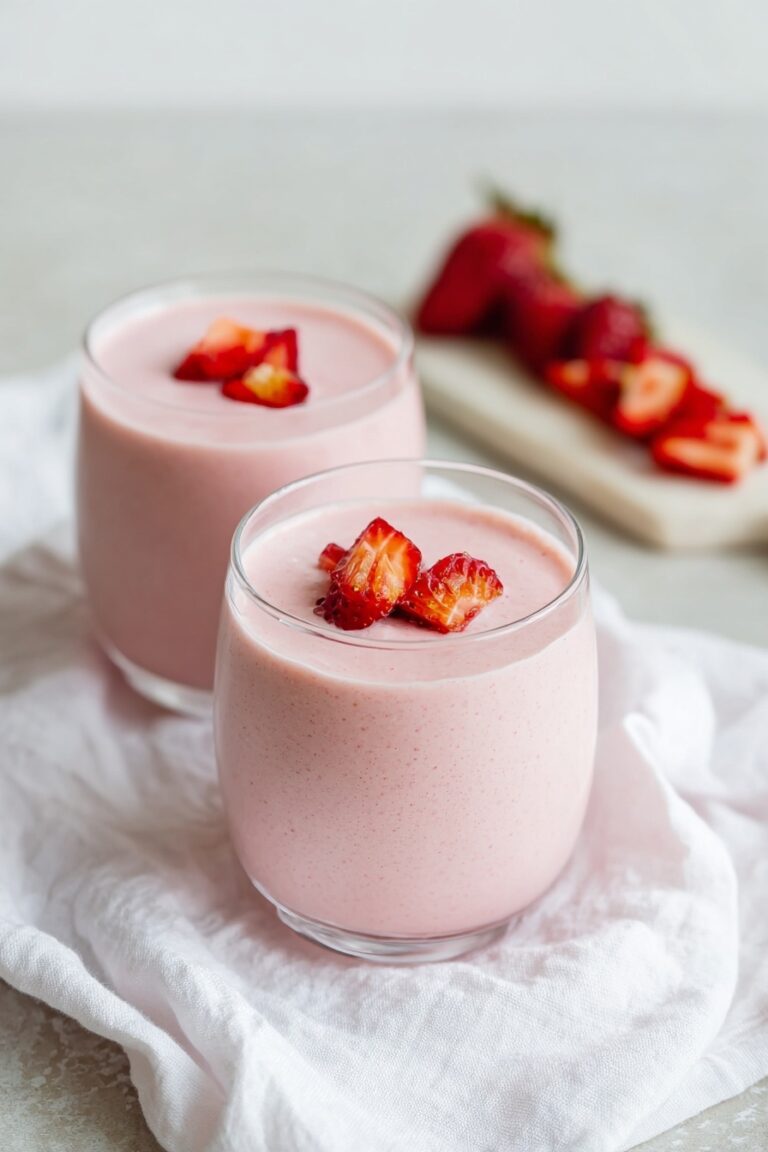
This fudge pairs wonderfully with fresh summer berries or a scoop of vanilla ice cream because the creamy fudge contrasts perfectly with fruity brightness. I also like serving it alongside some classic American pies, like apple or cherry, to round out a festive dessert spread.
Creative Ways to Present
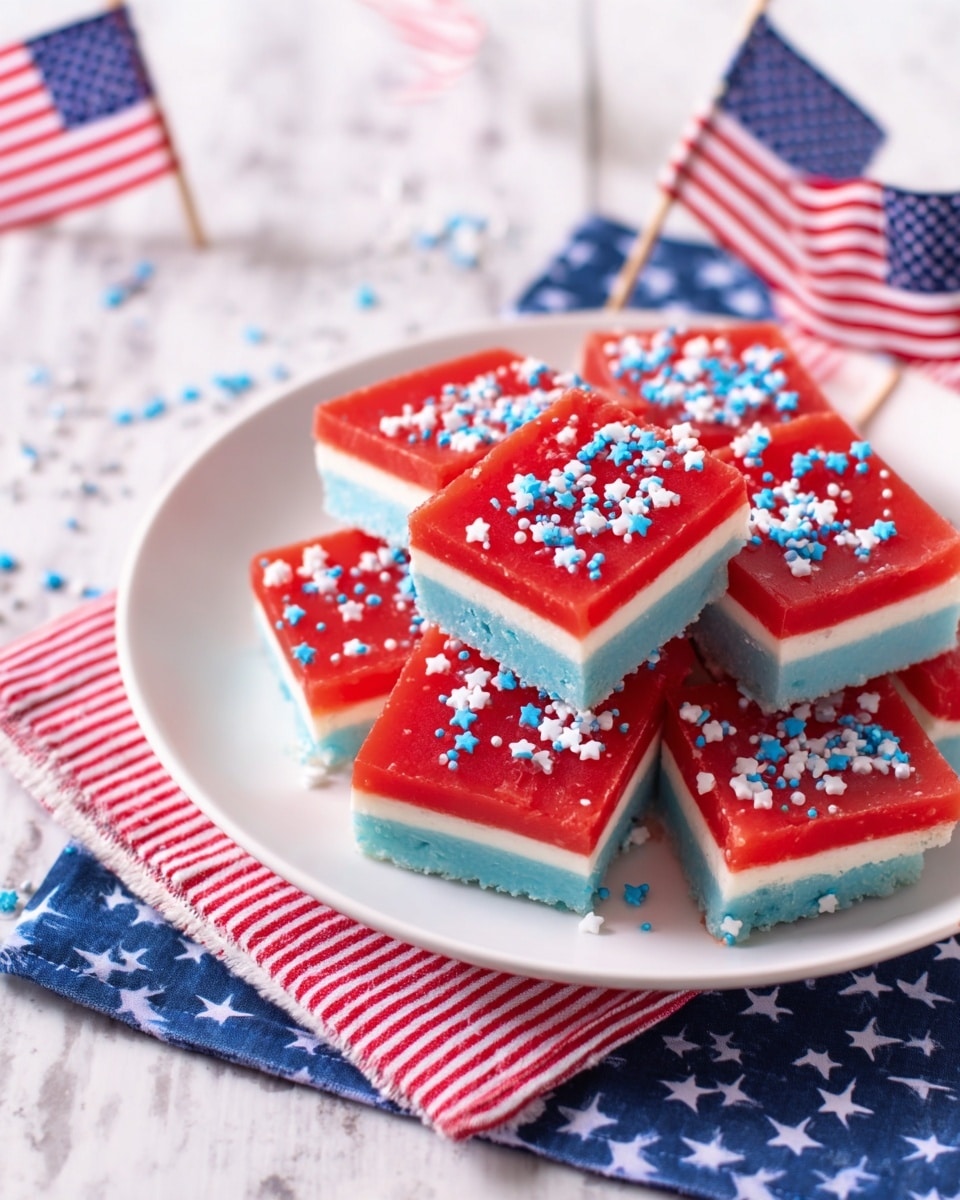
One of my favorite presentation tricks is to cut the fudge into bite-sized squares and arrange them on a patriotic-themed tray with little toothpicks. Kids love grabbing them this way at parties. For a more elegant event, layer the fudge cubes in clear glass jars or wrap each piece individually in wax paper tied with red and blue ribbons.
Make Ahead and Storage
Storing Leftovers
I store leftover fudge in an airtight container in the fridge, separating layers with parchment to keep pieces from sticking. It stays fresh and creamy for about a week, and honestly, it’s usually gone before then in my house.
Freezing
If you want to freeze it, wrap individual pieces tightly in plastic wrap and place them in a freezer bag. I learned this when I made a double batch for a big party. When thawed in the fridge overnight, the fudge retains its lovely texture almost like fresh.
Reheating
This fudge is best enjoyed cold or at room temperature, so I don’t recommend reheating. But if your kitchen is chilly, just leave it out for 10-15 minutes before serving to soften slightly without losing that luscious creaminess.
FAQs
-
Can I use different colors for this Red, White & Blue Fudge Recipe?
Absolutely! While red, white, and blue are perfect for patriotic occasions, you can swap any color gels you like. Just keep in mind gel food coloring gives the best, most vibrant colors without making your fudge runny.
-
How long does this fudge last?
Stored properly in an airtight container in the fridge, this fudge will stay fresh for about a week. For longer storage, freezing is your best bet to preserve texture and taste.
-
What if I don’t have marshmallow creme?
Marshmallow creme adds creaminess and helps with texture, but if you don’t have it, you can try substituting with mini marshmallows melted into the hot mixture, though the texture might be slightly different.
-
Can I make this fudge without white chocolate chips?
White chocolate chips provide sweetness and smoothness, but if you can’t find them, good-quality white chocolate bars chopped up work well too. Avoid substitutes like white candy melts for best results.
Final Thoughts
I absolutely love how this Red, White & Blue Fudge Recipe comes together with just a few simple ingredients and minimal fuss, yet looks so impressive and tastes divine. It’s my go-to for 4th of July and any time I want a festive touch to my dessert game. I hope you’ll find the same joy making and sharing this treat as I do—so grab your pots, your food coloring, and let’s get fudge-ing!
Print
Red, White & Blue Fudge Recipe
- Prep Time: 15 minutes
- Cook Time: 10 minutes
- Total Time: 1 hour 25 minutes
- Yield: 20 servings
- Category: Dessert
- Method: Stovetop
- Cuisine: American
- Diet: Vegetarian
Description
This vibrant Red, White & Blue Fudge is a festive and creamy treat perfect for celebrations. Layers of white chocolate fudge tinted in patriotic colors create a visually stunning and delicious dessert. With rich marshmallow creme and white chocolate chips, this fudge offers a smooth, sweet texture that’s easy to prepare and sure to impress.
Ingredients
Fudge Base
- 2 ½ cups sugar
- ½ cup butter
- 5 oz can evaporated milk
- 7 ounces marshmallow creme
- 8 oz white chocolate chips
Coloring & Decoration
- A few drops red food coloring
- A few drops blue food coloring
- Red, white, and blue sprinkles (optional)
Instructions
- Prepare the pan: Line a 9×9 inch baking dish with parchment paper and spray it with non-stick cooking spray to ensure easy removal of the fudge once set. Set aside for later use. Also, get three medium-sized bowls ready for dividing the fudge mixture.
- Cook the base mixture: In a large saucepan, combine the sugar, butter, and evaporated milk. Cook over medium heat, stirring occasionally until the mixture comes to a boil.
- Boil and stir continuously: Once boiling, reduce to a light boil and continue to cook for 5 minutes, stirring constantly to prevent burning and to ensure the sugar dissolves completely.
- Add marshmallow creme and white chocolate chips: Remove the saucepan from heat immediately after boiling. Quickly add the marshmallow creme and white chocolate chips, stirring vigorously until the mixture becomes smooth and fully combined.
- Divide and color the fudge: Evenly pour the fudge mixture into the three prepared bowls. Add red food coloring to one bowl, blue food coloring to the second, and leave the third plain for white. Stir each bowl separately until the color is fully blended.
- Create fudge layers: Pour the blue colored mixture evenly into the prepared baking dish and spread out smoothly. Layer the white fudge on top, spreading evenly, followed by the red fudge on the top layer, also spreading out evenly.
- Optional marbling and decoration: If desired, use a butter knife to swirl through the layers gently to create a marbled effect. Immediately sprinkle with red, white, and blue sprinkles if using.
- Cool and chill: Let the fudge cool at room temperature for 20-30 minutes until it firms slightly, then refrigerate for at least 1 hour to fully set before slicing into approximately 20 pieces.
Notes
- Using parchment paper in the baking dish makes removing the fudge easier and cleaner.
- Continuous stirring during the boil step is essential for smooth texture and to prevent burning.
- You can customize the color intensity by adjusting the amount of food coloring.
- For a marbled look, do not over-swirl the layers after pouring them in the pan.
- Store fudge in an airtight container in the fridge to maintain freshness for up to one week.
Nutrition
- Serving Size: 1 piece (approx. 1/20th of recipe)
- Calories: 180
- Sugar: 22g
- Sodium: 40mg
- Fat: 8g
- Saturated Fat: 5g
- Unsaturated Fat: 2.5g
- Trans Fat: 0g
- Carbohydrates: 27g
- Fiber: 0.5g
- Protein: 1g
- Cholesterol: 15mg
