
If you’re on the hunt for that flawlessly juicy, flavorful turkey with irresistibly crisp skin, I’ve got just the thing for you. Believe me when I say this Perfect Dry Brine Turkey Recipe will change your holiday cooking game forever. I absolutely love how this method locks in moisture and delivers rich, herbaceous notes without any fuss—plus, it’s easier than you might think. Stick with me here, and I’ll walk you through every step to get that golden bird on your table, juicy inside and crispy outside, every single time.
Why You’ll Love This Recipe
- Juicy and Tender Results: The dry brine deeply seasons the turkey while keeping the meat incredibly moist.
- Crisp, Golden Skin: Dry brining allows the skin to fully dry and crisp up in the oven to perfection.
- Simple and Hands-Off: Once your turkey is brining, it mostly cooks itself, freeing you up for all the other holiday prep.
- Reliable and Tested: I’ve cooked this same recipe over multiple holidays, and my family goes crazy for it every time.

Ingredients You’ll Need
Each ingredient here is chosen to boost savory herb flavors and foster that balance of juicy meat and crispy skin. Don’t worry — most are pantry staples, and shopping is straightforward.
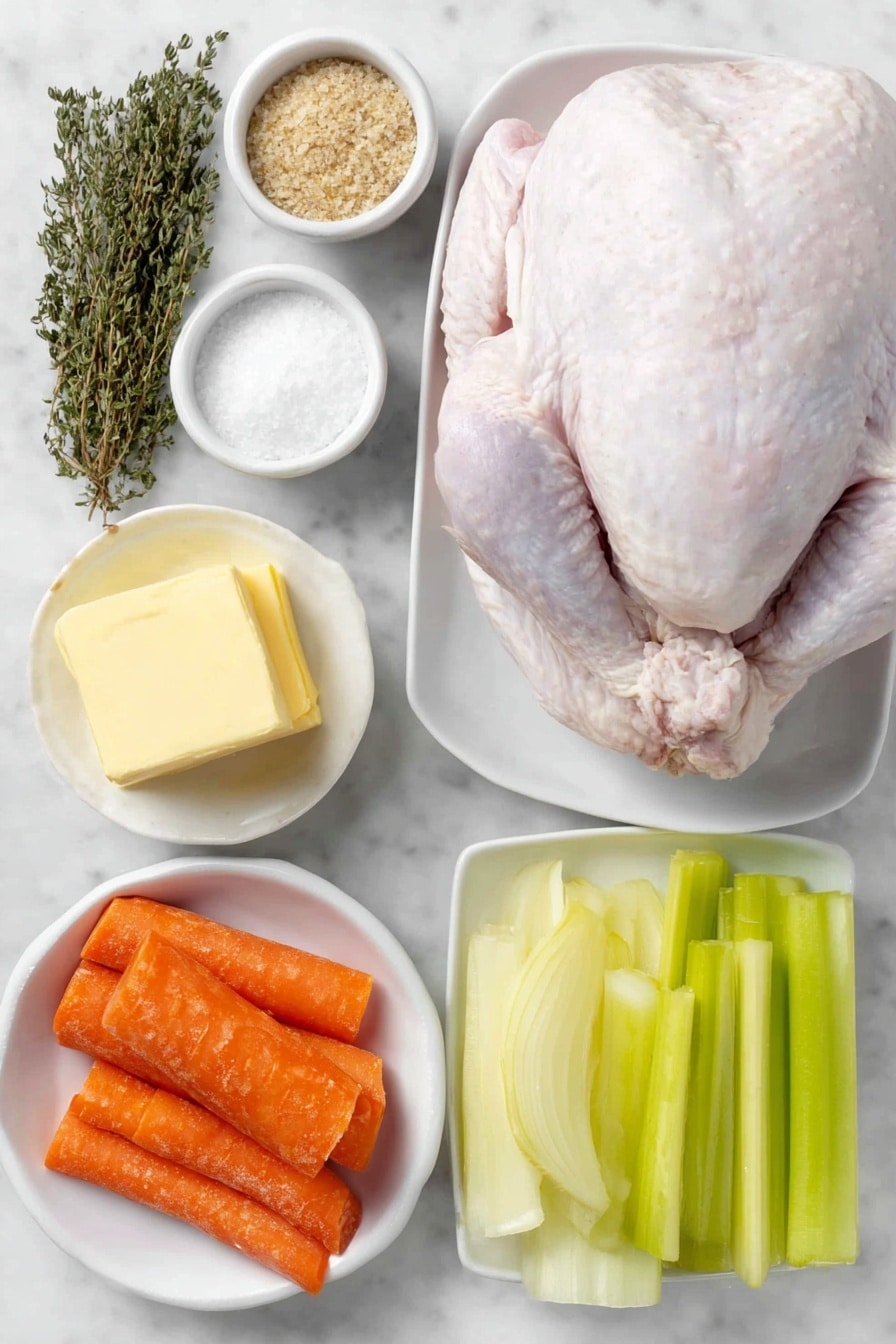
- Turkey: I recommend a 12-14 pound un-injected turkey for best results with dry brining — avoiding “self-basting” or pre-salted birds helps control seasoning.
- Light brown sugar: Adds subtle sweetness to balance the savory salt and herbs.
- Morton kosher salt: The coarse texture helps draw moisture and tenderize the meat efficiently.
- Dried thyme: A classic herb that complements turkey with its aromatic earthiness.
- Dried sage leaves or ground sage: Sage is a Thanksgiving staple that brings warm, savory depth.
- Freshly ground black pepper: Adds a bit of bite and rounds out the flavor profile.
- Unsalted butter: Smearing butter under the skin helps achieve luscious, golden crispiness while adding richness.
- Yellow onion, carrots, celery: These aromatics provide flavor and cozy roasting pan veggies to enhance the drippings and aroma.
Variations
I like to encourage making this recipe your own because that’s where the fun begins. Whether you prefer to tweak the herbs or accommodate dietary needs, these tweaks work beautifully.
- Herb Variations: I’ve swapped dried sage and thyme for fresh herbs like rosemary and parsley with excellent results—just chop finely and mix into the dry brine.
- Salt Reduction: If using a pre-brined or injected turkey, cut the kosher salt in half to avoid oversalting—trust me, it makes a big difference.
- Butter Alternatives: For a dairy-free version, olive oil or dairy-free margarine can work well, though butter gives the best skin crispiness.
- Smoking or Grilling: Once dry brined, you can adapt this recipe to smoky cooking methods for extra flair and flavor variation.
How to Make Perfect Dry Brine Turkey Recipe
Step 1: Prepping and Dry Brining Your Turkey
Start by removing the truss and any excess skin that binds the legs; this helps your turkey cook evenly and crisp up nicely. Pat the turkey completely dry with paper towels—dry skin equals crispy skin later. Mix your brown sugar, kosher salt, thyme, sage, and pepper into a beautiful aromatic dry brine. Rub and pat this seasoning all over the turkey, including inside the cavity; it’s important every nook gets love! Pop the bird uncovered into the fridge for at least 24 hours, but ideally up to 48. I discovered this longer time lets the skin dry out perfectly while the meat soaks up all the seasoning.
Step 2: Preparing for Roast and Butter Love
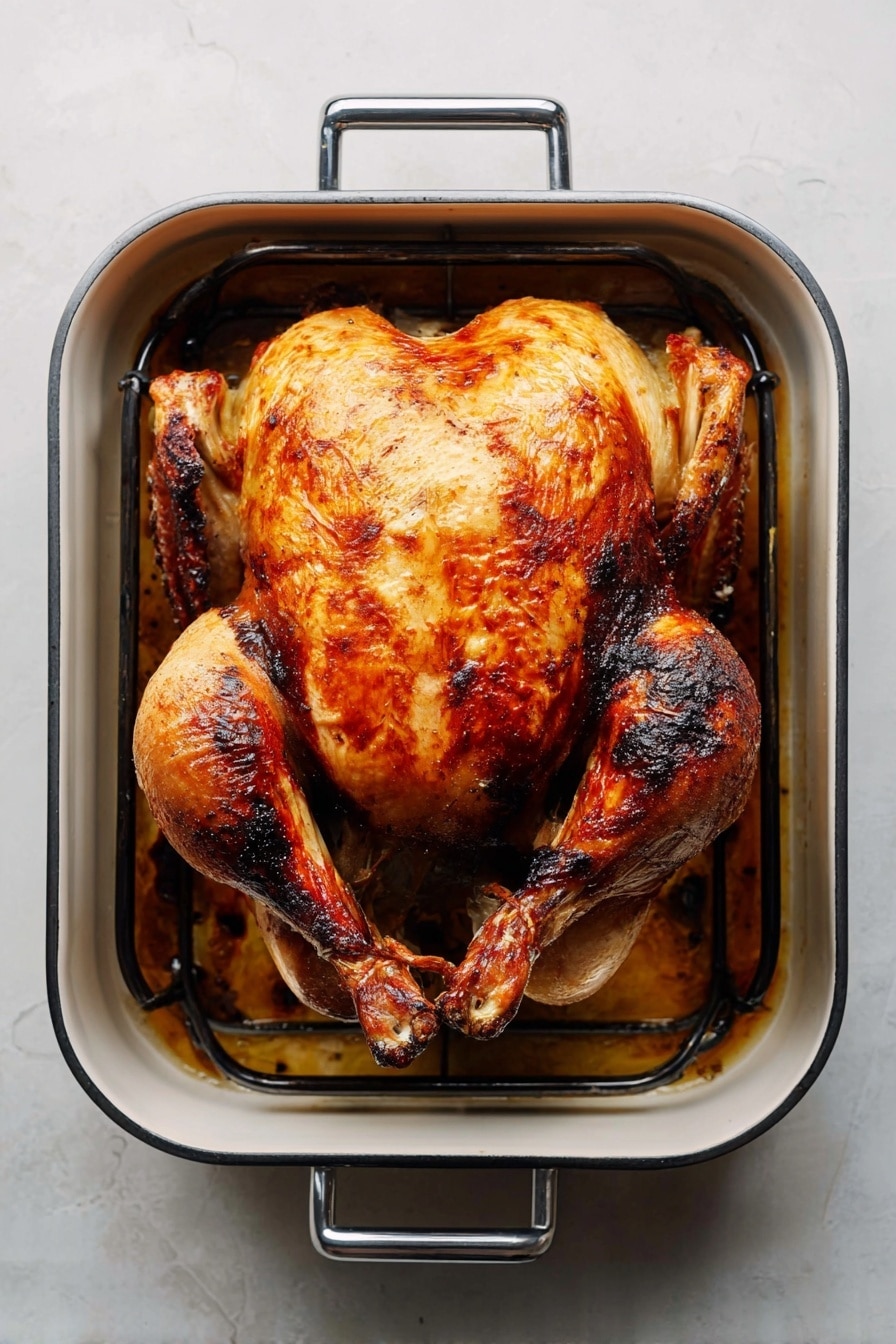
When you’re ready to roast, preheat your oven to 375°F and place your rack in the lower third. Brush off the excess dry brine from the outside of the bird—don’t clean the cavity as it holds flavor. Scatter your onion, carrots, and celery into the bottom of a large roasting pan; these add aroma and flavor to the drippings. Place your turkey on a roasting rack over top. Now for my favorite part: grab that soft, room-temperature unsalted butter and smear it lovingly over every visible surface of the turkey. This step is key—I learned that the butter helps that skin crisp up golden without burning.
Step 3: Roasting to Golden Perfection
Roast the turkey until it reaches an internal temperature of 165°F in the thickest breast area and 175°F in the thigh, about 1¾ to 2½ hours depending on size. I always check around the 1½ hour mark to make sure the skin isn’t browning too fast and tent foil if needed. Using a leave-in thermometer with a remote monitor is a game-changer—you can track doneness without opening the oven, keeping heat consistent. Pro tip: gently tilt the turkey over the pan to let juices drain back—this keeps the meat extra moist when resting later.
Step 4: Resting and Serving
Once out of the oven, tent your turkey loosely with foil and rest for 20-30 minutes—trust me, this step locks in all those delicious juices. Remove the veggies from the roasting pan; sometimes I reuse them on my serving platter if they’re not too soft. Reserve the drippings to make a rich homemade gravy that takes your meal to the next level. Carve and serve alongside that gravy, and watch your guests swoon.
Pro Tips for Making Perfect Dry Brine Turkey Recipe
- Use a Leave-In Thermometer: I can’t stress enough how this tool saved me from drying out a perfect bird—it lets you keep the oven closed and the temperature steady.
- Pat Dry Thoroughly Before Brining: The drier the skin before brining, the crispier it will get in the oven, I learned this the hard way early on.
- Don’t Skip the Resting Period: Allowing the turkey to rest after roasting keeps all the juices sealed in, making every bite a moist delight.
- Butter at Room Temperature: Cold butter is hard to spread and won’t evenly coat your turkey, so leave it out in advance.
How to Serve Perfect Dry Brine Turkey Recipe
Garnishes
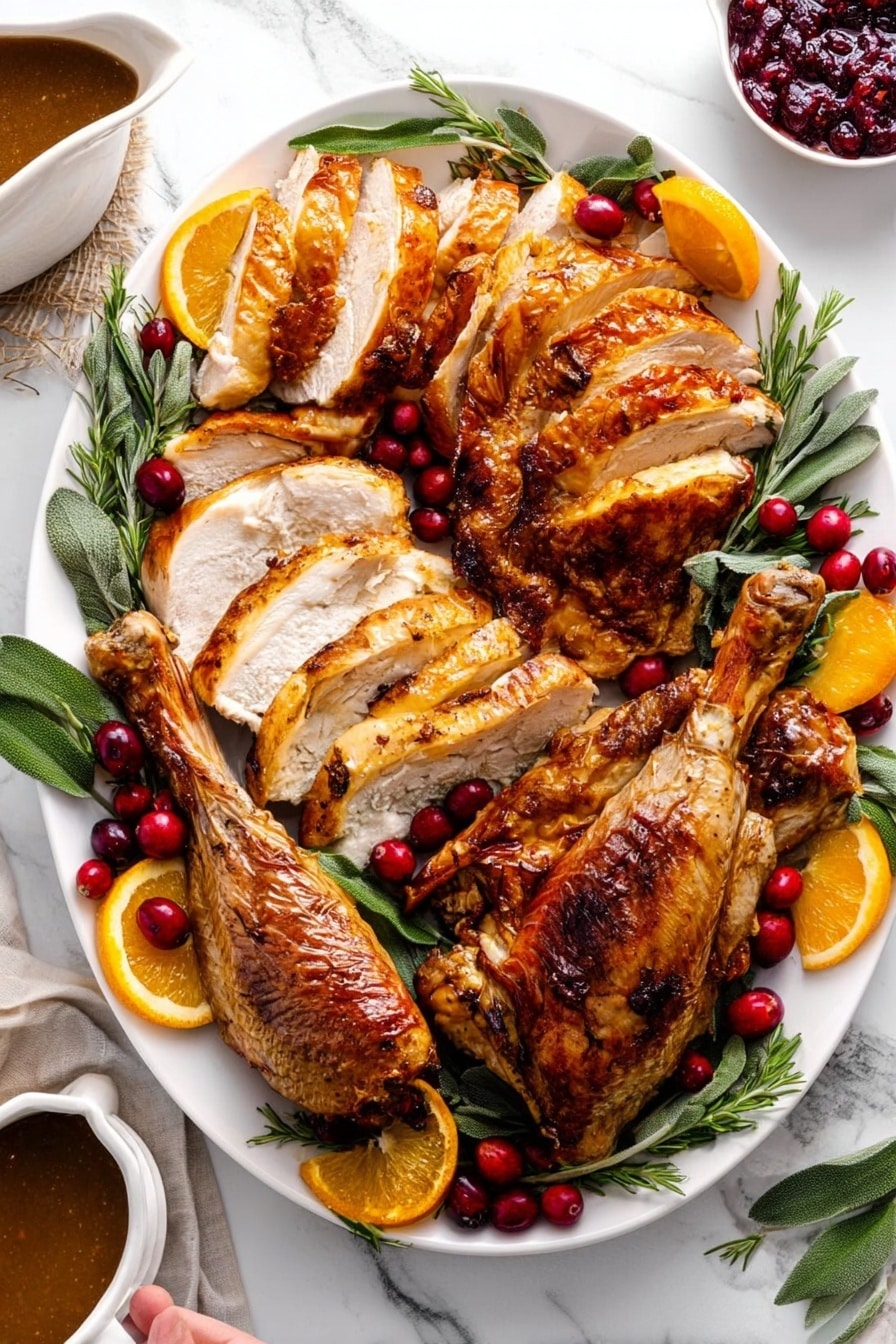
I love garnishing my turkey platter with fresh parsley sprigs and thin lemon slices. They add a pop of color, brightness, and a little zing that contrasts beautifully with the rich meat. Cranberries tossed around the edges are a festive and tasty touch as well.
Side Dishes
This turkey pairs perfectly with herb-roasted potatoes, classic green bean almondine, and creamy mashed sweet potatoes. Don’t forget a tangy cranberry sauce and homemade stuffing to complete the holiday spread—I promise your family will thank you.
Creative Ways to Present
For special occasions, I like to carve the turkey and arrange it back on a large serving platter over a bed of wild rice pilaf with scattered herbs and microgreens. It makes the presentation look intentional and festive without much extra effort.
Make Ahead and Storage
Storing Leftovers
I usually carve leftover turkey and store it in an airtight container in the fridge for up to two days. Keep any gravy separate to avoid sogginess. This way, the meat stays juicy and ready for sandwiches or quick reheats.
Freezing
If I know I won’t finish all the turkey soon, I freeze carved pieces in meal-sized portions wrapped tightly with plastic wrap and placed in a freezer bag. It freezes well, and thawing overnight in the fridge keeps it juicy.
Reheating
To reheat, I spread a thin layer of gravy on the turkey slices and cover them loosely with foil. Baking at 325°F for 20-30 minutes does the trick, keeping the turkey moist without drying it out. Microwave reheating is quick but can sometimes dry the meat.
FAQs
-
How long should I dry brine my turkey?
For best results, dry brine your turkey between 24 to 48 hours in the refrigerator. This timeframe allows the salt and herbs to penetrate the meat and helps draw moisture to the surface for crisp skin. If you brine longer than 24 hours, you can loosely cover the turkey with plastic wrap initially and then uncover it for the final day to dry the skin fully.
-
Can I dry brine a frozen turkey?
It’s best to fully thaw your turkey before dry brining. A frozen turkey won’t absorb the salt and seasoning properly, and your brining time may be compromised. Plan ahead for thawing in the fridge, which takes about 24 hours per 4-5 pounds.
-
Do I need to wash my turkey before dry brining?
It’s recommended to pat the turkey dry with paper towels but avoid washing it under running water to prevent cross-contamination. The dry brine will season the turkey thoroughly without washing.
-
How do I know when my turkey is done?
Use a digital leave-in or instant-read thermometer to check the thickest part of the breast and thigh. The breast should reach 165°F, and the thigh should hit 175°F for safe and juicy results.
Final Thoughts
I used to struggle every holiday trying to get my turkey just right—either dry or lacking flavor—until I discovered this Perfect Dry Brine Turkey Recipe. It’s become my go-to, and honestly, it makes the whole cooking process much less stressful. I love sharing it with friends because it delivers show-stopping results with relatively little effort. Give this a try the next time you roast a turkey, and I think you’ll find yourself hooked as much as I am. Happy cooking!
Print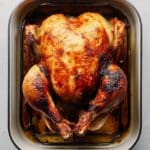
Perfect Dry Brine Turkey Recipe
- Prep Time: 30 minutes
- Cook Time: 2 hours 30 minutes
- Total Time: 3 hours
- Yield: 8 servings
- Category: Main Course
- Method: Roasting
- Cuisine: American
Description
This Dry Brine Turkey recipe ensures juicy, flavorful meat with perfectly crisp skin, ideal for your Thanksgiving feast. The turkey is seasoned with a blend of brown sugar, kosher salt, thyme, sage, and black pepper, then allowed to dry brine in the refrigerator. Roasting the turkey on a rack above aromatics creates a deeply golden, succulent bird with a classic savory flavor.
Ingredients
Turkey and Dry Brine
- 1 (12 to 14-pound) turkey, patted dry
- ¼ cup packed light brown sugar
- 3 tablespoons Morton kosher salt (or ¼ cup Diamond kosher salt)
- 2 teaspoons dried thyme
- 2 teaspoons dried sage leaves or ground sage
- 1 teaspoon freshly ground black pepper
Finishing and Aromatics
- 6 tablespoons unsalted butter, at room temperature
- 1 large yellow onion, cut into wedges
- 2 carrots, cut into 2-inch pieces
- 2 stalks celery, cut into 2-inch pieces
Instructions
- Prepare the baking sheet and turkey: Line a rimmed baking sheet with aluminum foil and place a rack on top. Remove the truss from the turkey legs, trim excess fat, remove giblets and neck, then pat the turkey dry with paper towels.
- Mix and apply the dry brine: In a small bowl, combine brown sugar, kosher salt, thyme, sage, and black pepper. Rub this mixture all over the turkey, including inside the cavity. Place the turkey on the rack and refrigerate uncovered for at least 24 hours, up to 48 hours, to allow the skin to dry and the flavors to penetrate.
- Preheat oven and prepare for roasting: Preheat the oven to 375°F and position a rack in the lower third. Use damp paper towels to brush the dry brine off the turkey’s exterior, keeping the cavity brine intact.
- Arrange aromatics and butter the turkey: Scatter onion wedges, carrot pieces, and celery stalks in the bottom of a large roasting pan. Place a roasting rack inside this pan and set the turkey on it. Tuck the wings underneath and smear softened butter evenly over the entire turkey.
- Roast the turkey: Roast for 1¾ to 2½ hours until the skin is deep golden. Monitor with a thermometer until the thickest part of the breast reaches 165°F and the thigh reaches 175°F. If browning too quickly, loosely cover with foil after about 1½ hours.
- Rest and carve the turkey: Carefully tilt the turkey over the pan to pour cavity juices into the roasting pan. Transfer the turkey to a platter, tent it with foil, and let it rest for 20–30 minutes. Discard or save the roasted vegetables. Reserve the pan drippings for gravy.
- Make and serve with gravy: Prepare homemade gravy using the reserved drippings. Carve the turkey and serve alongside the gravy.
- Make-ahead option: The cooked turkey can be carved and stored ahead by layering it with gravy in an ovenproof dish, covered tightly and refrigerated for up to two days. Reheat in a 325°F oven for 20–30 minutes.
Notes
- For best results, choose a turkey that is not self-basting, injected, or kosher to avoid over-salting; reduce salt by half if using these types.
- Use a digital leave-in thermometer with remote monitor to track internal temperatures without opening the oven.
- Maintaining the turkey uncovered in the refrigerator during dry brining helps achieve crispier skin.
- If the skin browns too fast during roasting, tent loosely with foil to prevent burning.
- Resting the turkey after roasting allows juices to redistribute for moist meat.
Nutrition
- Serving Size: 1 serving (approx. 1/8 of cooked turkey)
- Calories: 1075
- Sugar: 5 g
- Sodium: 1619 mg
- Fat: 47 g
- Saturated Fat: 15 g
- Unsaturated Fat: 32 g
- Trans Fat: 0 g
- Carbohydrates: 6 g
- Fiber: 0 g
- Protein: 147 g
- Cholesterol: 513 mg


