
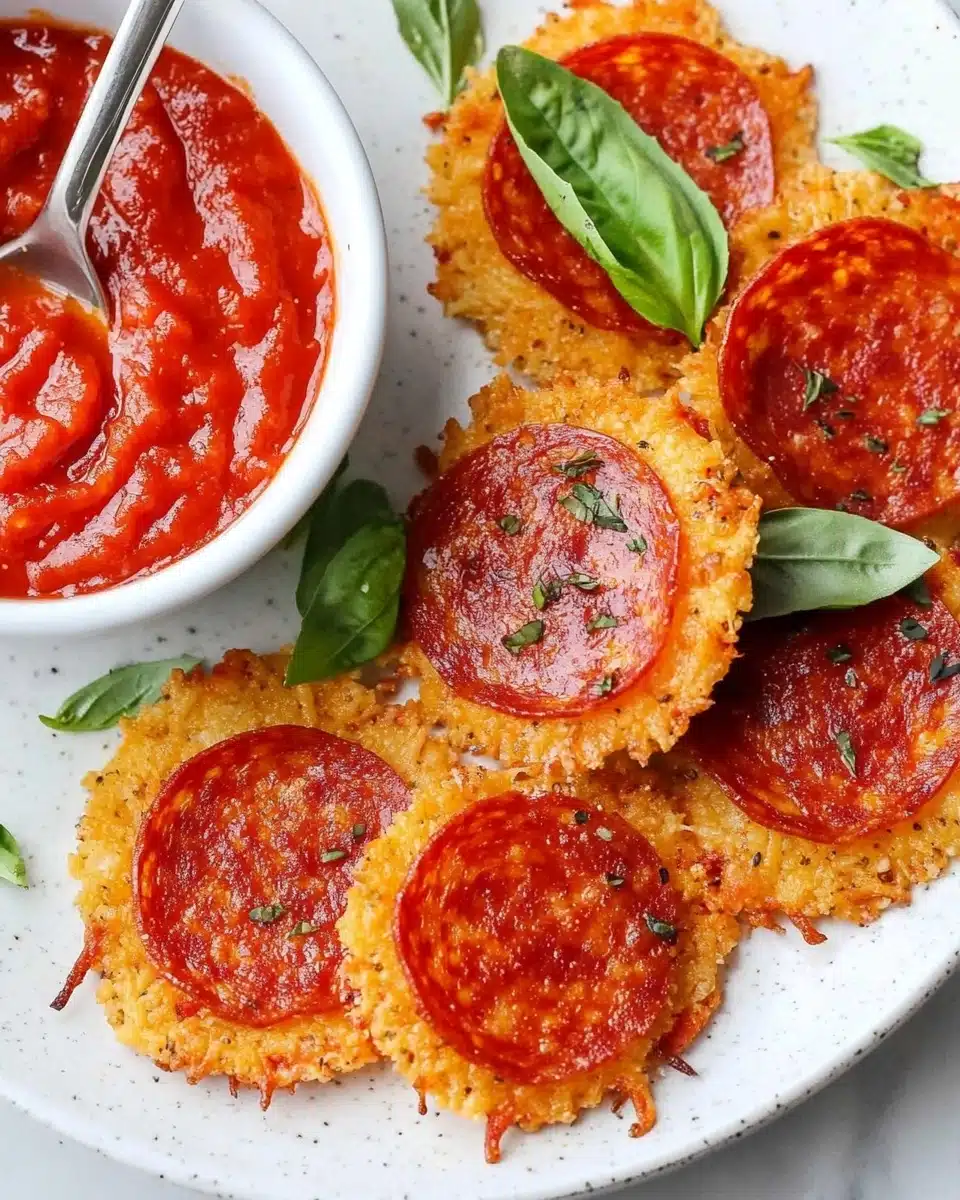
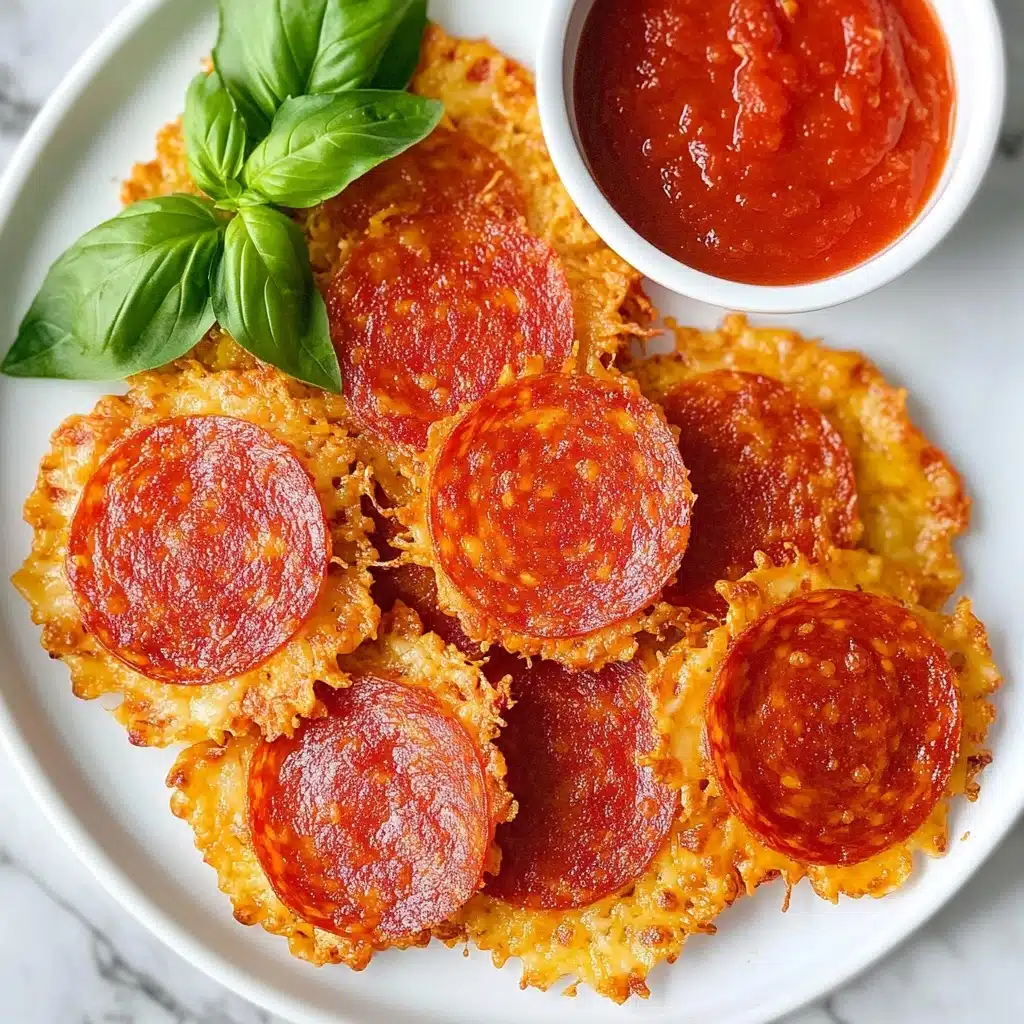
If bold, cheesy flavor and snappy bites are your thing, you absolutely need to try these Pepperoni & Cheese Crisps! Each crisp is a delightful swirl of gooey, golden cheese and zesty pepperoni that comes together in minutes. It’s the sort of snack that’s so flavor-packed and crunchy, you won’t believe it fits right into your keto lifestyle.
Why You’ll Love This Recipe
- Ultra-Fast & Effortless: You can have a whole batch of Pepperoni & Cheese Crisps ready in under 10 minutes—perfect for a spontaneous craving or party snack!
- Irresistible Crunch & Flavor: Each crisp is a savory bite that delivers crispy, cheesy edges and that unmistakable pepperoni sizzle.
- Keto & Gluten-Free Friendly: Completely low-carb and naturally gluten-free (just double-check your labels), they’re a satisfying snack you can really feel good about.
- Versatile for All Occasions: Serve them as appetizers, game-day bites, or whenever you just want something cheesy and fun without turning on the oven.

Ingredients You’ll Need
The beauty of Pepperoni & Cheese Crisps is how little you need to make something crave-worthy—just three main ingredients, each one bringing its own savory magic for maximum crunch and bold flavor. Let’s break them down so you get the very best from your batch.
- Shredded Cheddar Cheese (or Mozzarella/Parmesan blend): The cheese is your crispy, golden base; sharp cheddar offers extra flair, while a blend brings extra depth and meltiness.
- Pepperoni Slices: Choose classic pepperoni for that signature spicy bite and irresistible crisped edges as they cook.
- Sugar-Free Tomato Sauce: Totally optional, but it makes a perfect tangy dip to echo classic pizza flavors without the carbs.
Variations
Just because the original is simple doesn’t mean you can’t have fun with it! Pepperoni & Cheese Crisps are super customizable—swap ingredients to suit your taste, try new cheeses, or tweak for dietary needs. Here are a few ideas to get you inspired:
- Use Different Cheeses: Try provolone, Swiss, or even a smoky gouda for a flavor twist and subtly different textures.
- Spicy Jalapeño Kick: Add a thin slice of fresh jalapeño on top of the cheese before crisping for a spicy, bold snack.
- Veggie-Forward: Add finely chopped bell pepper, green onion, or even a sprinkle of Italian herbs to make them more colorful and aromatic.
- Mini Pizza Crisps: Spread a dab of tomato sauce under the cheese, sprinkle with oregano, and top with pepperoni for a true pizza-inspired bite.
How to Make Pepperoni & Cheese Crisps
Step 1: Prepare the Cheese Piles
Heat a nonstick skillet over medium heat. Scoop out about one tablespoon of shredded cheese and drop it in little piles, leaving space so they have room to melt and crisp up. You’ll want to do these in batches (about 4-6 at a time, depending on your skillet) so they get plenty of airflow and cook evenly.
Step 2: Add Pepperoni & Sizzle
As the cheese piles start to melt and bubble (it takes about a minute or so), top each with a slice of pepperoni. Let them cook for another minute as the edges turn golden and start to crisp—this is where that irresistible, crunchy magic happens!
Step 3: Flip & Finish Crisping
Use a spatula to flip each crisp (pepperoni side down now) and cook for just 30 seconds longer. This quick finish ensures that the pepperoni crisps up beautifully without the cheese overcooking or burning.
Step 4: Cool & Serve
Transfer the crisps to a plate, pepperoni side up. Give them a minute to cool—that’s when they become their crunchiest best! Serve with sugar-free tomato sauce for dipping, and start enjoying the snack attack.
Pro Tips for Making Pepperoni & Cheese Crisps
- Choose Your Skillet Wisely: A reliable nonstick skillet is your best friend—any sticky residue makes flipping the crisps tricky and messy!
- Watch for the Perfect Bubble: Wait for the cheese edges to visibly brown and bubble before flipping; that’s the signal they’re crispy and ready for the next step.
- Batch Size Matters: Resist overcrowding your pan—even spacing means evenly crisped Pepperoni & Cheese Crisps every time.
- Let Them Cool: They firm up as they cool, so have a little patience—your reward is that shatteringly crisp texture you crave.
How to Serve Pepperoni & Cheese Crisps
Garnishes
For an extra touch, sprinkle your Pepperoni & Cheese Crisps with a dash of Italian seasoning, a pinch of cracked black pepper, or even a little freshly chopped parsley. A sprinkle of grated parmesan on top gives them a gourmet look and even more savory punch.
Side Dishes
A plate of these works so well alongside a zesty salad (think arugula with a sharp vinaigrette), or as a crispy accent to a bowl of tomato basil soup. If you’re serving for a crowd, set them next to an antipasto platter or fresh veggie sticks for snacking balance.
Creative Ways to Present
Place the crisps in mini muffin liners for easy, grab-and-go bites on a snack tray, or stack them sky-high and crown them with a dipping cup in the middle. For parties, skewer them onto appetizer sticks or serve on a wooden board surrounded by fresh herbs for a rustic, inviting spread.
Make Ahead and Storage
Storing Leftovers
If you have any Pepperoni & Cheese Crisps leftover (hard to believe, but it happens!), let them cool completely, then pop them into an airtight container at room temperature for up to 2 days. They’ll stay perfectly crunchy for a quick snack or late-night nibble.
Freezing
While they’re best enjoyed fresh, you can freeze Pepperoni & Cheese Crisps by layering them between parchment paper in a freezer-safe bag. Pull out as many as you need, allow them to thaw for a few minutes, then re-crisp in a hot oven or air fryer for best results.
Reheating
To revive the crunch, set your crisps on a baking sheet (no oil needed) and warm them in a 350°F oven for 2-3 minutes, or just until crisp again. Avoid the microwave for reheating—they can get chewy or soggy rather than crisp.
FAQs
-
Can I make Pepperoni & Cheese Crisps in the microwave or oven instead of a skillet?
Absolutely! For the microwave, arrange cheese and pepperoni piles on parchment paper and cook for about 1–1.5 minutes, watching closely to avoid burning. For the oven, bake at 400°F on a parchment-lined sheet for 4–6 minutes—just be sure to keep an eye out at the end for maximum crispiness.
-
What cheeses work best for these crisps?
Cheddar is classic, but mozzarella, parmesan, Colby jack, or even a spicy pepper jack all work beautifully for Pepperoni & Cheese Crisps. Just make sure to use cheese that melts well for that ideal crispy texture.
-
Are these Pepperoni & Cheese Crisps gluten-free?
Yes, the core ingredients are naturally gluten-free, though it’s important to check the labels on your pepperoni and cheese (and tomato sauce, if using) for any hidden gluten or cross-contamination if you’re sensitive or allergic.
-
How do I keep my Pepperoni & Cheese Crisps crispy after making?
Let them cool completely before storing and keep them in an airtight container at room temperature. If they soften, a few minutes in a hot oven will bring the crunch right back!
Final Thoughts
If you love easy, bold, and totally addictive snacks, I hope you’ll whip up a batch of these Pepperoni & Cheese Crisps! They’re effortlessly crunchy, packed with flavor, and sure to be your next favorite keto treat—whether you’re hosting or just treating yourself. Happy snacking!
Print
Pepperoni & Cheese Crisps Recipe
- Prep Time: 0 minutes
- Cook Time: 5 minutes
- Total Time: 5 minutes
- Yield: 4 servings
- Category: Stovetop
- Method: Stovetop
- Cuisine: Keto
- Diet: Low Calorie
Description
These Pepperoni & Cheese Crisps are a delightful keto-friendly snack that combines the savory flavors of pepperoni and cheese in crispy, bite-sized morsels. Perfect for a quick treat or party appetizer.
Ingredients
Ingredients for Skillet Method:
- 1/2 cup shredded cheddar cheese or a blend of shredded mozzarella and parmesan
- 12 slices pepperoni
- 1/4 cup sugar-free tomato sauce
Additional Ingredients for Microwave and Oven Methods:
- Parchment paper (for microwave and oven methods)
Instructions
- Skillet Method: Heat a nonstick skillet over medium heat. Spoon small piles of shredded cheese onto the skillet with space in between. Cook for about a minute until bubbling, then place a slice of pepperoni on each cheese pile. Cook until the edges are crispy, then flip and cook briefly on the other side. Serve with tomato sauce.
- Microwave Method: Place cheese piles on parchment paper, top with pepperoni, and microwave until crispy.
- Oven Method: Bake cheese and pepperoni piles on parchment paper in a preheated oven until crispy.
Notes
- If gluten-sensitive, ensure all ingredients are gluten-free.
- Microwave and oven cooking options provided as alternatives.
Nutrition
- Serving Size: 1 serving
- Calories: 144 kcal
- Sugar: 0g
- Sodium: 385mg
- Fat: 10g
- Saturated Fat: 5g
- Unsaturated Fat: 4g
- Trans Fat: 0g
- Carbohydrates: 1g
- Fiber: 0g
- Protein: 12g
- Cholesterol: 33mg
