
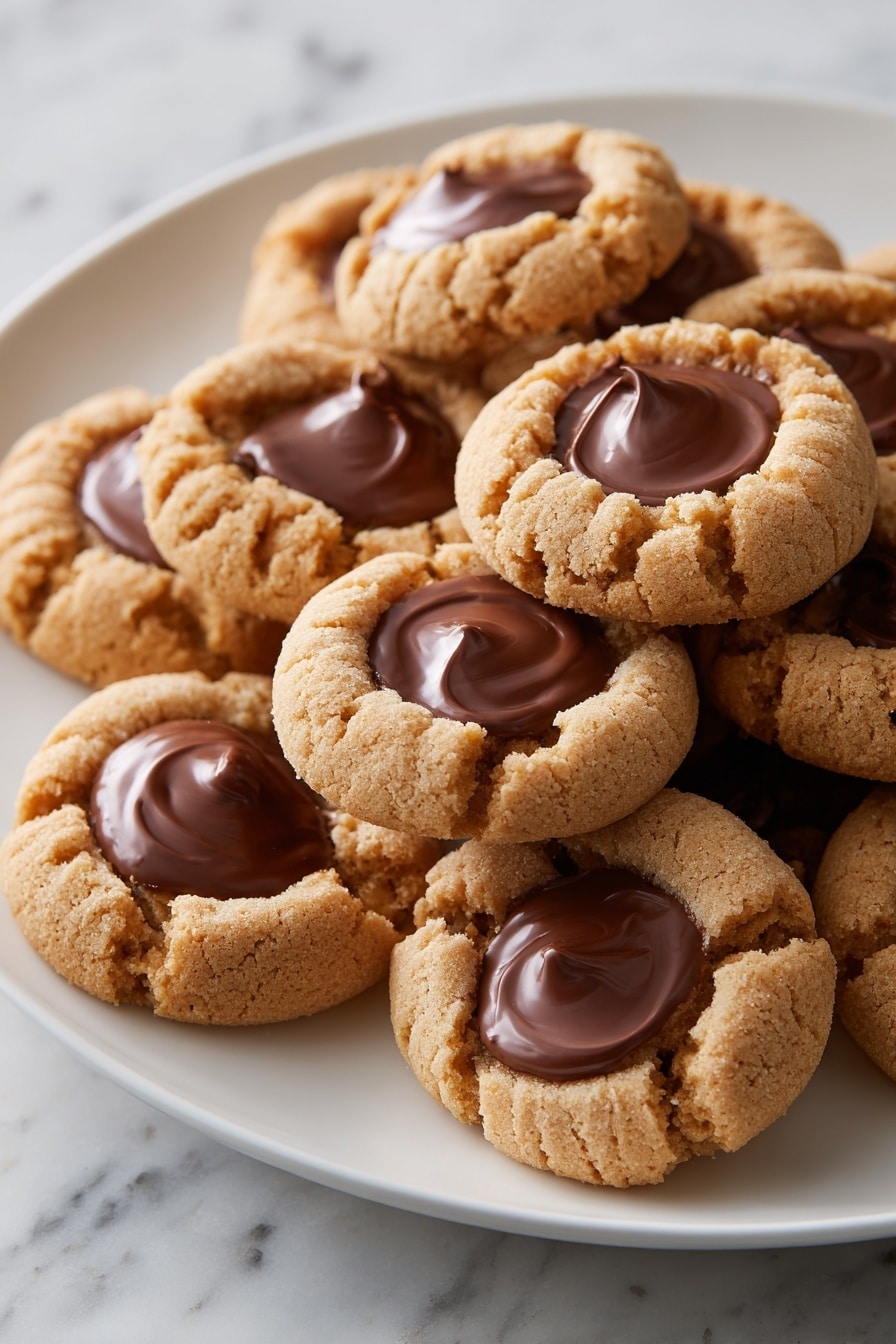
If you’re a peanut butter fan like me, you’re going to adore this Peanut Butter Cup Cookies Recipe. These cookies are soft, chewy, and packed with that classic peanut butter flavor, plus they have a little surprise—melty mini peanut butter cups right in the center. I absolutely love how these cookies balance sweet, salty, and creamy, making them an instant favorite whenever I need a quick homemade treat. Trust me, once you try this recipe, it’ll become your go-to peanut butter cookie.
Why You’ll Love This Recipe
- Double the Peanut Butter Punch: The combination of creamy peanut butter in the dough and gooey peanut butter cups on top creates an irresistible flavor explosion.
- Soft and Chewy Texture: Unlike some peanut butter cookies that turn out dry, these stay moist and tender for days.
- Simple but Impressive: Minimal ingredients and straightforward steps give you bakery-quality cookies without any fuss.
- Quick Baking Time: You can whip these up and have warm, fresh cookies in under 30 minutes.

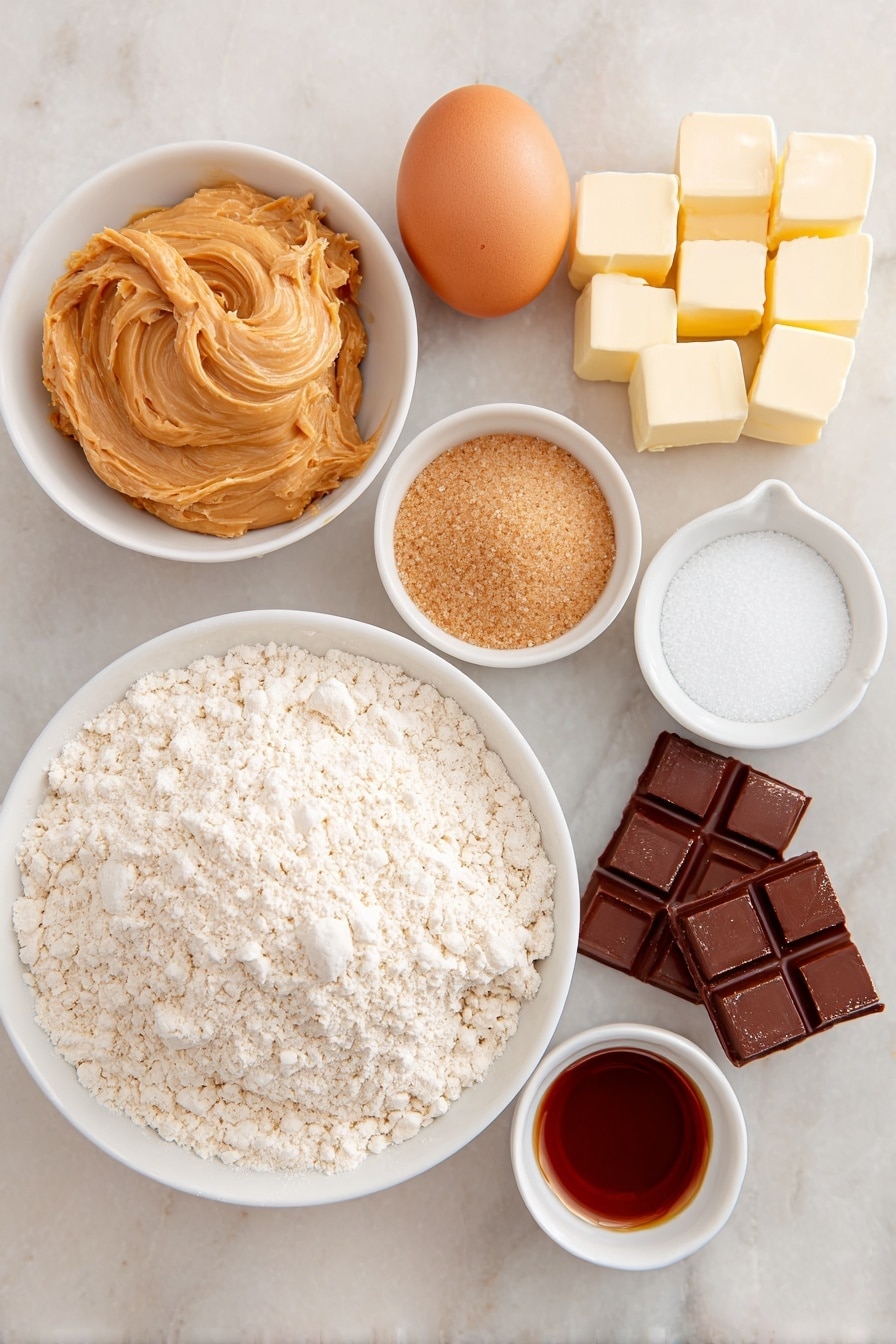
Ingredients You’ll Need
Each element in this Peanut Butter Cup Cookies Recipe is chosen for that perfect combination of flavor and texture. Using creamy peanut butter keeps my dough silky, while the mix of brown and white sugars helps with that chewy finish we all love. Here are some pointers on the ingredients before you get started.
- Nonstick cooking spray: Essential to keep those mini muffin cookies from sticking, making cleanup a breeze.
- All-purpose flour: The backbone of any cookie, just make sure to measure properly for the best results.
- Kosher salt: Balances the sweetness and enhances the peanut butter flavor.
- Baking soda and baking powder: Work together to give the cookies a light rise while keeping them soft.
- Creamy peanut butter: I always use favorites like Skippy or Jif for smooth texture and classic taste.
- Unsalted butter: Softened to room temperature for easy mixing—don’t melt it or you’ll throw off the dough consistency.
- Light brown sugar and granulated sugar: Brown sugar adds moistness and chewiness, granulated sugar helps with crisp edges.
- Large egg: Helps bind ingredients and adds moisture—room temperature eggs mix more evenly.
- Vanilla extract: A bit of vanilla always brings out the richness of peanut butter and sugar.
- Mini peanut butter cups: The star of the show! Make sure to unwrap before placing on the hot cookies for that melty center.
Variations
I love that this Peanut Butter Cup Cookies Recipe is super adaptable, so you can tweak it based on what you have on hand or your dietary needs. Here are a few ways I’ve personalized it myself, and you might find one you enjoy, too!
- Substitute for nut allergies: I’ve tried using sunflower seed butter instead of peanut butter for friends with nut allergies—it still bakes beautifully with a slightly different flavor.
- Vegan version: With vegan butter and a flax egg, these cookies still come out soft and delicious, perfect for plant-based eaters.
- Different mix-ins: Adding chopped peanuts or a sprinkle of sea salt on top before baking gives that extra crunch and flavor kick.
- Size adjustments: For lunchtime treats, I sometimes make these in a standard cookie scoop instead of mini muffin tins for bigger, chewier cookies.
How to Make Peanut Butter Cup Cookies Recipe
Step 1: Prep and Mix Your Dry Ingredients
Start by preheating your oven and lightly spraying your mini muffin pan—this keeps everything from sticking when your cookies are puffed up and warm. Then, whisk together your flour, salt, baking soda, and baking powder in a small bowl. This step makes sure your leavening agents are evenly spread out, so your cookies bake uniformly without any funny spots. It’s such a quick step but pays off big time!
Step 2: Cream Peanut Butter and Butter
In your stand mixer (or with a hand mixer), beat the peanut butter and butter on medium speed until creamy and blended. I always scrape the sides down to avoid lumps—giving you a smooth base. This mix will be on the looser side, which is perfect for the texture we want in our cookie dough.
Step 3: Add Sugars, Egg, and Vanilla
Next, toss in your brown and granulated sugars. Beat these into your peanut butter mixture until thick and fluffy—you’ll see the color lighten up. Then add the egg and vanilla, incorporating just until everything looks creamy and well mixed. Don’t overbeat here; you want a tender dough, not tough cookies.
Step 4: Combine Dry Ingredients and Form Dough Balls
Slowly mix in your flour mixture on low speed, scraping the bowl to make sure no flour pockets hide at the bottom. Stop beating as soon as no dry bits remain—overmixing is a cookie’s worst enemy! Then use a scoop or spoon to portion out your dough—roll each into a ball with your hands, which makes dropping them into the mini muffin pan seamless.
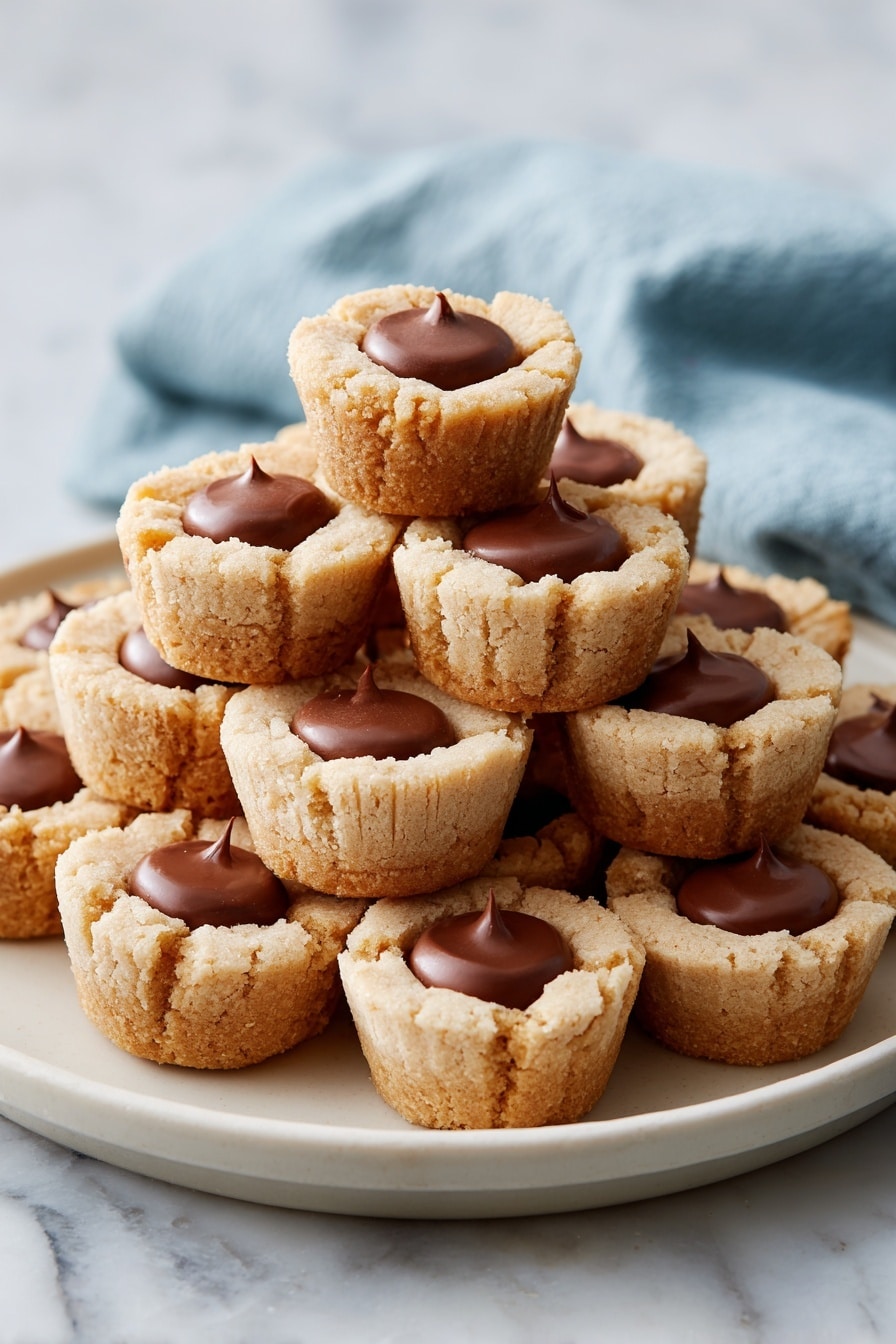
Step 5: Bake and Add Peanut Butter Cups
Bake your cookies until they’re lightly golden and puffed, with matte, dry tops—usually 8 to 12 minutes depending on your oven. While they bake, unwrap those mini peanut butter cups because timing is key: the moment you pull the pan out, press each treat right into the center of each hot cookie. This step softens the chocolate perfectly without melting it into a mess.
Step 6: Cool and Remove from Pan
Let your cookies cool in the pan for about 5 minutes so they set just enough to handle. If you find some are delicate or your peanut butter cups slide around, give them a little more time to firm up. Then twist each cookie out carefully and transfer to a rack to cool completely or enjoy warm and melty—the choice is yours!
Pro Tips for Making Peanut Butter Cup Cookies Recipe
- Measure Flour Correctly: Use the spoon-and-level method to avoid dense cookies—too much flour can dry them out.
- Room Temperature Ingredients: Bringing egg and butter to room temp helps the dough combine effortlessly and bake evenly.
- Don’t Overbake: The edges should just start to turn golden—overbaking steals away the chewy softness.
- Peanut Butter Cup Timing: Press in the mini cups right after baking while cookies are hot for that perfect melty middle without mess.
How to Serve Peanut Butter Cup Cookies Recipe
Garnishes
I like to keep it simple, usually dusting a tiny bit of powdered sugar over the cooled cookies to add a hint of sweetness and a pretty finish. Sometimes, I sprinkle a pinch of flaky sea salt on top of each peanut butter cup just before serving—totally elevates the flavors.
Side Dishes
These cookies pair perfectly with a cold glass of milk or a cup of rich coffee in the afternoon. For a decadent dessert plate, add a scoop of vanilla ice cream on the side—it’s pure heaven with the melty peanut butter cups.
Creative Ways to Present
For parties, I place these cookies in small cupcake liners arranged on a pretty platter, and sometimes drizzle melted chocolate over the top for extra flair. They also make cute gifts when packed in a decorative tin layered with parchment paper and tied with a rustic ribbon.
Make Ahead and Storage
Storing Leftovers
I store leftover cookies in an airtight container at room temperature, layering them with wax or parchment paper to keep them from sticking. They stay soft and fresh for up to four days, which means there’s usually no leftovers for long around my house!
Freezing
If you need to save some for later, these cookies freeze beautifully. I pop the fully cooled cookies in a single layer on a baking sheet, freeze until firm, then transfer to a freezer-safe bag. When you’re ready, just thaw at room temp for a couple of hours.
Reheating
To revive that fresh-baked feel, warm the cookies for about 10 seconds in the microwave—it brings back the melty peanut butter cup center and soft texture. Just be careful not to overheat or the chocolate can get too melty and messy.
FAQs
-
Can I use crunchy peanut butter instead of creamy?
You absolutely can! Crunchy peanut butter will add a bit of extra texture and nuttiness, which some people really enjoy. Just keep in mind the cookies might be a little less smooth, but still delicious.
-
Why do I press the peanut butter cups into the cookies right after baking?
Pressing the peanut butter cups while the cookies are hot softens the chocolate just enough to create that luscious, gooey center without melting the chocolate all over the pan. It’s a simple trick I discovered that makes a big difference!
-
Can I make these cookies vegan?
Yes! Swap out the butter with a vegan alternative and substitute the egg for a flax egg (1 tablespoon flaxseed meal + 3 tablespoons water, chilled for 10 minutes). They’ll be just as tasty and soft.
-
How long will these cookies keep fresh?
Stored in an airtight container at room temperature, these cookies stay soft and fresh for up to 4 days. Beyond that, they’re still good but might start to dry out.
-
Can I use full-size peanut butter cups instead of mini ones?
You can, but I recommend cutting them into smaller pieces to fit inside the mini muffin pan cavities. Full-size cups might overwhelm the dough and make it tricky to bake evenly.
Final Thoughts
Making this Peanut Butter Cup Cookies Recipe always brings me back to those cozy moments in the kitchen with family and friends. The blend of soft cookie and melty peanut butter cup is pure comfort food, and I know you’ll love sharing this with the people you care about. So, grab your mini muffin pan, unwrap those peanut butter cups, and enjoy the magic of freshly baked peanut buttery goodness right from your oven. Happy baking!
Print
Peanut Butter Cup Cookies Recipe
- Prep Time: 15 minutes
- Cook Time: 10 minutes
- Total Time: 25 minutes
- Yield: 24 to 30 cookies
- Category: Dessert
- Method: Baking
- Cuisine: American
- Diet: Vegetarian
Description
Delightfully soft and chewy Peanut Butter Cup Cookies that combine the salty richness of peanut butter with melty mini peanut butter cups. Perfectly golden and slightly puffed, these cookies are quick to make and stay moist for days, offering a nostalgic treat for all peanut butter lovers.
Ingredients
Dry Ingredients
- 1 1/3 cups (180g) all-purpose flour
- 1 teaspoon kosher salt
- 1/2 teaspoon baking soda
- 1/4 teaspoon baking powder
Wet Ingredients
- 2/3 cup (180g) creamy peanut butter, such as Skippy or Jif
- 6 tablespoons (84g) unsalted butter, room temperature
- 2/3 cup (150g) packed light brown sugar
- 1/3 cup (70g) granulated sugar
- 1 large egg, at room temperature
- 1 teaspoon vanilla extract
Other
- Nonstick cooking spray, for greasing the pan
- 24 to 30 mini peanut butter cups, unwrapped
Instructions
- Preheat and Prepare Pan: Arrange a rack in the center of the oven and preheat to 350°F (175°C). Lightly spray the cavities of a nonstick mini muffin pan with nonstick cooking spray.
- Mix Dry Ingredients: In a small bowl, whisk together the flour, kosher salt, baking soda, and baking powder. Set aside for later use.
- Cream Peanut Butter and Butter: In the bowl of a stand mixer fitted with the paddle attachment, or a large mixing bowl using a hand mixer, beat the peanut butter and butter on medium speed until fully combined and creamy, about 30 seconds to 1 minute. Scrape down the sides of the bowl as needed.
- Add Sugars: Add the light brown sugar and granulated sugar to the bowl and beat until the mixture thickens and becomes fluffy, about 30 seconds to 1 minute. Scrape the bowl as needed to ensure even mixing.
- Incorporate Egg and Vanilla: Add the egg and vanilla extract, then beat on medium speed until fully incorporated and the mixture lightens and is creamy, about 15 seconds more, scraping down the bowl as needed.
- Combine Dry and Wet Ingredients: Add the dry flour mixture to the butter mixture and beat on low speed until just combined, about 20 seconds. Use a rubber spatula to give the dough one final stir to make sure there are no dry bits remaining.
- Portion Dough: Using a 1½-inch scoop or tablespoon, divide dough into 24 large or up to 30 smaller portions. Roll each portion into a ball with your hands. Place each ball into a cavity of the prepared mini muffin pan without pressing down.
- Bake Cookies: Bake the cookies at 350°F (175°C) for 8 to 12 minutes, rotating the pan halfway through to ensure even baking. Cookies should be golden, slightly puffed, with matte and dry tops, and just starting to turn golden around the edges.
- Press Peanut Butter Cups: Remove the pan from the oven and immediately press one unwrapped mini peanut butter cup into the center of each hot cookie. Let the cookies cool in the pan for about 5 minutes until set enough to handle.
- Cool and Remove Cookies: Carefully twist each cookie to release it from the pan and transfer to a cooling rack to cool completely. If cookies are delicate or chocolate moves, cool an additional 5 minutes in the pan. Serve cooled or warm with melty peanut butter cups.
- Storage: Store leftover cookies at room temperature in an airtight container, layered with wax or parchment paper between cookies to prevent sticking, for up to 4 days.
Notes
- These cookies are soft and chewy with a perfect blend of salty peanut butter and sweet chocolate.
- Using mini muffin pans ensures uniform cookie size and shape.
- Don’t overbake; the tops should be matte and dry but not deeply browned.
- Peanut butter cups are pressed into the cookies while still hot for melty centers.
- Store cookies properly to maintain freshness and softness for several days.
Nutrition
- Serving Size: 1 cookie (based on 24 yield)
- Calories: 279 kcal
- Sugar: 11 g
- Sodium: 139 mg
- Fat: 22 g
- Saturated Fat: 12 g
- Unsaturated Fat: 10 g
- Trans Fat: 0 g
- Carbohydrates: 19 g
- Fiber: 1 g
- Protein: 3 g
- Cholesterol: 53 mg


