

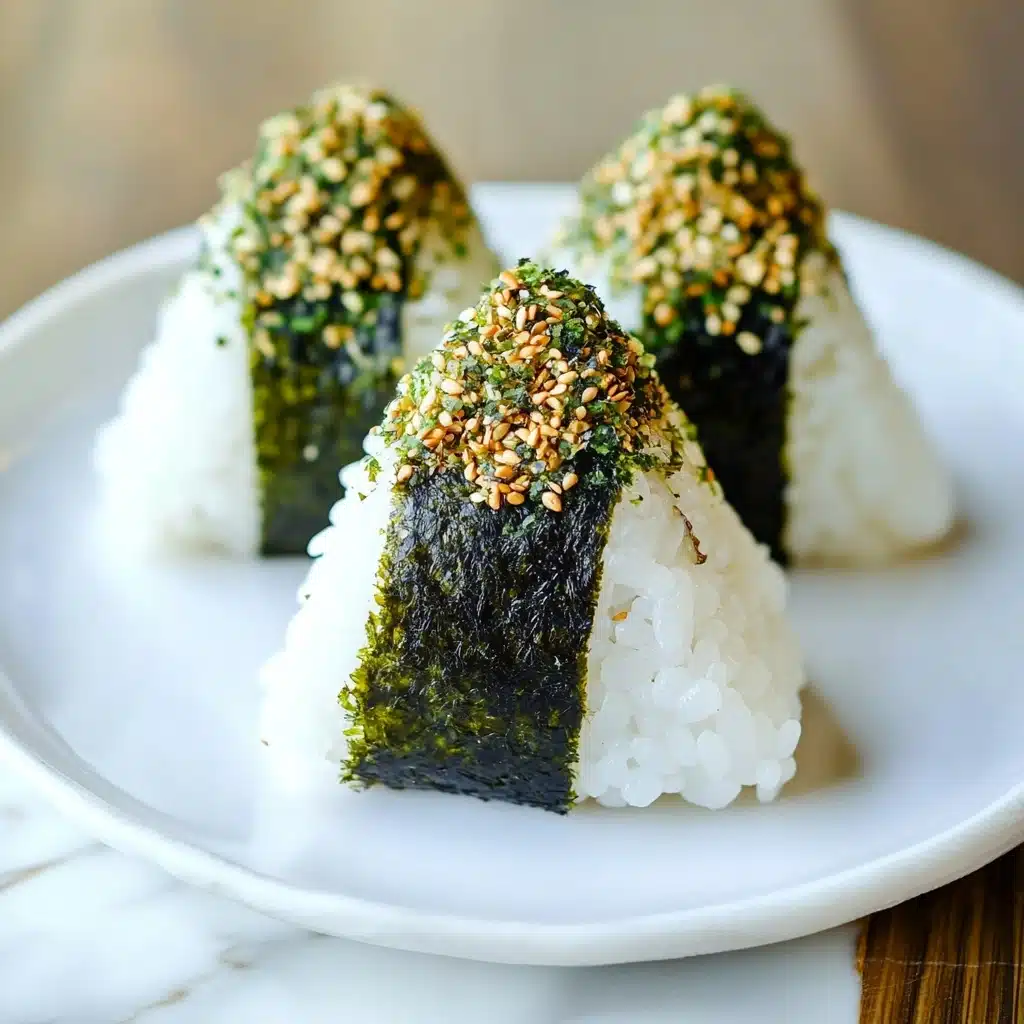
Few foods capture the heart and nostalgia of Japanese cooking quite like Onigiri (Japanese Rice Balls). These little triangles or rounds of hand-pressed rice, lovingly stuffed and wrapped in nori, are pure comfort– whether they’re part of a quick lunch, tucked into a bento box, or enjoyed as an on-the-go snack. If you’re ready to master this iconic staple, get set for a step-by-step guide brimming with tips to help your onigiri shine!
Why You’ll Love This Recipe
- Snackable Perfection: Onigiri (Japanese Rice Balls) are the ideal bite–handheld, portable, and perfect for stashing in a lunchbox or snack bag!
- Totally Customizable: With a world of fillings and seasonings, you truly make each Onigiri your own every single time.
- Beginner-Friendly: No fancy gadgets needed—just your hands, a few pantry basics, and a little creativity.
- Deliciously Nostalgic: Each bite is pure Japanese home-cooking comfort—simple ingredients with big flavor and memories.

Ingredients You’ll Need
The beauty of Onigiri (Japanese Rice Balls) is how simple yet essential each ingredient is. Every component–from fluffy rice to savory fillings and nori–works together to create a bite that’s delightfully balanced, textured, and satisfying.
- Japanese short-grain white rice: The sticky texture is vital—it holds together perfectly for shaping and achieving that signature chewy, tender bite.
- Water: Don’t overlook this! Proper rice-to-water ratio ensures plump, moist grains (not mushy or dry).
- Diamond Crystal kosher salt: Not just for flavor—this salt also helps preserve onigiri for portable snacking.
- Nori (dried seaweed): Adds a savory, crisp wrap with a subtle ocean aroma—plus it keeps rice off your fingers!
- Salmon fillets: For a classic, flaky salted salmon filling—quick-cooked and simply seasoned.
- Katsuobushi (dried bonito flakes): Intensely savory and smoky—a perfect filling mixed with soy sauce.
- Soy sauce: Adds that umami depth to yozakana (Okaka) and the tuna mayo filling.
- Canned albacore tuna (in olive oil): The ultimate creamy, familiar tuna mayo filling—Japanese bento staple!
- Japanese Kewpie mayonnaise: Incredibly rich and tangy—different from American mayo, it’s worth seeking out.
- Umeboshi (pickled plum): Tart, salty, and intensely flavorful—traditional and beloved in classic onigiri.
- Spicy salted pollock or cod roe (karashi mentaiko): A bold, briny filling for those who love a little kick.
- Shio kombu: Delicately seasoned shredded kelp for a super savorful Japanese touch.
- Furikake: A sprinkle of colorful, crunchy, savory seasoning that instantly jazzes up plain rice balls.
Variations
One of the joys of Onigiri (Japanese Rice Balls) is how adaptable they are. Whether you’re craving something classic or want to raid the fridge, there’s no end to the combinations you can invent to suit your mood, dietary needs, or the odds and ends in your pantry!
- Yaki Onigiri: Brush your shaped onigiri with soy sauce and grill them until crispy for an irresistible golden crust.
- Vegetarian Fillings: Swap in avocado, cooked shiitake mushrooms, pickled daikon, or even miso-marinated tofu for protein-packed, plant-based rice balls.
- Mix-in Onigiri: Stir furikake, sesame seeds, or even bits of shiso leaf directly into the rice before shaping for a pop of color and flavor in every bite.
- Kid-Friendly: Try familiar fillings like cooked chicken teriyaki, flaked grilled fish, or even a spoonful of mashed egg salad.
How to Make Onigiri (Japanese Rice Balls)
Step 1: Cook the Perfect Japanese Rice
For truly great Onigiri (Japanese Rice Balls), start with Japanese short-grain rice, rinsing it until the water runs clear. Cook it with care in a rice cooker or pot—ensure you let it soak before cooking for that perfect texture. Once cooked, let it steam and cool just until warm (not hot), which makes shaping easier and the finished onigiri pillowy but sturdy.
Step 2: Prepare the Fillings
While your rice steams, get your fillings ready! Bake or broil the salted salmon, flake it, and set aside. Mix katsuobushi with soy sauce for Okaka onigiri. Whip together tuna, Kewpie mayo, and soy sauce for the popular tuna mayo. Pit umeboshi, prep mentaiko, and have shio kombu and furikake at the ready. Assemble flavors you love—you can make several varieties to keep things fun!
Step 3: Shape the Onigiri
You can shape Onigiri with your hands, a mold, or even using plastic wrap for mess-free prep. Moisten your hands (or mold) with water and a little kosher salt to prevent sticking. For filled onigiri, gently flatten some rice in your palm, press in your filling, then cover and mold into a triangle or ball—pressing just enough to hold it together without compacting too tightly. Each rice ball is a little work of art!
Step 4: Add Furikake or Nori
Coat the outside of your onigiri with furikake for pops of color, crunch, and savoriness. Or wrap them with a strip of toasted nori—either around the base, or covering the whole onigiri. If you like crispy nori, wait to wrap until just before eating for maximum contrast and flavor.
Step 5: Serve and Enjoy
Arrange your Onigiri (Japanese Rice Balls) on a plate, add a little extra filling or furikake to the top to signal what’s inside, and enjoy them warm or at room temperature. Whether you’re packing them up for a trip, or serving a platter at home, these comforting, travel-ready snacks are always a hit!
Pro Tips for Making Onigiri (Japanese Rice Balls)
- Rice Matters Most: Use only Japanese short-grain rice—its stickiness is what lets the onigiri stay perfectly shaped and tender after cooling.
- Hands: Damp, Not Wet: Keep a bowl of water nearby so you can keep your hands (or mold) damp—this prevents rice sticking, but if your hands are too wet, the onigiri won’t hold together.
- Salt for Safety & Flavor: Don’t skip salting your hands (or plastic wrap)—besides a gentle seasoning, salt helps prevent spoilage if the Onigiri will travel with you.
- Fresh Fillings: Use cooked and well-drained fillings, and avoid anything too wet to keep the rice light and your Onigiri from getting soggy inside.
How to Serve Onigiri (Japanese Rice Balls)
Garnishes
You can keep things traditional by topping your Onigiri (Japanese Rice Balls) with a sprinkle of furikake, some toasted sesame seeds, or a small piece of the filling for easy identification. For extra color, try snipped chives, thin strips of shiso, or even a fun nori cut-out.
Side Dishes
Onigiri pairs beautifully with a hot bowl of miso soup, a refreshing cucumber salad, grilled veggies, or crisp pickled radish. In true bento style, tuck in some tamagoyaki (Japanese omelette) and a few slices of fresh fruit for a complete, balanced meal.
Creative Ways to Present
Create a dazzling onigiri platter with different shapes—triangles, rounds, and logs—each with varied fillings, toppings, and nori wrapping styles. For parties, arrange them on bamboo leaves or in a tiered bento box, and add cute pick flags or little edible decorations to impress guests and kids alike!
Make Ahead and Storage
Storing Leftovers
Onigiri is best enjoyed the same day it’s made, but you can store leftover rice balls tightly wrapped in plastic wrap and covered with a thick kitchen towel in the fridge to help prevent the rice from drying out. Plan to eat them within 24 hours for the best taste and texture.
Freezing
Onigiri (Japanese Rice Balls) freeze surprisingly well! Wrap each rice ball tightly in plastic wrap and pop them in a zip-top bag—leave off the nori until after thawing and reheating so it stays crisp. Fillings like salmon or plain rice are best for freezing.
Reheating
To reheat, simply microwave the wrapped onigiri until just warm (don’t overdo it or it will dry out). Add fresh nori after reheating. If your rice ball feels a little firm, a quick steam or sprinkle of water before microwaving will revive that plush, chewy texture.
FAQs
-
Can I use regular long-grain rice for onigiri?
It’s best to use Japanese short-grain rice (or genuine sushi rice) for Onigiri (Japanese Rice Balls), as regular long-grain rice isn’t sticky enough to hold the shape and will fall apart easily. Short-grain is essential for texture and authenticity.
-
How do I keep the rice from sticking to my hands?
Dip your hands in water and rub them with a dash of kosher salt before shaping each rice ball. This simple trick keeps the rice from sticking and adds a touch of flavor.
-
What are some other fillings I can try?
The sky’s the limit! Aside from the classic fillings, try teriyaki chicken, sautéed mushrooms, flaked mackerel, pickled ginger, or even roasted veggies. Just keep fillings cooked and not too watery.
-
Can I make Onigiri (Japanese Rice Balls) ahead for a party or bento?
Absolutely! Assemble the Onigiri in the morning, wrap tightly in plastic, and transport in a cooler or insulated bag. For best texture, add nori just before serving so it stays crisp, and consume within the day.
Final Thoughts
I hope you feel inspired to roll up your sleeves and create a batch of Onigiri (Japanese Rice Balls) to enjoy at home, on a picnic, or as a heartfelt lunchbox treat. There’s something so joyful about crafting these simple, savory bites—every onigiri is a tiny hug from the Japanese kitchen. Give them a try, and don’t be surprised if they become your new comfort food favorite!
Print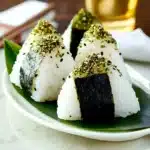
Onigiri (Japanese Rice Balls) Recipe
- Prep Time: 30 minutes
- Cook Time: 30 minutes
- Total Time: 1 hour
- Yield: 9 onigiri (13 with a mold)
- Category: Side Dish
- Method: Rice Cooking, Mixing, Shaping
- Cuisine: Japanese
- Diet: Vegetarian
Description
Learn how to make delicious Japanese Onigiri rice balls with various tasty fillings such as salted salmon, tuna mayo, umeboshi, and more. A perfect snack or addition to a bento box!
Ingredients
For the Steamed Rice
- 2 1/4 cups uncooked Japanese short-grain white rice (3 rice cooker cups; 540 ml)
- 2 1/2 cups water (600 ml)
For the Onigiri
- Diamond Crystal kosher salt
- 3 sheets nori (dried laver seaweed)
For the Japanese Salted Salmon Filling (quick version)
- 1-2 fillet salmon
- Diamond Crystal kosher salt
For the Okaka Filling
- 1 packet katsuobushi (dried bonito flakes) (one packet is typically 3 g or 5 g)
- 1 Tbsp soy sauce
For the Tuna Mayo Filling
- 1 (5-ounce) can albacore tuna (preferably packed in olive oil)
- 2 Tbsp Japanese Kewpie mayonnaise
- 1/2 Tbsp soy sauce
For the Other Fillings
- 2 umeboshi (Japanese pickled plum)
- 2 sacs spicy salted pollock roe or cod roe (karashi mentaiko)
- shio kombu (prepared)
- furikake (rice seasoning)
Instructions
- To Prepare the Steamed Rice
Overfill a cup measure with uncooked rice, rinse, and cook with water. Let it cool.
- To Prepare the Onigiri Fillings
Prepare various fillings like salted salmon, okaka, tuna mayo, umeboshi, mentaiko, and shio kombu.
- To Shape the Onigiri
Use molds, hands, or plastic wrap to shape rice balls with fillings. Garnish with furikake and nori.
- To Coat with the Furikake
Coat the onigiri with rice seasoning for added flavor.
- To Wrap with the Nori and Serve
Wrap the onigiri with nori strips or sheets before enjoying warm or at room temperature.
- To Store
If packing for later, keep cool and consume within 6 hours to avoid rice hardening.
Notes
- For traditional salted salmon, refer to the Japanese Salted Salmon recipe.
- Use moistened hands to shape onigiri to prevent sticking.
- Adjust fillings and seasonings to taste.
Nutrition
- Serving Size: 1 onigiri
- Calories: Approx. 150 calories
- Sugar: Varies based on fillings
- Sodium: Varies based on fillings
- Fat: Varies based on fillings
- Saturated Fat: Varies based on fillings
- Unsaturated Fat: Varies based on fillings
- Trans Fat: Varies based on fillings
- Carbohydrates: Varies based on fillings
- Fiber: Varies based on fillings
- Protein: Varies based on fillings
- Cholesterol: Varies based on fillings


