
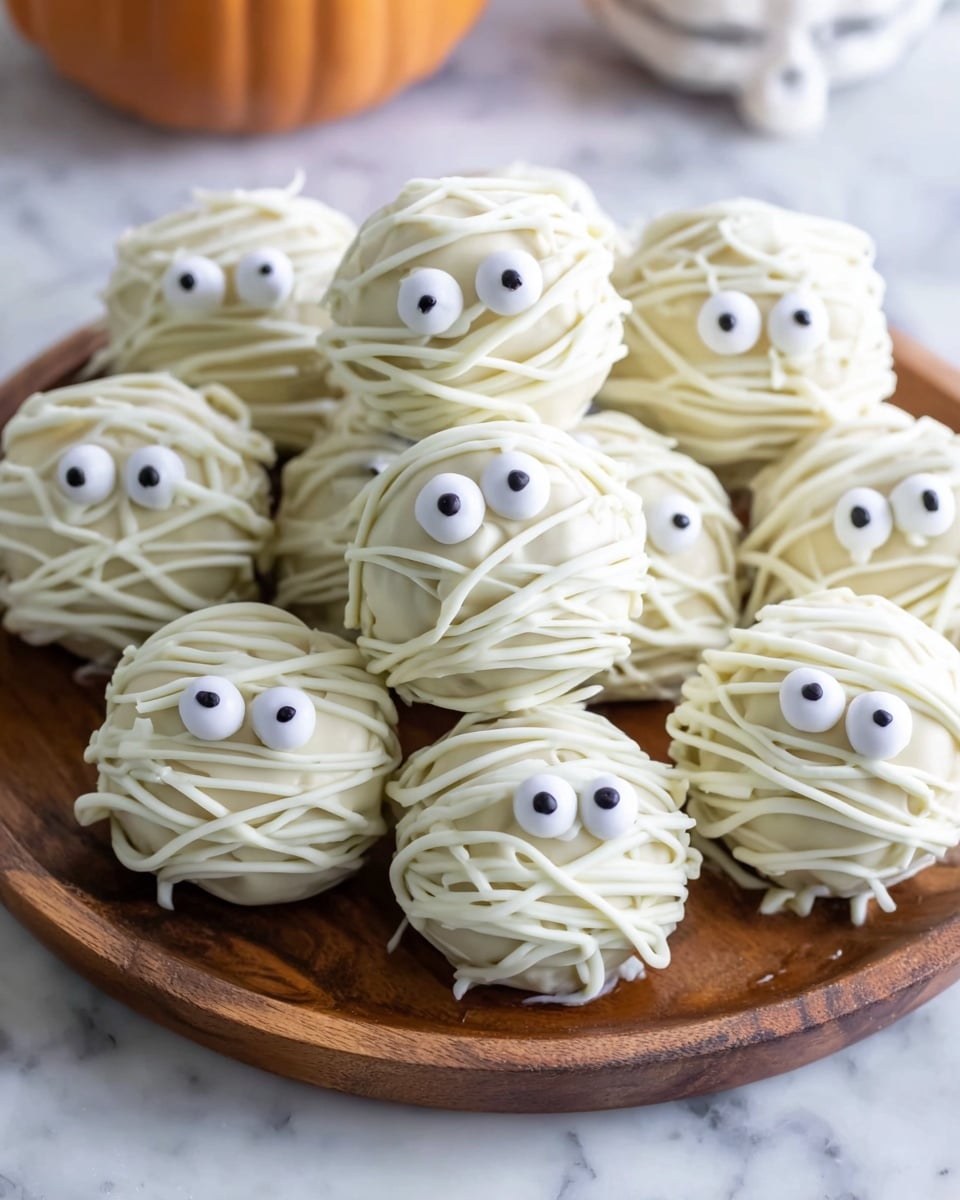
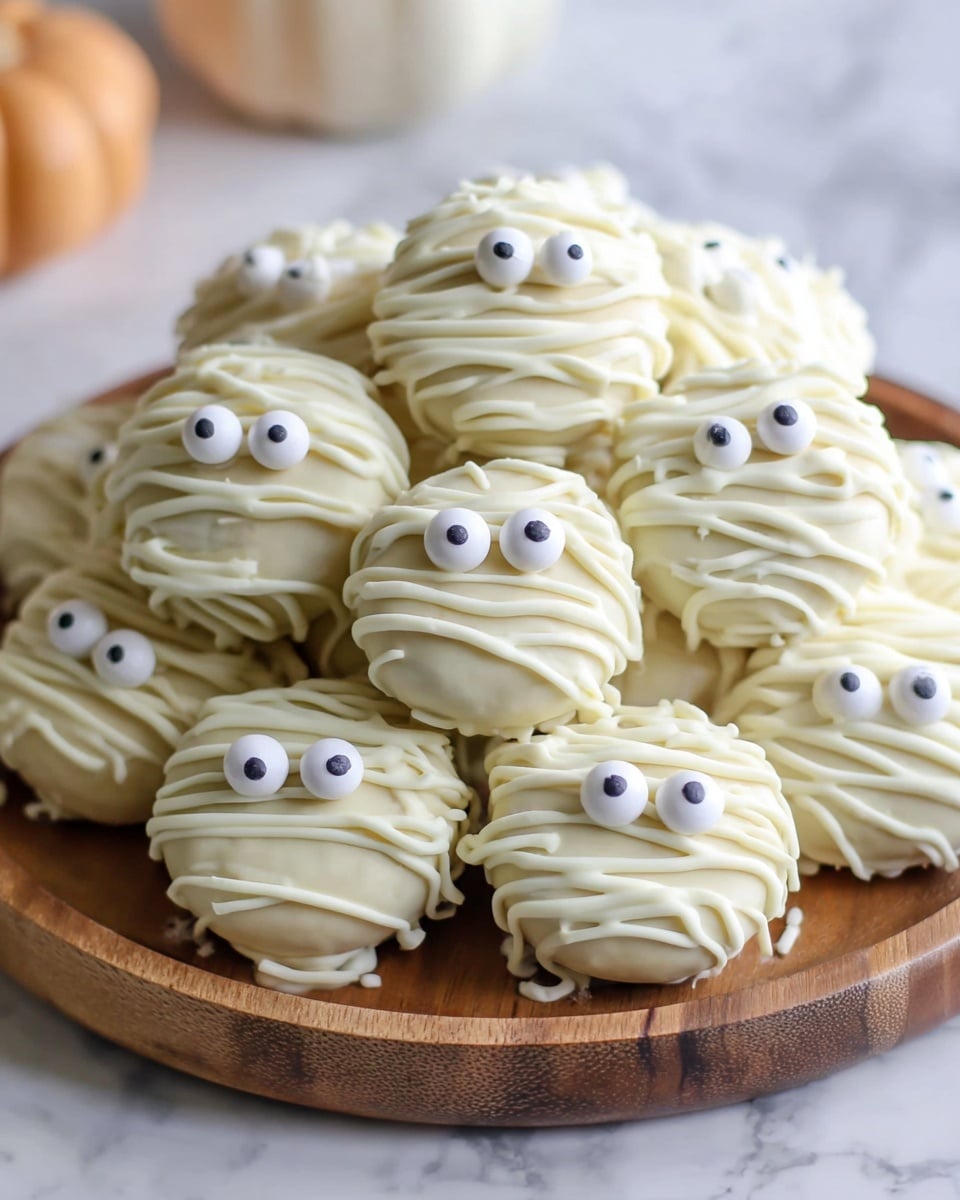
If you’re looking for a Halloween treat that’s as adorable as it is delicious, let me introduce you to my favorite spooky snack: the Mummy Oreo Cake Pops Recipe. These bite-sized delights combine creamy cheesecake, the unmistakable crunch of Oreos, and a gorgeous white chocolate coating—all decked out in fun mummy wraps. Trust me, once you try this recipe, it’s going to be your go-to for parties and family gatherings. I absolutely love how easy they are to make, and your friends and family are sure to go crazy for these festive pops!
Why You’ll Love This Recipe
- Simple Ingredients: You only need a few pantry staples and Oreo cookies to whip these up.
- No Baking Required: Cool and fun, with no oven time needed which means less stress.
- Perfect Party Treat: They’re as cute as they are tasty, making them a real crowd-pleaser for all ages.
- Customizable and Fun: You can easily switch up decorations or add flavors to make them your own spooky masterpiece.

Ingredients You’ll Need
This Mummy Oreo Cake Pops Recipe works its magic with ingredients that blend creamy, sweet, and crunchy textures perfectly. Plus, most of these are probably already in your pantry or fridge!
- Classic Oreo Cookies: Using the whole cookie including centers ensures the perfect crumb texture without any waste.
- Full-fat Cream Cheese: At room temperature, it blends easier into the cookie crumbs for that smooth, decadent dough.
- White Chocolate Chips or Chopped White Chocolate: I prefer good quality chocolate for a creamy coating that sets perfectly.
- Vegetable or Canola Oil: A tiny bit thins the melted white chocolate for easy dipping and drizzling without compromising flavor.
- Eyeball Sprinkles: These little edible eyes bring the whole mummy look to life—so fun and festive!
Variations
I love tinkering with this Mummy Oreo Cake Pops Recipe to suit the occasion or my mood. You can make it as spooky or as simple as you like—it’s all about having fun in the kitchen and making these treats your own.
- Chocolate Drizzle Instead of White Chocolate: Once I tried adding dark chocolate drizzle instead, and it gave a delicious contrast and extra richness that was a hit with my family.
- Different Sprinkles: No eyeball sprinkles? No problem! Use mini chocolate chips or even draw eyes with edible markers for a creative twist.
- Flavor Infusion: Mix a bit of peppermint or pumpkin spice into cream cheese for a festive flavor boost that’s perfect around the holidays.
- Vegan Adaptation: You can swap cream cheese and white chocolate for vegan alternatives, and they still turn out wonderfully tasty.
How to Make Mummy Oreo Cake Pops Recipe
Step 1: Crush the Oreos into Fine Crumbs
Start by placing 36 Oreos in a food processor and pulsing until they break down into fine, uniform crumbs. When I didn’t have a food processor, I just sealed them in a plastic bag and crushed them with a rolling pin—it works just fine! The key is to get a consistent crumb texture so the cream cheese binds everything evenly.
Step 2: Mix in Cream Cheese to Form Dough
Add the room-temperature cream cheese to the Oreo crumbs and pulse a few more times until you get a wet dough mixture. If you see chunks of cream cheese that aren’t blending well, just cut them smaller and continue pulsing. This step is what gives the cake pops their creamy, melt-in-your-mouth texture.
Step 3: Scoop and Chill the Oreo Balls
Using a 1-tablespoon scoop, form small balls and place them on a parchment-lined plate. I try to keep mine fairly uniform in size because it just looks more polished, but you don’t have to be a perfectionist here. Pop them into the freezer for 30 minutes to firm up. This chilling step is crucial—it helps the pops hold together when you dip them in chocolate.
Step 4: Melt the White Chocolate and Add Oil
While the balls chill, melt 2 cups of white chocolate chips using 15-second bursts in the microwave, stirring in between to get a smooth, glossy finish. Stir in the vegetable or canola oil to thin the chocolate just enough to effortlessly coat your pops. I learned the hard way that skipping the oil makes dipping way harder!
Step 5: Dip the Oreo Balls and Add Eyeballs
Remove half the Oreo balls from the freezer and dip one at a time into the melted white chocolate, pressing gently to coat fully. Use a fork to lift them out and tap off excess chocolate. While the coating is still wet, press two eyeball sprinkles on the top for that perfect mummy look. Repeat this process with the remaining balls, remembering to work in batches so none get too soft.
Step 6: Drizzle with Remaining White Chocolate
Put the last cup of white chocolate in a small piping bag and warm gently until mostly melted. Cut a tip and drizzle over each cake pop for that signature bandaged mummy effect. This extra layer not only looks fantastic but also hides any crumbs or imperfections. Let them set for about 15 minutes in the fridge before moving to an airtight container.
Pro Tips for Making Mummy Oreo Cake Pops Recipe
- Keep Pops Firm: If your pops soften while dipping, just pop them back in the freezer until they’re firm again.
- Use a Thick Glass to Melt Chocolate: I discovered that a short, thick glass holds heat better and keeps your chocolate fluid longer for smoother coating.
- Uniform Scooping Matters: Using a 1 Tbsp scoop keeps your pops the same size, which makes dipping and presentation so much easier and prettier.
- Eyeball Sprinkles Substitution: No eyeball sprinkles? No worries—melt some dark chocolate and pipe eyes on for a homemade spooky look.
How to Serve Mummy Oreo Cake Pops Recipe
Garnishes
I usually stick to eyeball sprinkles because they instantly turn these treats into little mummies, but feel free to sprinkle on edible glitter or colored sugar to amp up the festive factor. Some mini chocolate chips added to the drizzle layer give a fun texture too—I love a bit of crunch!
Side Dishes
These cake pops go perfectly with a cup of hot cocoa or a fun Halloween punch. I also like serving them alongside pumpkin-shaped sugar cookies or spooky cupcakes for a themed dessert table that kids and adults alike adore.
Creative Ways to Present
For parties, I’ve tried placing the Mummy Oreo Cake Pops in a spooky “graveyard” display with crushed cookie “dirt” in a shallow box. Another fun idea is to stand them upright in floral foam decorated with Halloween confetti or cobwebs—makes a great centerpiece and keeps them from rolling away!
Make Ahead and Storage
Storing Leftovers
Once your mummy pops are fully set, pop them in an airtight container in the fridge. I’ve kept mine fresh and delicious for up to a week, which is great if you need to prep for a party in advance or want to enjoy them over several days.
Freezing
I’ve frozen these before by wrapping them individually in plastic wrap and then placing them in a freezer bag. They freeze well for up to a month and thaw in the fridge overnight without losing their texture or flavor—super handy for saving time before Halloween.
Reheating
Because these pops contain cream cheese, I don’t recommend microwaving or reheating in the traditional sense. Instead, I take them out of the fridge about 10 minutes before serving to let them come to a slightly softer room temperature—that way, they’re perfectly creamy without melting the chocolate coating.
FAQs
-
Can I use reduced-fat cream cheese in the Mummy Oreo Cake Pops Recipe?
You can, but full-fat cream cheese gives a richer texture and blends more smoothly with the Oreo crumbs. Reduced-fat versions might make the mixture less creamy and a bit harder to bind, so plan accordingly.
-
What if I don’t have a food processor to crush Oreos?
No worries! Place the Oreos in a sealed plastic bag and crush them using a rolling pin or even the bottom of a heavy glass until you get fine crumbs. It takes a bit more effort, but it works just as well.
-
How do I prevent the white chocolate from hardening too quickly when dipping?
Use a short, thick glass to keep the melted white chocolate warm longer. Warm it in small 15-second bursts and stir between each to keep it silky. You can also reheat gently if it starts to thicken too much during dipping.
-
Can I make these cake pops ahead of time for a party?
Absolutely! They store beautifully in the fridge for up to a week and can even be frozen for longer storage. Just remember to let them come to room temperature before serving for the best flavor and texture.
Final Thoughts
This Mummy Oreo Cake Pops Recipe has become a beloved favorite in my family — not just because they’re cute, but because they taste decadently good without any complicated baking. If you want to impress with a fun, easy dessert that’s perfect for Halloween or anytime you want a sweet treat, give this a try in your kitchen. I promise you’ll enjoy sharing these little mummies with friends and family as much as I love making them.
Print
Mummy Oreo Cake Pops Recipe
- Prep Time: 5 minutes
- Cook Time: 0 minutes
- Total Time: 20 minutes
- Yield: 30 cake pops
- Category: Dessert
- Method: No-Cook
- Cuisine: American
Description
These spooky Mummy Cake Pops are a fun and festive treat made from crushed Oreos combined with cream cheese, coated in smooth white chocolate, and decorated with cute eyeball sprinkles. Perfect for Halloween parties or as a delightful sweet snack, these no-bake cake pops are easy to prepare and store well for up to a week in the fridge.
Ingredients
Mummy Cake Pops
- 36 classic Oreo cookies (centers and all) – 400g
- 1 cup (8 oz) full-fat cream cheese, room temperature – 226g
- 3 cups good-quality white chocolate chips or chopped white chocolate – 525g
- 2 tsp vegetable or canola oil – 12g
- 60 small eyeball sprinkles
Instructions
- Prepare the base mixture: Line a large, flat plate with parchment paper and set aside. Place 36 Oreo cookies in a food processor and pulse until they become fine, uniform crumbs. Alternatively, crush Oreos in a ziplock bag with a rolling pin if no food processor is available.
- Mix with cream cheese: Add 1 cup of full-fat cream cheese to the processed Oreos and pulse until fully combined into a wet dough. Cut cream cheese into smaller pieces if it doesn’t blend easily. Remove the blade and scrape the mixture with a spatula.
- Form balls: Using a 1 Tbsp cookie scoop or spoon, scoop about 30 uniform-sized Oreo balls onto the parchment-lined plate. Freeze for 30 minutes to chill and firm up the balls.
- Melt white chocolate coating: Melt 2 cups (350g) of white chocolate in a short, wide heat-proof glass in 15-second intervals, stirring between each, until smooth. Stir in 2 teaspoons of vegetable or canola oil to thin the chocolate for easier coating.
- Coat the Oreo balls: Working in batches, dip each chilled Oreo ball in the melted white chocolate, gently pressing to coat fully. Use a fork to lift each ball out and tap the fork to remove excess chocolate before placing back on parchment paper.
- Add eyeball decorations: While the white chocolate coating is still wet, press two eyeball sprinkles onto the top of each coated ball to create mummy eyes.
- Drizzle with second chocolate layer: Melt the remaining 1 cup of white chocolate chips in a small piping bag by microwaving in 15-second intervals until mostly melted, then gently massage the bag to finish melting. Cut a small tip and drizzle the white chocolate over each mummy ball to create the wrapped mummy effect.
- Set and store: Let the cake pops sit at room temperature for a few hours or place them in the fridge for about 15 minutes to fully set the white chocolate. Store airtight in the fridge for up to one week.
Notes
- This recipe makes approximately 30 mummy cake pops using 1 Tbsp of dough per pop; adjust scoop size to change yield.
- You can halve or double the recipe to make fewer or more cake pops.
- If cake pops soften or fall apart during dipping, freeze them again or warm the chocolate slightly to maintain smooth dipping.
- Use a 1 Tbsp cookie scoop for uniform-sized cake pops for the best appearance.
- If eyeball sprinkles are unavailable, melting dark chocolate to pipe eyes is a great alternative.
- Let cake pops chill for 15 minutes after coating to help the white chocolate set before storing.
- Keep cake pops refrigerated in an airtight container for up to one week to maintain freshness.
Nutrition
- Serving Size: 1 cake pop
- Calories: 160 kcal
- Sugar: 15 g
- Sodium: 110 mg
- Fat: 9 g
- Saturated Fat: 5 g
- Unsaturated Fat: 3 g
- Trans Fat: 0 g
- Carbohydrates: 19 g
- Fiber: 0.5 g
- Protein: 2 g
- Cholesterol: 20 mg


