
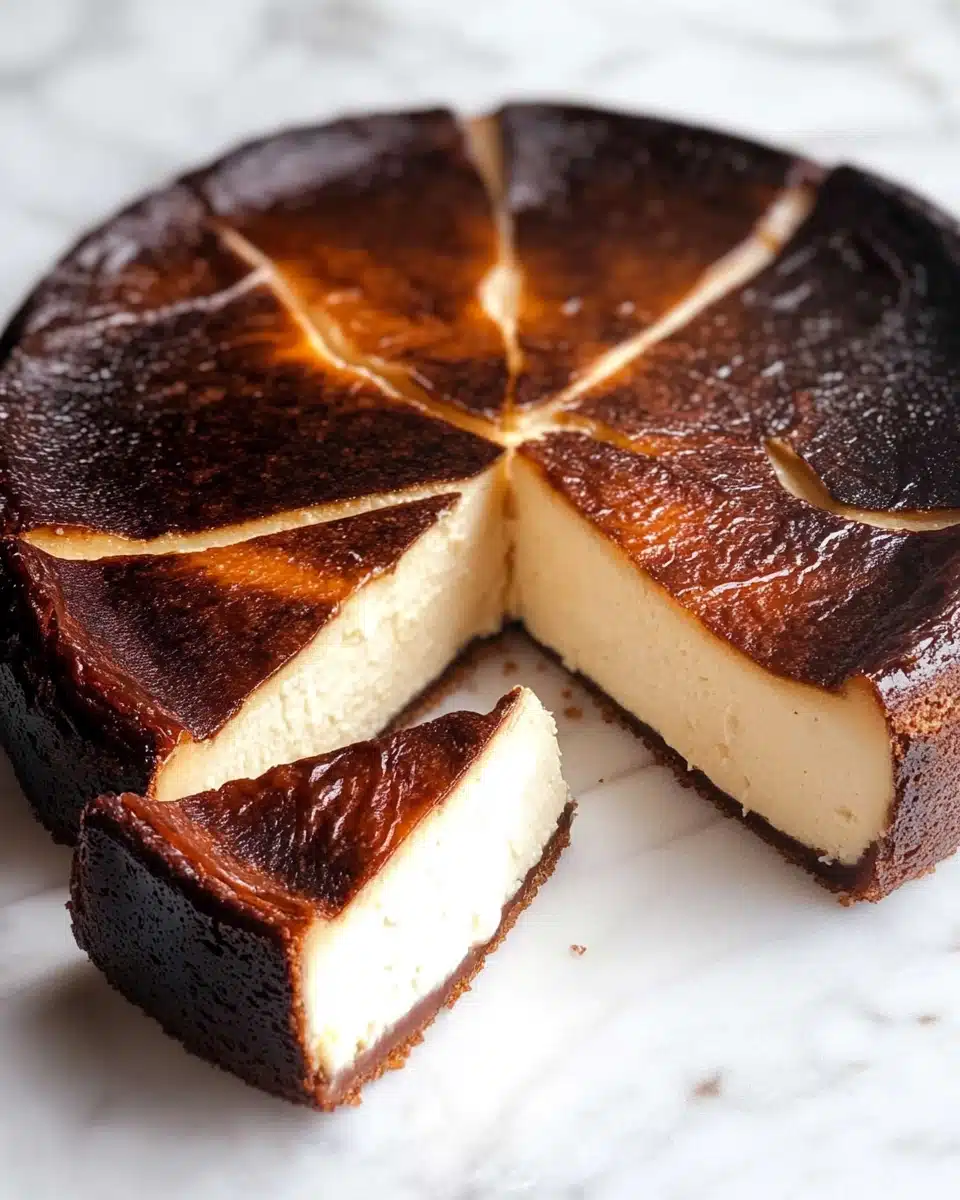
The Mini Burnt Basque Cheesecake, with its signature caramelized top and lusciously creamy center, is a showstopper in every bite. Imagine all the drama and deliciousness of the classic Basque cheesecake, but in a cute 7-inch size that’s perfect for sharing—or not! Indulge in this dreamy Spanish dessert that’s impossibly easy to make, gloriously rustic, and unapologetically irresistible.
Why You’ll Love This Recipe
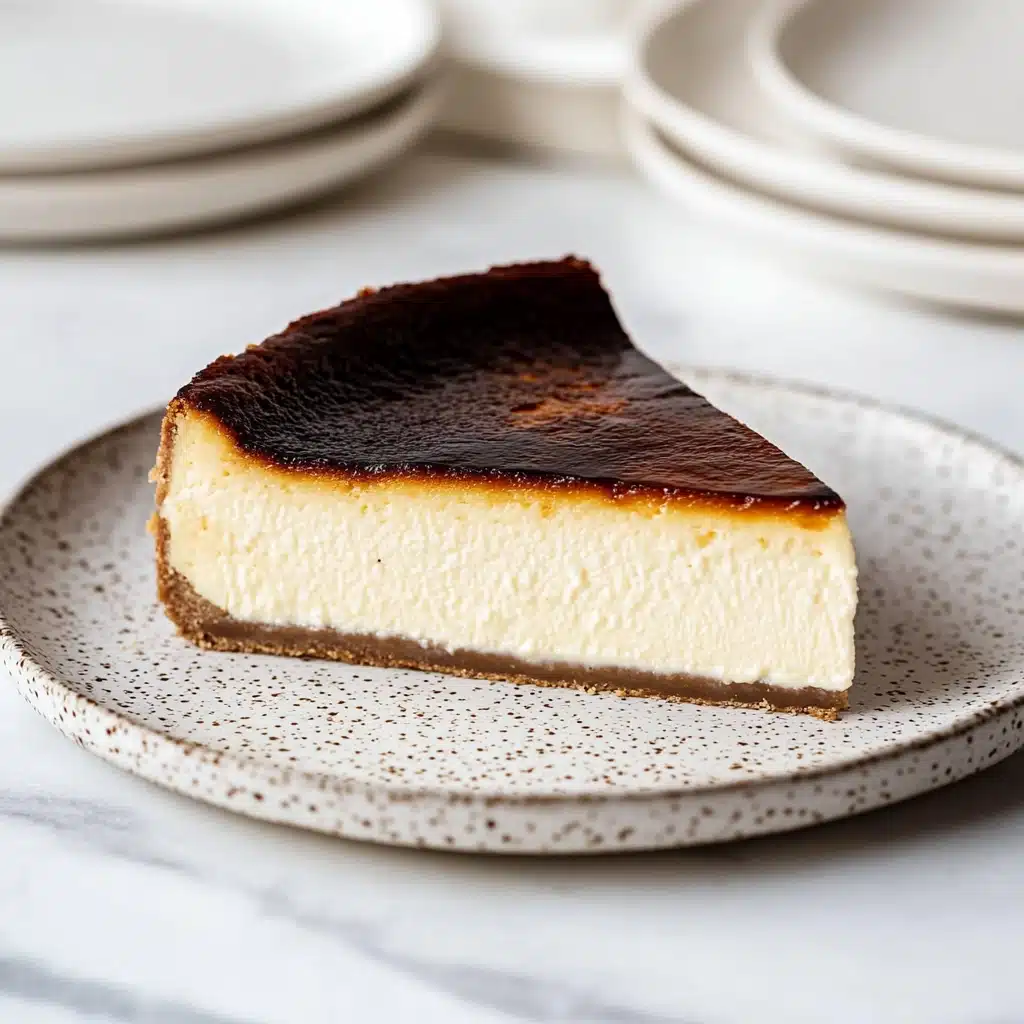
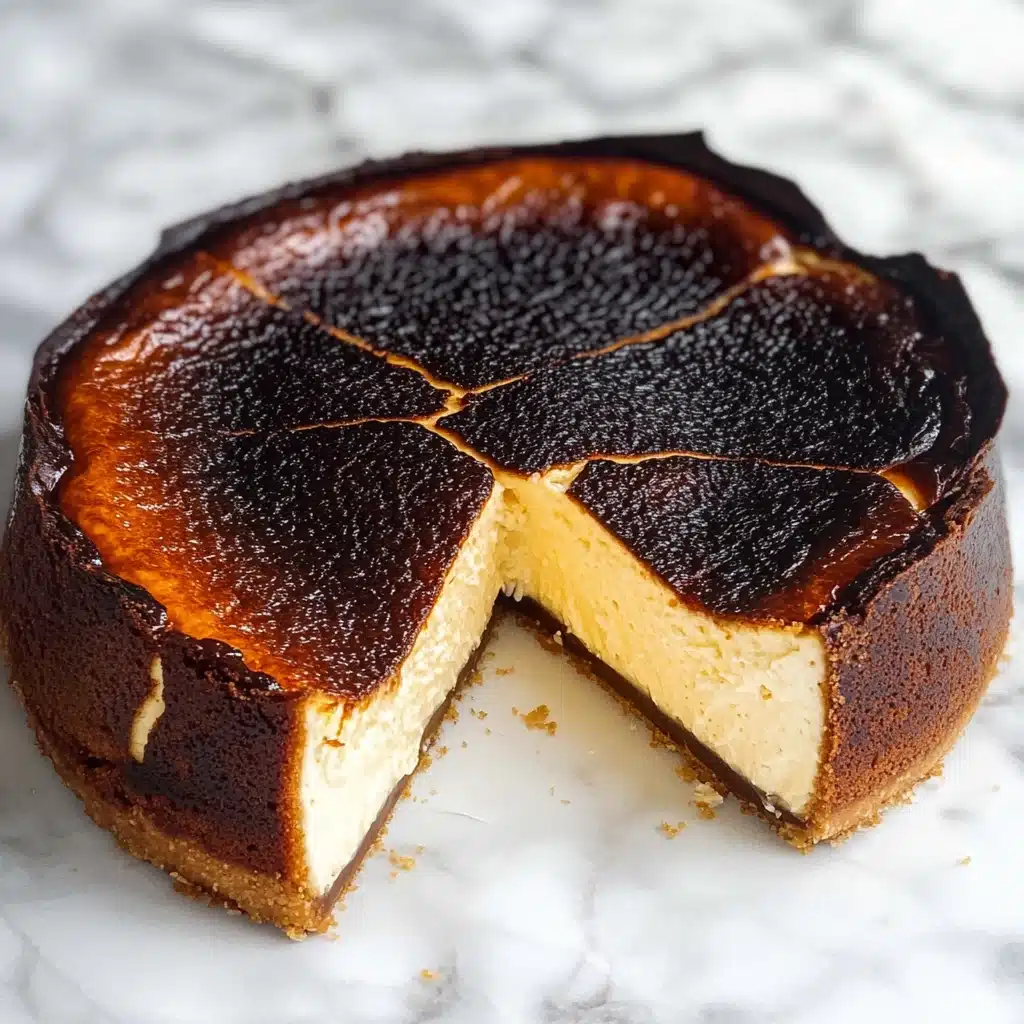
- Showstopping Texture: The Mini Burnt Basque Cheesecake has a uniquely caramelized, almost “burnt” top that contrasts with a silky-soft, custardy center.
- Effortless Elegance: You don’t need a water bath or crust—just a handful of ingredients blended in one bowl for results worthy of a bakery window.
- Perfectly Portable: Its petite size means this cheesecake is just right for intimate gatherings, date nights, or a treat just for you.
- Flavors That Shine: Rich cream cheese is gently brightened by lemon zest and vanilla, allowing every tangy, creamy note to take center stage.
Ingredients You’ll Need
This Mini Burnt Basque Cheesecake is all about simple, quality ingredients. Every one brings something special: tang from the cream cheese, sweetness from sugar, freshness from lemon zest, and a whisper of vanilla to round out that silky, luscious custard flavor.
- Cream cheese (370 g): For the best texture and flavor, use full-fat cream cheese at room temperature—trust me, it makes all the difference in creating a perfectly rich and lump-free batter.
- Sugar (⅔ cup): The right amount to complement the tangy cream cheese without making the cake overly sweet.
- Vanilla extract (1 teaspoon): Adds subtle warmth and depth to the cheesecake’s custardy base.
- Lemon zest (½ teaspoon): Just enough to brighten the flavor and balance the richness.
- Salt (¼ teaspoon): Enhances all the sweet, tangy, and creamy notes—don’t skip it!
- Flour (4 tablespoons): A little flour is the secret to that dreamy, soufflé-like texture that holds its shape with every slice.
- Eggs (2) + 1 Egg yolk: These bring structure and an unmatched custardy smoothness to the cake.
- Heavy cream (1 cup): Delivers full-on creamy decadence and that iconic Basque cheesecake wobble.
Variations
The best thing about Mini Burnt Basque Cheesecake is how beautifully it adapts to your cravings. With just a couple of tweaks, you can make it fit any mood, any pantry, and just about any dietary need—your kitchen, your rules!
- Chocolate Swirl: Marble in a few tablespoons of melted dark chocolate before baking for a dramatic flavor twist.
- Gluten-Free: Swap the flour for a 1:1 gluten-free baking blend—the cake’s deliciously creamy texture will stay perfectly on point.
- Citrus Lovers’ Dream: Add a touch more zest or a teaspoon of orange blossom water for an extra bright, fragrant finish.
- Miniatures for Parties: Divide the batter among lined muffin tins for truly bite-sized cheesecakes, ideal for gatherings or gifting!
How to Make Mini Burnt Basque Cheesecake
Step 1: Prep Your Pan and Oven
Start by lining a 7-inch springform pan with parchment paper—crumpling the paper first helps it hug the pan’s sides and creates those beautiful, rustic folds. Preheat your oven to a fiery 200°C (400°F); you want it nice and hot for that coveted caramelized top.
Step 2: Cream the Cream Cheese
In a large bowl, beat the room-temperature cream cheese with an electric mixer until smooth and fluffy. This first step is the secret to avoiding stubborn lumps and getting that divinely creamy texture every Basque cheesecake fan craves.
Step 3: Sweeten Things Up
Add sugar, vanilla extract, and lemon zest to the cream cheese. Continue beating until everything is silky and completely combined, scraping down the bowl to make sure every bit of flavor is mixed in. The aroma at this point is pure happiness!
Step 4: Incorporate Eggs & Yolks
Gently beat in the eggs and extra yolk, mixing just until incorporated. Avoid overmixing here—you want the batter to stay airy and custardy, not dense.
Step 5: Add Cream & Flour
Pour in the heavy cream and sift the flour over the top to prevent clumps. Mix by hand or on low speed, just until the batter is smooth and uniform with no streaks or lumps.
Step 6: Fill the Pan & Release Air Bubbles
Transfer the batter to your prepared pan. Give it a few gentle taps on the counter to pop any lingering air bubbles—this goes a long way toward achieving that smooth, custard-like finish!
Step 7: Bake to Burnt Perfection
Bake in the preheated oven for 50–60 minutes. Don’t be alarmed if the top looks deeply caramelized (almost burnt!) while the center remains slightly wobbly—this is what makes the Mini Burnt Basque Cheesecake so irresistible. The dramatic top and custardy middle are the hallmarks of this dessert.
Step 8: Chill Before Serving
Let your cheesecake cool completely to room temperature, then refrigerate for at least two hours (overnight is even better). This rest time gives it that signature creamy texture and makes slicing a dream. Remove from pan and enjoy as is, or straight from the fridge for an ultra-chilled treat!
Pro Tips for Making Mini Burnt Basque Cheesecake
- Room Temp Magic: Let all your dairy and eggs reach room temperature before mixing—this keeps your batter incredibly smooth (and lump-free!).
- Parchment Panache: Don’t skip crumpling your parchment; those lovely wrinkles add rustic Basque charm and help the cheesecake release effortlessly after chilling.
- High Heat, No Fear: Resist the urge to open your oven early—even if the top looks very dark. The deep caramelization is what gives Mini Burnt Basque Cheesecake its signature flavor!
- Patience is a Virtue: Let your cheesecake chill thoroughly before slicing. This waiting game turns that gently wobbly center into the most crave-worthy creamy texture.
How to Serve Mini Burnt Basque Cheesecake
Garnishes
This little beauty needs very little to shine, but a light dusting of powdered sugar, a swirl of softly whipped cream, or some fresh summer berries takes Mini Burnt Basque Cheesecake to an irresistible new level. If you’re feeling fancy, a grating of lemon zest or a drizzle of berry coulis adds a pop of color and flavor contrast.
Side Dishes
Sometimes all you need is a great cup of coffee or a glass of sherry alongside your slice. For a dessert spread, serve with a fresh fruit salad, poached pears, or a scoop of tangy sorbet to complement the creamy, caramel richness of your cheesecake.
Creative Ways to Present
Try slicing the Mini Burnt Basque Cheesecake into tiny wedges and arranging them on a platter with piles of berries and edible flowers, or serve individual slices in jars layered with macerated fruit for a whimsical dessert-in-a-jar experience. You can even cut into bite-sized squares for a striking, rustic dessert board!
Make Ahead and Storage
Storing Leftovers
Just pop any leftover Mini Burnt Basque Cheesecake into an airtight container and store it in the refrigerator for up to five days. The flavor and texture actually improve as it rests, becoming even more luscious (if you can keep from sneaking a slice every time you pass the fridge)!
Freezing
Yes, you can freeze slices (or the whole cake!) for up to a month. Wrap each piece tightly in plastic wrap and pop them in a freezer bag. Thaw overnight in the fridge before serving to maintain that dreamy, creamy consistency.
Reheating
The Mini Burnt Basque Cheesecake is best enjoyed chilled or at room temperature, but if you like it just slightly warm, pop a slice in the microwave for 10–15 seconds. The custard will turn extra melty—just be careful not to overheat, or it’ll lose that gorgeous texture!
FAQs
-
Can I use low-fat cream cheese for Mini Burnt Basque Cheesecake?
Full-fat cream cheese is essential for achieving the signature creamy, stable texture of this cheesecake. Low-fat versions will work in a pinch, but the cake may be softer and potentially crack or separate after baking.
-
Do I need a springform pan to make Mini Burnt Basque Cheesecake?
While a springform pan makes it much easier to release the delicate cake, you can use a well-lined regular cake pan (add extra parchment for overhang) if that’s what you have on hand—just be gentle when lifting it out after chilling.
-
Why does the top look so dark—did I burn my cheesecake?
No worries! That deeply caramelized, “burnt” top is exactly what you want. It creates a delicious, smoky flavor and contrast to the creamy interior—the hallmark of every Mini Burnt Basque Cheesecake.
-
How long should I chill the Mini Burnt Basque Cheesecake before slicing?
Letting it chill for at least two hours ensures a creamy, set center and easy slicing. For best results (and even more flavor!), let it rest in the fridge overnight before serving.
Final Thoughts
If you’re craving a dessert that’s spectacularly simple yet truly special, this Mini Burnt Basque Cheesecake will win you over at first bite. Gather your ingredients, preheat that oven, and embrace the drama—your new favorite easy cheesecake awaits! Happy baking, and don’t forget to savor every creamy, caramelized slice.
Print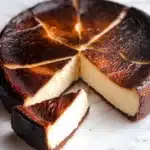
Mini Burnt Basque Cheesecake Recipe
- Prep Time: 20 minutes
- Cook Time: 50 minutes
- Total Time: 3 hours 10 minutes
- Yield: 8 small slices
- Category: Dessert
- Method: Baking
- Cuisine: Spanish
- Diet: Vegetarian
Description
Delight in the rich, creamy goodness of these individual-sized Mini Burnt Basque Cheesecakes. With a perfectly burnt top and a luscious, velvety texture, these treats are sure to impress your taste buds!
Ingredients
Cheesecake batter:
- 370 g Cream cheese
- 2/3 cup Sugar
- 1 teaspoon Vanilla extract
- 1/2 teaspoon Lemon zest
- 1/4 teaspoon Salt
- 4 tablespoon Flour
- 2 Eggs
- 1 Egg yolk
- 1 cup Heavy cream
Instructions
- Prepare the pan and preheat: Preheat the oven to 200°C (400°F) and line a 7-inch springform pan with parchment paper.
- Mix cream cheese: In a large bowl, beat room temperature cream cheese until creamy.
- Add ingredients: Mix in sugar, lemon zest, and vanilla extract until smooth.
- Incorporate eggs: Add eggs and egg yolk, mixing until just combined.
- Finish the batter: Stir in heavy cream and sifted flour until smooth.
- Bake: Pour batter into the pan, tap to remove air bubbles, and bake for 50-60 minutes until the top is burnt and slightly jiggly.
- Cool and serve: Let the cheesecake cool, then remove from pan and serve chilled or at room temperature.
Notes
- Room temperature cream cheese ensures a smooth batter.
- Use a springform pan for easy release.
- High-fat cream cheese like Philadelphia is recommended.
- Chill the cheesecake for at least 5 hours or overnight for best results.
- Room-temperature ingredients yield a creamy cheesecake.
- Scrape the bowl sides for a lump-free batter.
- Avoid opening the oven door prematurely to prevent collapsing or cracking.
Nutrition
- Serving Size: 1 slice
- Calories: 340
- Sugar: 18g
- Sodium: 230mg
- Fat: 26g
- Saturated Fat: 15g
- Unsaturated Fat: 9g
- Trans Fat: 0g
- Carbohydrates: 22g
- Fiber: 0g
- Protein: 6g
- Cholesterol: 145mg


