
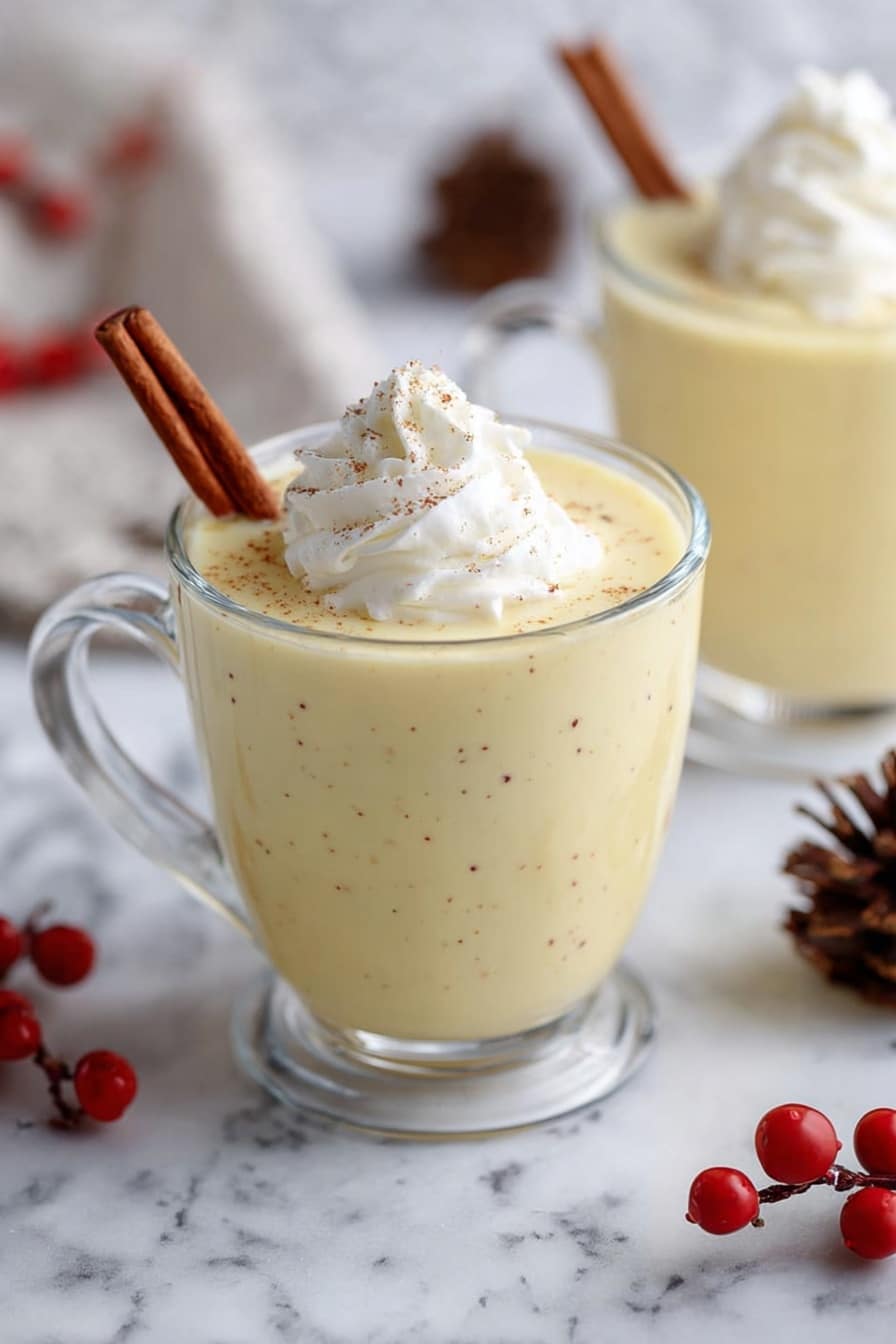
Nothing quite says holiday cheer like a rich, velvety glass of eggnog, and I’ve got a little secret to share with you: this Homemade Creamy Eggnog Recipe is hands down the best you’ll ever taste. I absolutely love how it’s smooth, perfectly spiced, and richer than anything you can pick up from the store. Trust me—you’ll want to make this your go-to festive treat year after year.
Why You’ll Love This Recipe
- Luxuriously Creamy Texture: Thanks to the blend of heavy cream and milk, this eggnog is silky smooth and so indulgent.
- Perfectly Spiced: I use just the right pinch of nutmeg and cinnamon to bring warmth without overpowering the drink.
- Customizable and Easy: Whether you want it boozy or not, this recipe adapts perfectly to your preferences.
- Made From Scratch With Real Ingredients: You’ll never settle for store-bought eggnog again once you taste this fresh version.

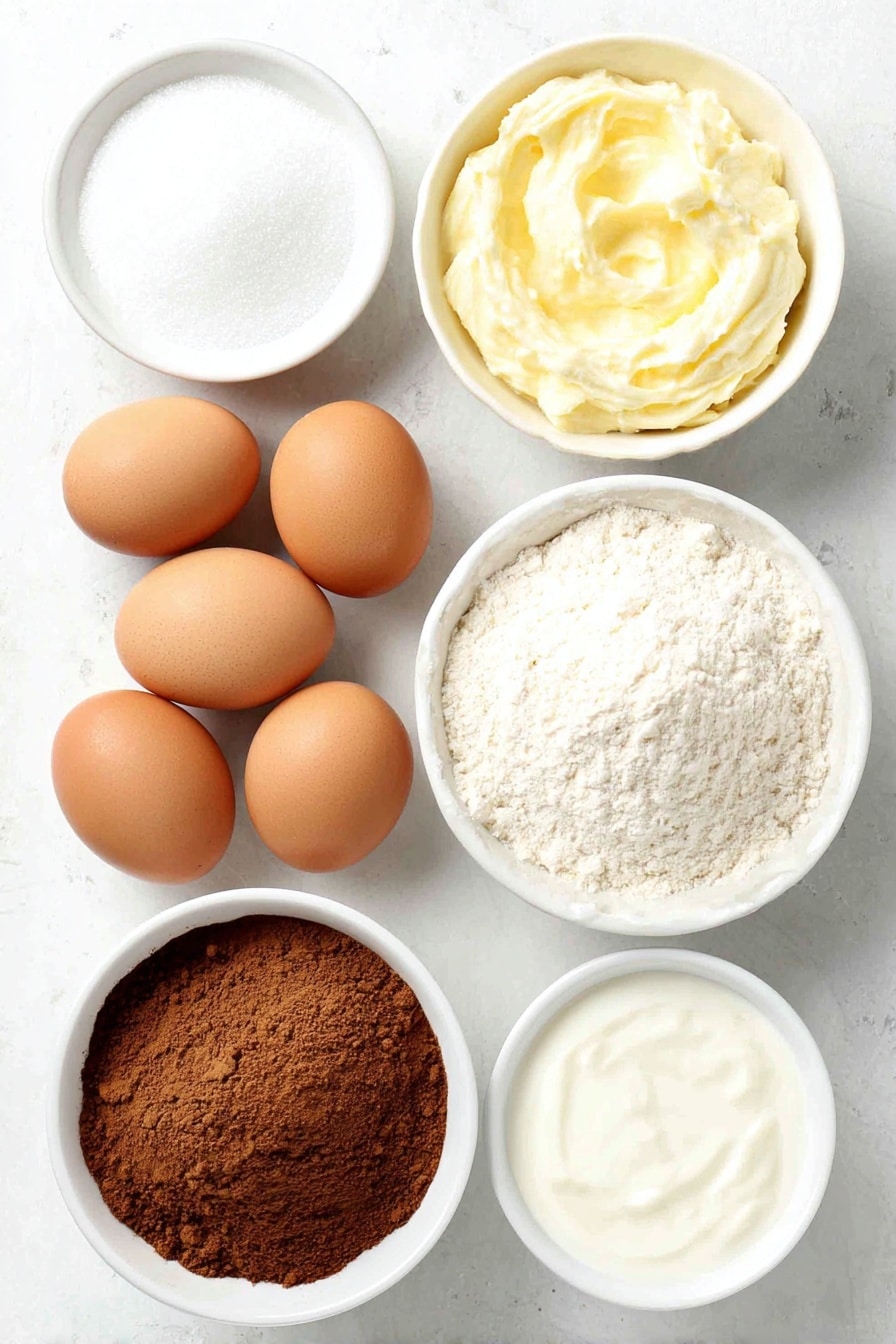
Ingredients You’ll Need
The ingredient list may look simple, but each one plays a starring role in making this Homemade Creamy Eggnog Recipe a standout. I recommend using the freshest eggs and quality dairy—you’ll really taste the difference!
- Egg Yolks: These provide the rich, silky base; fresh eggs always make this creamy and safe when cooked properly.
- Granulated Sugar: Sweetens the eggnog while balancing the spices.
- Heavy Whipping Cream: This boosts richness and gives that luxurious mouthfeel.
- Milk: I like whole milk here for creaminess without being too heavy.
- Ground Nutmeg: The classic warm spice that defines eggnog’s flavor.
- Salt: Just a pinch—trust me, it enhances all the flavors beautifully.
- Vanilla Extract: Adds natural sweetness and depth.
- Cinnamon: For sprinkling on top—it’s the finishing touch that brings the festive vibe.
- Alcohol (Optional): Bourbon or rum work great here if you want a little kick, but it’s just as delightful without.
Variations
This Homemade Creamy Eggnog Recipe is wonderfully flexible—I often tweak it depending on who I’m serving or what I have on hand. You can make it lighter, richer, boozy, or even dairy-free if that’s your jam!
- Alcohol-Free: When I want this recipe kid-friendly or lighter, I simply leave out the bourbon—no one misses it because the nutmeg and vanilla really shine on their own.
- Spiked Version: Adding a splash of spiced rum or a good bourbon immediately elevates it for holiday parties; my family goes crazy for this festive twist.
- Dairy-Free Option: I’ve experimented with almond or oat milk plus coconut cream and still got a creamy result, perfect for those avoiding dairy.
- Extra Spices: Once, I added a touch of grated fresh ginger and a dash of cloves for a warm, spicy twist that surprised and delighted everyone.
How to Make Homemade Creamy Eggnog Recipe
Step 1: Whisk Egg Yolks and Sugar Until Creamy
Start by whisking your egg yolks and granulated sugar together in a medium bowl until the mixture becomes light in color and creamy. This step is key because it helps dissolve the sugar and sets the stage for a smooth, silky eggnog. I like to use a balloon whisk here for the best air incorporation, which makes a big difference in texture.
Step 2: Warm the Dairy with Spices
In a saucepan over medium-high heat, combine the heavy cream, milk, ground nutmeg, and a pinch of salt. Stir gently but constantly until the mixture just reaches a bare simmer—you’re looking for little bubbles popping around the edges, but definitely not boiling. This warming helps infuse those cozy nutmeg flavors throughout the drink.
Step 3: Temper Your Eggs
This is where a lot of folks get nervous, but I promise it’s easy if you take your time. Slowly add a big spoonful of the hot milk mixture to your egg and sugar whisk, stirring vigorously as you go—that’s tempering. Repeat a few times until the eggs have warmed enough so they won’t scramble when you pour the full mixture back into the saucepan.
Step 4: Thicken the Eggnog
Pour the tempered egg mixture back into the saucepan. Return to medium heat and whisk constantly for about a minute until the mixture thickens slightly and reaches roughly 160°F on a thermometer. If you don’t have a thermometer, watch for the mixture to coat the back of a spoon. Remember, it’ll thicken more as it cools, so don’t overdo it or it’ll be too thick.
Step 5: Add Vanilla and Optional Alcohol
Once off the heat, stir in the vanilla extract and your choice of alcohol if you’re adding any. This final mix adds warmth and rounds out the rich flavors. I love a splash of bourbon—it’s like a cozy sweater in a glass.
Step 6: Chill and Serve
Pour the eggnog through a fine mesh strainer to catch any cooked bits, then cover and refrigerate until fully chilled. When ready to serve, give it a gentle stir and top with a sprinkle of cinnamon or nutmeg. If you want that restaurant-smooth consistency, blending it with a little milk before serving does wonders!
Pro Tips for Making Homemade Creamy Eggnog Recipe
- Slow and Steady Tempering: Taking your time to gradually add the hot milk to the eggs prevents scrambling and makes the texture silkier.
- Use a Thermometer: Cooking to around 160°F ensures safety and ideal thickness without curdling—this little tool is a game-changer.
- Strain for Extra Smoothness: Pushing the eggnog through a fine mesh keeps it delightfully smooth, removing any cooked egg bits.
- Add Alcohol Last: Adding bourbon or rum after cooking preserves their flavors and bouquet, making your eggnog irresistible.
How to Serve Homemade Creamy Eggnog Recipe
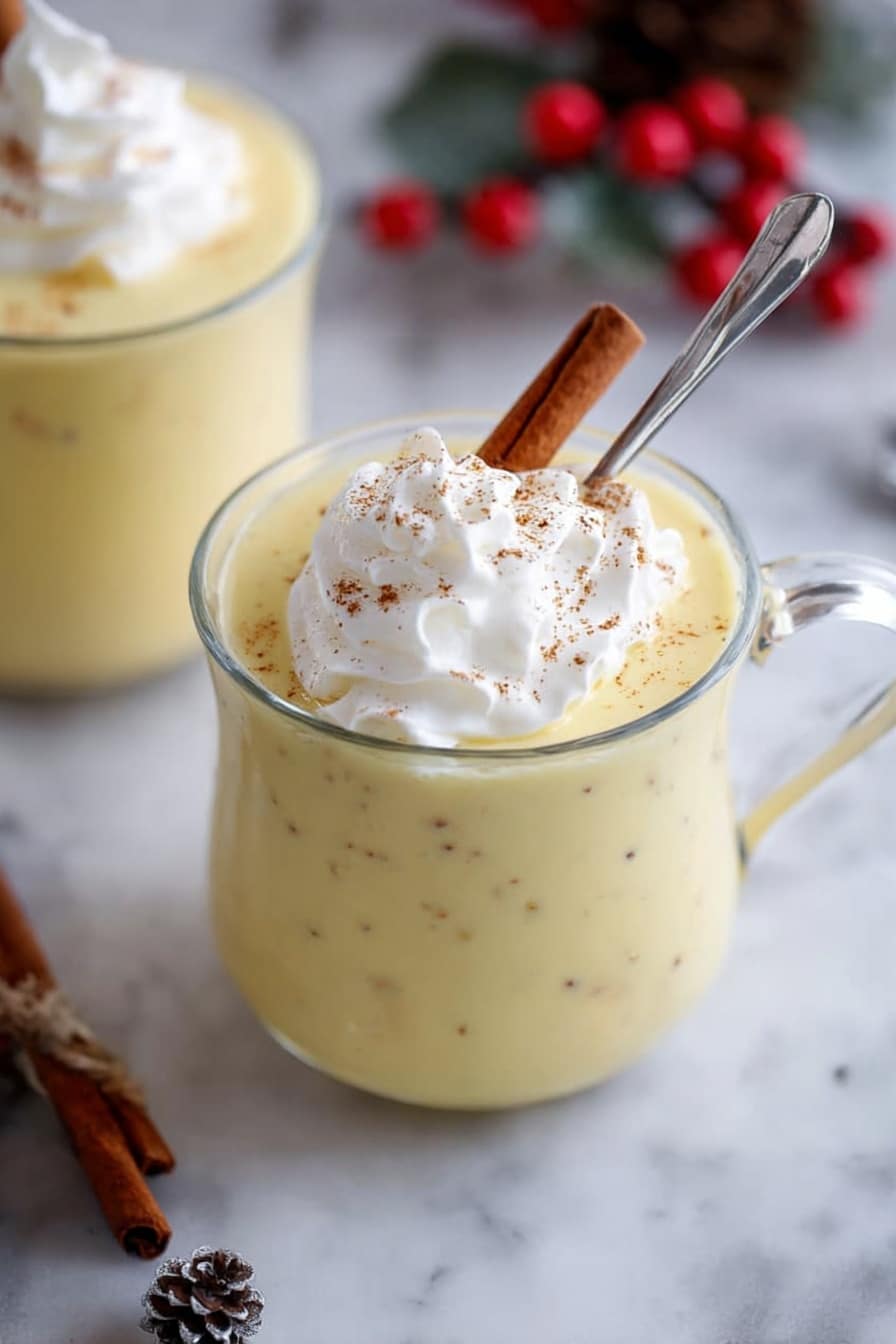
Garnishes
I love topping my eggnog with a fresh dusting of ground cinnamon or nutmeg—it instantly lifts the aroma and gives each sip that festive feel. Sometimes, I like to add a small swirl of freshly whipped cream to make it truly decadent. A cinnamon stick stirrer also makes the experience extra fun, especially when sharing with guests.
Side Dishes
For a classic holiday vibe, I pair this Homemade Creamy Eggnog Recipe with gingerbread cookies or spiced pecans. Freshly baked sugar cookies or buttery shortbread also complement the rich creaminess perfectly. If you want a cozy evening, try it alongside warm pumpkin bread or even a fruitcake—comfort in every bite and sip!
Creative Ways to Present
One year, I served eggnog in festive mason jars tied with cinnamon sticks and red ribbon—it totally wowed my family during our holiday brunch. You can also float star anise or a sprig of fresh rosemary on top for a sophisticated touch. For parties, consider layering the eggnog in clear glasses with crushed gingerbread crumbs for a fun “dessert” look!
Make Ahead and Storage
Storing Leftovers
I usually store my homemade eggnog in a sealed pitcher or container in the refrigerator. It keeps beautifully for up to one week. Just give it a good stir before serving again, as some separation might happen. It tastes even better the next day because the flavors have more time to mingle.
Freezing
Freezing eggnog isn’t my go-to because the texture changes a bit—it can get grainy when thawed. But if you want to save it, freeze in airtight containers and thaw slowly in the fridge. Blend it back up once thawed for better consistency.
Reheating
If you like your eggnog warm, gently reheat it on the stove over low heat, stirring constantly to avoid curdling. Avoid boiling it again—just warm to your preferred temperature and serve immediately for best flavor and texture.
FAQs
-
Is homemade eggnog safe to drink since it contains raw eggs?
This Homemade Creamy Eggnog Recipe uses a gentle cooking process called tempering and heats the mixture to about 160°F, which is enough to kill harmful bacteria and cook the eggs safely. So, it’s perfectly safe and delicious!
-
Can I make this recipe dairy-free?
Absolutely! You can substitute the milk and heavy cream with almond milk, coconut milk, oat milk, or any dairy-free cream alternatives you prefer. The texture will be slightly different, but it’s still creamy and festive.
-
How long does homemade eggnog last in the fridge?
Stored in an airtight container, homemade eggnog keeps for up to one week in the refrigerator. Always give it a good stir before serving again to recombine any separation.
-
Can I make this recipe non-alcoholic for kids?
Yes! Simply skip the alcohol step—this eggnog is delicious on its own and kid-friendly, with all the rich flavors and sweetness intact.
-
What’s the best alcohol to add to eggnog?
Spiced rum and bourbon are classic choices for eggnog. They add warmth and complement the nutmeg and vanilla beautifully. Feel free to experiment with brandy or whiskey depending on your taste.
Final Thoughts
This Homemade Creamy Eggnog Recipe is really close to my heart—every holiday season I pull it out and it’s like wrapping myself in a warm, festive hug. I love how adaptable it is, and how the flavors develop if you make it ahead. I hope you’ll give this recipe a try and watch how it becomes your family’s holiday favorite, too. Don’t be surprised if you end up making it well beyond the holidays—it’s just that good!
Print
Homemade Creamy Eggnog Recipe
- Prep Time: 15 minutes
- Cook Time: 10 minutes
- Total Time: 25 minutes
- Yield: 6 servings
- Category: Beverage
- Method: Stovetop
- Cuisine: American
Description
This homemade eggnog recipe offers a rich, creamy, and perfectly spiced holiday classic that you can make from scratch. Made with fresh eggs, cream, milk, and aromatic nutmeg and cinnamon, this eggnog is deliciously smooth and customizable with optional alcohol for an extra festive touch. Enjoy a comforting and indulgent beverage that easily beats store-bought versions.
Ingredients
Eggnog Base
- 6 large egg yolks
- 1/2 cup granulated sugar
- 1 cup heavy whipping cream
- 2 cups milk
- 1/2 teaspoon ground nutmeg
- Pinch of salt
- 1/4 teaspoon vanilla extract
Toppings and Optional
- Ground cinnamon, for topping
- Alcohol (optional, such as rum, bourbon, or brandy)
Instructions
- Whisk Egg Yolks and Sugar: In a medium bowl, whisk the egg yolks and granulated sugar together until the mixture becomes light and creamy, ensuring the sugar is well incorporated.
- Heat Cream Mixture: In a saucepan over medium-high heat, combine the heavy cream, milk, ground nutmeg, and a pinch of salt. Stir frequently until the mixture reaches a bare simmer, just before boiling.
- Temper the Eggs: Slowly add a large spoonful of the hot milk mixture to the egg yolks while whisking vigorously to gradually raise the egg temperature without curdling. Repeat this step, adding spoonfuls at a time to fully temper the eggs.
- Cook the Eggnog: Pour the tempered egg mixture back into the saucepan and cook over medium heat, whisking constantly for about one minute, until slightly thickened and reaches approximately 160°F. The mixture will continue to thicken as it cools.
- Finish and Strain: Remove the saucepan from heat, then stir in vanilla extract and optional alcohol if using. Pour the eggnog through a fine mesh strainer into a pitcher to ensure smoothness and cover with plastic wrap.
- Chill and Serve: Refrigerate until the eggnog is well chilled and has thickened further. For a thinner and completely smooth texture, blend with 1 or 2 tablespoons of milk just before serving. Garnish with a sprinkle of cinnamon or nutmeg and fresh whipped cream if desired.
- Storage: Store leftover eggnog in the refrigerator for up to one week, keeping it covered and chilled.
Notes
- This is the ultimate homemade eggnog recipe: thick, creamy, and perfectly balanced with a mild nutmeg flavor.
- Using fresh eggs and tempering them carefully ensures a safe and silky texture without scrambling.
- Adding alcohol is optional but adds a festive depth to the drink.
- Adjust the thickness by blending with milk before serving for a smoother consistency.
- Store any leftovers refrigerated and consume within one week for best quality.
Nutrition
- Serving Size: 1 serving
- Calories: 307 kcal
- Sugar: 20 g
- Sodium: 58 mg
- Fat: 21 g
- Saturated Fat: 12 g
- Unsaturated Fat: 9 g
- Trans Fat: 0 g
- Carbohydrates: 22 g
- Fiber: 0 g
- Protein: 6 g
- Cholesterol: 246 mg


