
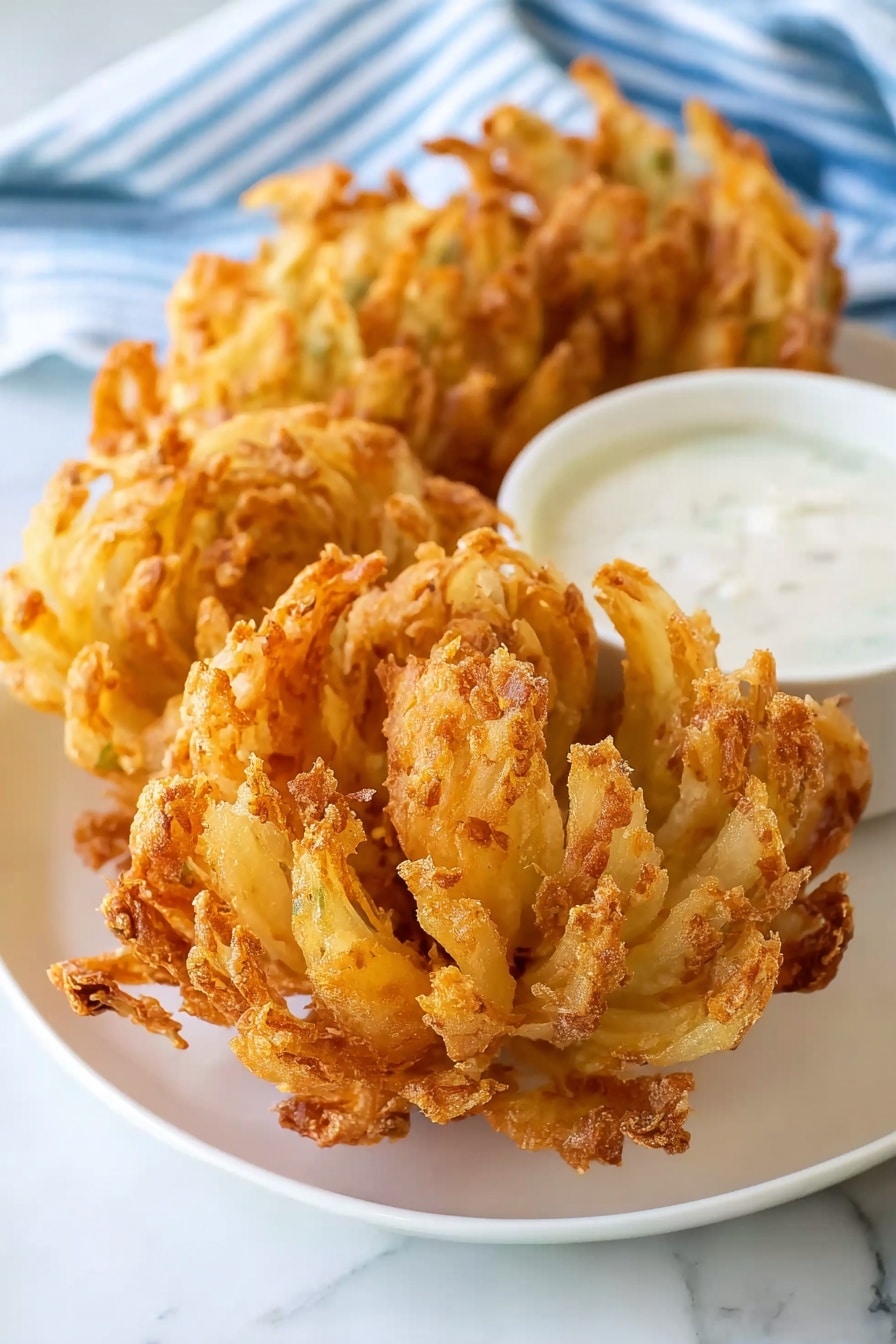
If you’re craving that iconic appetizer from your favorite steakhouse, I have just the thing for you. This Homemade Blooming Onion Recipe will give you all the crispy, flavorful goodness you love without leaving your kitchen. Trust me, once you make this, you’ll wonder why you ever thought of ordering it out. It’s fun to prepare, incredibly satisfying, and honestly, it’s a total crowd-pleaser.
Why You’ll Love This Recipe
- Authentic Flavor: This recipe nails that tangy, spicy dipping sauce paired with a perfectly crispy onion.
- Fun to Make: Cutting the onion into that iconic “bloom” shape is really satisfying and easier than you think.
- Perfect for Sharing: Whether it’s family night or a casual get-together, this appetizer will be the star of the table.
- Made from Scratch: You control every ingredient, so it’s fresher and even better than the restaurant version in my opinion.

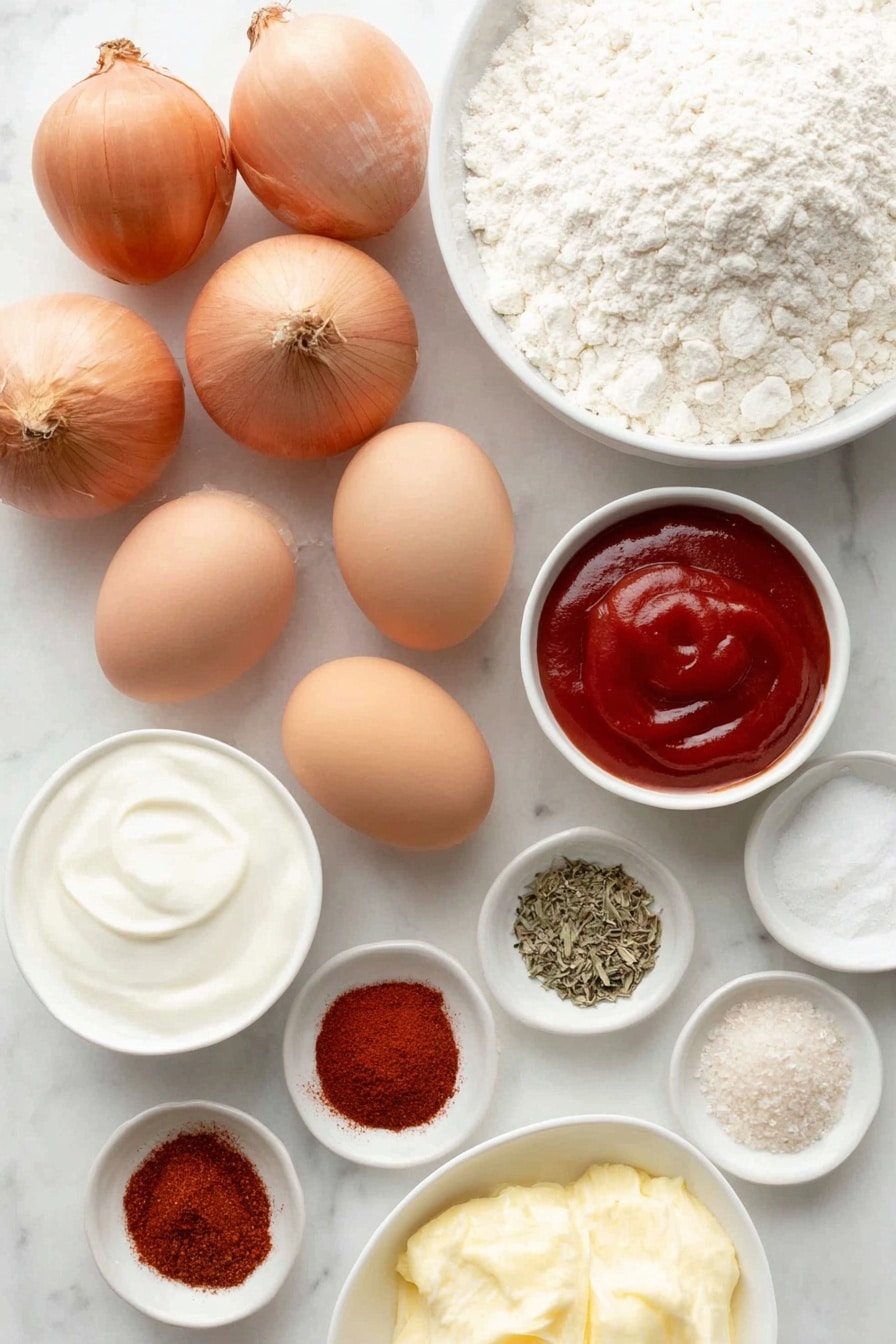
Ingredients You’ll Need
All the ingredients come together perfectly to create that signature crispy coating and tangy dipping sauce. I always recommend grabbing fresh sweet onions—they’re the heart of this blooming onion magic.
- Mayonnaise: Adds creaminess to the dipping sauce, balancing the spices beautifully.
- Sour cream: For that cool tang in the sauce that pairs perfectly with the crispy onion.
- Creamy horseradish: Gives the sauce a subtle kick, making each bite pop.
- Ketchup: Adds a hint of sweetness and depth to the sauce.
- Paprika: Key for that smoky color and flavor in both the sauce and coating.
- Garlic powder: A classic seasoning to add warmth to the mix.
- Cayenne pepper: Just enough heat to wake up your taste buds without overwhelming.
- Eggs and milk: Form the wet batter for breading your onion, helping the flour coating stick beautifully.
- All-purpose flour: The base for that crispy, crunchy coating everyone raves about.
- Ground cumin, oregano, thyme: These dried herbs and spice add layers of flavor to the breading.
- Salt and black pepper: Essential for seasoning both the sauce and the coating.
- Medium sweet onions: I like using sweet onions because they caramelize slightly while frying and balance the spicy sauce.
- Vegetable oil: For frying—the higher smoke point keeps that crust crispy and golden.
Variations
One of the best parts about this Homemade Blooming Onion Recipe is how easy it is to tweak to your liking. I’ve played around with a few customizations over time, which keeps it fresh and fun every time I make it.
- Spicy Variation: I sometimes bump up the cayenne in both the sauce and coating for an extra kick—just what my spice-loving family enjoys!
- Gluten-Free Option: Swap out the all-purpose flour for a gluten-free blend. It’s not quite as crispy, but still delicious and worth trying for those with sensitivities.
- Herb Twist: Adding fresh chopped parsley or chives into the dipping sauce brightens things up nicely.
- Oven-Baked Version: When I want a lighter take, I bake the coated onion at 425°F until crispy instead of frying—it’s easier cleanup and still tasty.
How to Make Homemade Blooming Onion Recipe
Step 1: Prepare the Dipping Sauce
Start by mixing the mayonnaise, sour cream, creamy horseradish, ketchup, paprika, garlic powder, and cayenne pepper in a bowl. Give it a good stir until everything’s well combined and creamy. This sauce is the perfect tangy companion and a reason why the blooming onion is so addictive. You can make this ahead and keep it chilled.
Step 2: Mix Your Wet and Dry Batters
In a bowl wide and deep enough for the onion, whisk together the eggs and milk—it’s your dunking station. In another bowl, combine the flour, paprika, cumin, oregano, thyme, salt, cayenne, black pepper, and garlic powder. This flavorful dry mix is what creates that irresistible crunchy coating.
Step 3: Cut and “Bloom” Your Onion
This step took me a minute to get comfortable with, but it’s really not as tricky as it looks. First, trim a small flat section off the root end of each onion—that helps your onion sit steady on the cutting board. Peel off the dry outer layers, then place the onion flat side down. Using a sharp knife, carefully cut vertical slices down into the onion from top to bottom, stopping about ½ inch before the root so the layers stay connected. I like to make 4 main quarter slices, then cut each quarter into 3 or 4 smaller sections to create that full bloom. Flip the onion over and gently fan the pieces outward to reveal that stunning, flower-like effect.
Step 4: Breading the Onion
Here’s what seals the deal. Using your hands, gently and thoroughly dredge the onion in the flour mixture, carefully spreading those petals so every inch gets coated. Then dunk the entire onion into the egg and milk mixture, making sure to get into every crevice. Finally, back it into the flour bowl for a second coat—this double dipping is key to that amazing crispiness.
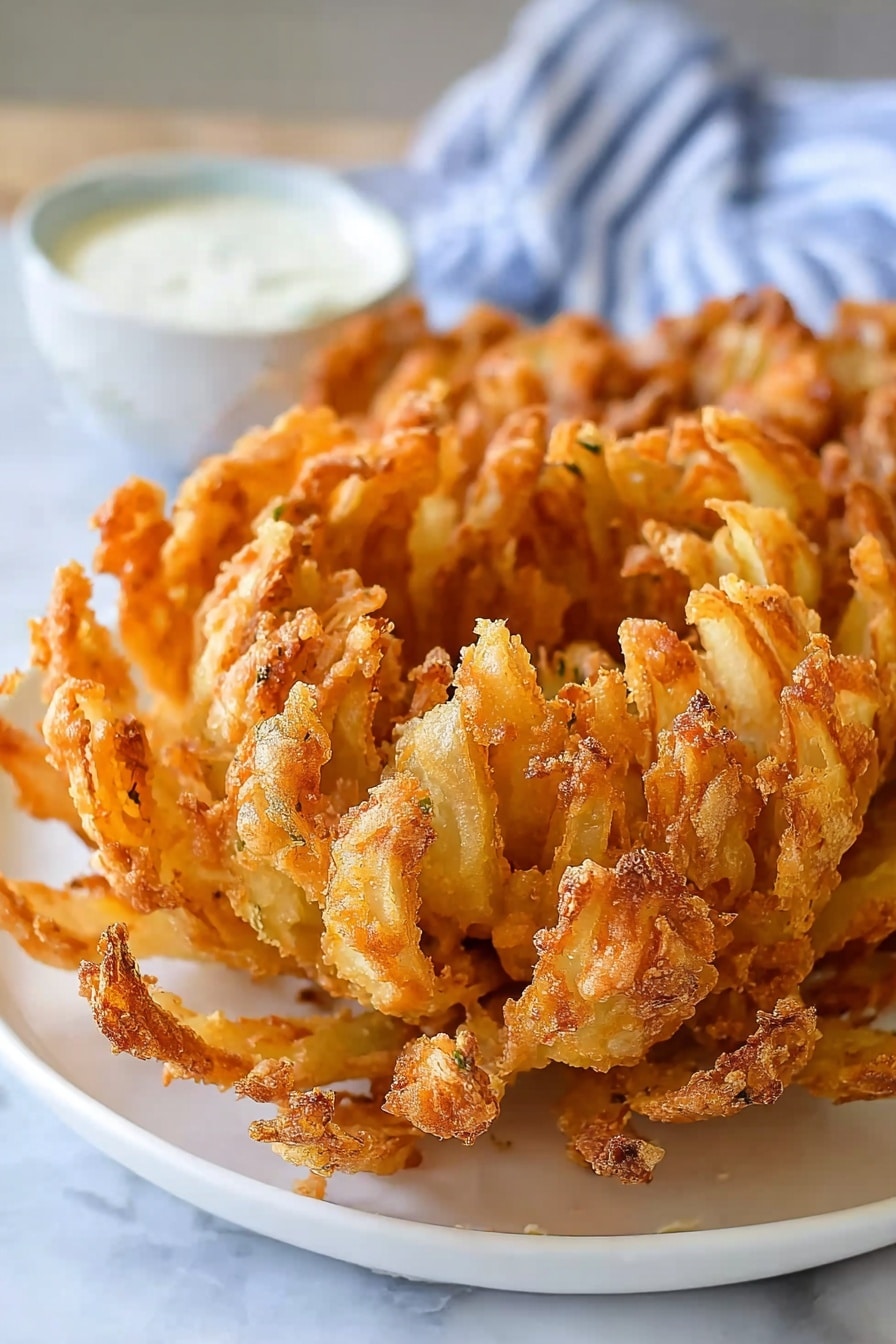
Step 5: Fry to Golden Perfection
Heat the vegetable oil in a heavy pan to 375°F—enough oil to cover the onion. I find a deep cast-iron skillet perfect for this. Carefully place the onion root side up in the hot oil. Fry for 7 to 10 minutes, turning occasionally if needed, until it’s beautifully golden and crispy. Drain on paper towels to get rid of excess oil. Fried onions can be a bit intimidating at first, but keep an eye on your oil temperature and don’t overcrowd your pan—this makes all the difference.
Serve hot alongside your dipping sauce. I love this when the edges are still crackling slightly; it’s finger-lickin’ good!
Pro Tips for Making Homemade Blooming Onion Recipe
- Keep the Root Intact: Cutting just up to the root helps the onion hold together while frying—don’t slice all the way through!
- Temperature Control: Maintaining 375°F oil is critical—too hot and it burns, too cool and it gets soggy.
- Double Coating for Crunch: The two-step flour-egg-flour breading ensures a thick, crispy crust every time.
- Dry Your Onion Well: Make sure your onion is dry before dipping to help the coating stick properly.
How to Serve Homemade Blooming Onion Recipe
Garnishes
I like adding a sprinkle of freshly chopped parsley on top—it adds a pop of green and fresh flavor. Some folks enjoy a squeeze of fresh lemon juice or a dash of smoked paprika over the top for an extra flavor layer. Whatever you pick, it makes the presentation look as good as it tastes!
Side Dishes
This appetizer pairs amazingly well with simple sides like a crisp green salad or air-fried potatoes. For a full meal vibe, I love serving it alongside a juicy steak or grilled chicken and some roasted veggies. It’s definitely a crowd-pleaser that complements hearty dishes.
Creative Ways to Present
For a party, try placing the blooming onion on a large wooden board surrounded by small bowls of different dipping sauces—like ranch, spicy mayo, or even blue cheese dressing—for guests to mix and match. I’ve also used edible flowers to decorate the platter, which surprisingly wowed everyone at a summer gathering.
Make Ahead and Storage
Storing Leftovers
If you have any leftovers (which can be rare around here!), store them in an airtight container in the fridge. They’ll keep best when separated from the dipping sauce. The onion texture softens over time, so I recommend reheating sooner rather than later.
Freezing
Freezing isn’t my favorite for this recipe because the onion tends to get soggy after thawing. But if you do freeze, it’s best to flash-freeze the coated onion before frying, then fry directly from frozen—just add a couple extra minutes to the cooking time.
Reheating
To bring back the crispiness, I pop leftovers into a 350°F oven or air fryer for 5-7 minutes. This refreshes the crunchy coating far better than microwaving. Just watch carefully to avoid burning. Serve alongside freshly made dipping sauce for best results.
FAQs
-
Can I use regular onions instead of sweet onions for this Homemade Blooming Onion Recipe?
Absolutely! While sweet onions provide a milder, sweeter flavor that balances well with the spicy sauce, you can use yellow or white onions as well. Just keep in mind that they may have a sharper bite, so soaking sliced onions in cold water briefly before breading can mellow that.
-
Is there a way to make this recipe healthier?
Yes, I’ve made an oven-baked version that’s lighter and easier to clean up. Instead of frying, coat the onion as usual, then bake it at 425°F on a wire rack for about 25-30 minutes until crispy. You can also opt for low-fat dairy in the sauce to reduce calories.
-
What’s the best oil to use for frying?
I recommend vegetable oil or canola oil since they have a neutral taste and high smoke points, perfect for frying at 375°F. Avoid olive oil as it burns quickly and can impart unwanted flavors.
-
How do I keep the onion from falling apart during frying?
The key is to not cut through the root end. Keeping about a ½ inch intact allows the onion to stay together. Also, handle gently when breading to prevent petals from breaking, and make sure your oil is hot enough for immediate crisping.
Final Thoughts
I absolutely love how this Homemade Blooming Onion Recipe turns out every single time. It’s one of those dishes that brings people together—you’ll get smiles, compliments, and requests for seconds. I remember the first time I successfully fanned out that onion and got it perfectly crispy; it was like unlocking a secret code in the kitchen. So go ahead, try this at home and turn your next meal into a fun, delicious celebration. Cheers to crispy, blooming goodness!
Print
Homemade Blooming Onion Recipe
- Prep Time: 20 minutes
- Cook Time: 18 minutes
- Total Time: 38 minutes
- Yield: 3 servings (3 blooming onions)
- Category: Appetizer
- Method: Frying
- Cuisine: American
Description
This Blooming Onion recipe is a delicious homemade version of the famous appetizer from Outback Steakhouse. Crispy fried sweet onions are coated in a flavorful spiced flour mixture, then fried golden brown and served with a zesty dipping sauce made from mayonnaise, sour cream, and horseradish. Perfect as an impressive appetizer for gatherings or a tasty snack to enjoy at home.
Ingredients
Dipping Sauce
- ¼ cup mayonnaise
- ¼ cup sour cream
- 1 ½ tablespoons creamy horseradish
- 1 ½ tablespoons ketchup
- ½ teaspoon paprika
- ½ teaspoon garlic powder
- ¼ teaspoon ground cayenne pepper
Egg Wash
- 2 eggs
- 1 cup milk
Breading Mix
- 2 cups all-purpose flour
- 1 tablespoon paprika
- 2 teaspoons ground cumin
- 1 teaspoon dried oregano
- 1 teaspoon dried thyme
- 1 teaspoon salt
- 1 teaspoon ground cayenne pepper
- ½ teaspoon ground black pepper
- ½ teaspoon garlic powder
Main Ingredient
- 3 medium sweet onions
- Vegetable oil (for frying, quantity enough to cover onions)
Instructions
- Prepare the dipping sauce: In a bowl, combine mayonnaise, sour cream, creamy horseradish, ketchup, paprika, garlic powder, and cayenne pepper. Mix well and set aside in the refrigerator to chill.
- Make the egg wash: Whisk together the eggs and milk in a wide, deep bowl large enough to dunk the onion completely.
- Prepare the breading mixture: In another wide bowl, mix the flour, paprika, ground cumin, dried oregano, dried thyme, salt, cayenne pepper, black pepper, and garlic powder thoroughly to combine.
- Prepare the onions: Slice a small, flat cut off the non-root end of each onion to create a stable base. Remove any dried or damaged outer peels. Place the onion cut side down on a cutting board with the root side up.
- Cut the onion petals: Using a sharp knife, carefully cut the onion into four quarter sections, stopping about ½ inch from the root to keep the petals connected at the base. Then, cut each quarter into three or four equal sections, forming the ‘petals’. Gently spread the petals outward, turning the onion root side down to fan out the sections.
- Bread the onion: Using your hands, carefully coat the onion petals with the flour mixture, ensuring to separate the petals for even coverage. Dunk the floured onion into the egg wash to fully coat. Return it to the flour mixture, again coating all petals completely.
- Heat the oil: In a heavy pan, heat vegetable oil to 375°F (190°C). You need enough oil to fully submerge the onion.
- Fry the onion: Place the breaded onion root side up into the hot oil. Fry for 7–10 minutes until the outside is golden brown and crispy. Use tongs carefully to avoid breaking the petals.
- Drain and serve: Remove the blooming onion from the oil and drain on paper towels to remove excess oil. Serve immediately with the prepared dipping sauce.
Notes
- This is a copycat recipe inspired by Outback Steakhouse’s famous blooming onion.
- Ensure to keep the onion petals connected at the root to maintain the shape while frying.
- Use a sharp knife to make clean cuts and avoid damaging the onion structure.
- Maintain the oil temperature at 375°F for crispy, non-greasy results.
- Serve promptly for best texture and flavor.
Nutrition
- Serving Size: 1 blooming onion
- Calories: 638 kcal
- Sugar: 12 g
- Sodium: 1084 mg
- Fat: 25 g
- Saturated Fat: 7 g
- Unsaturated Fat: 16 g
- Trans Fat: 0.04 g
- Carbohydrates: 86 g
- Fiber: 6 g
- Protein: 18 g
- Cholesterol: 138 mg


