
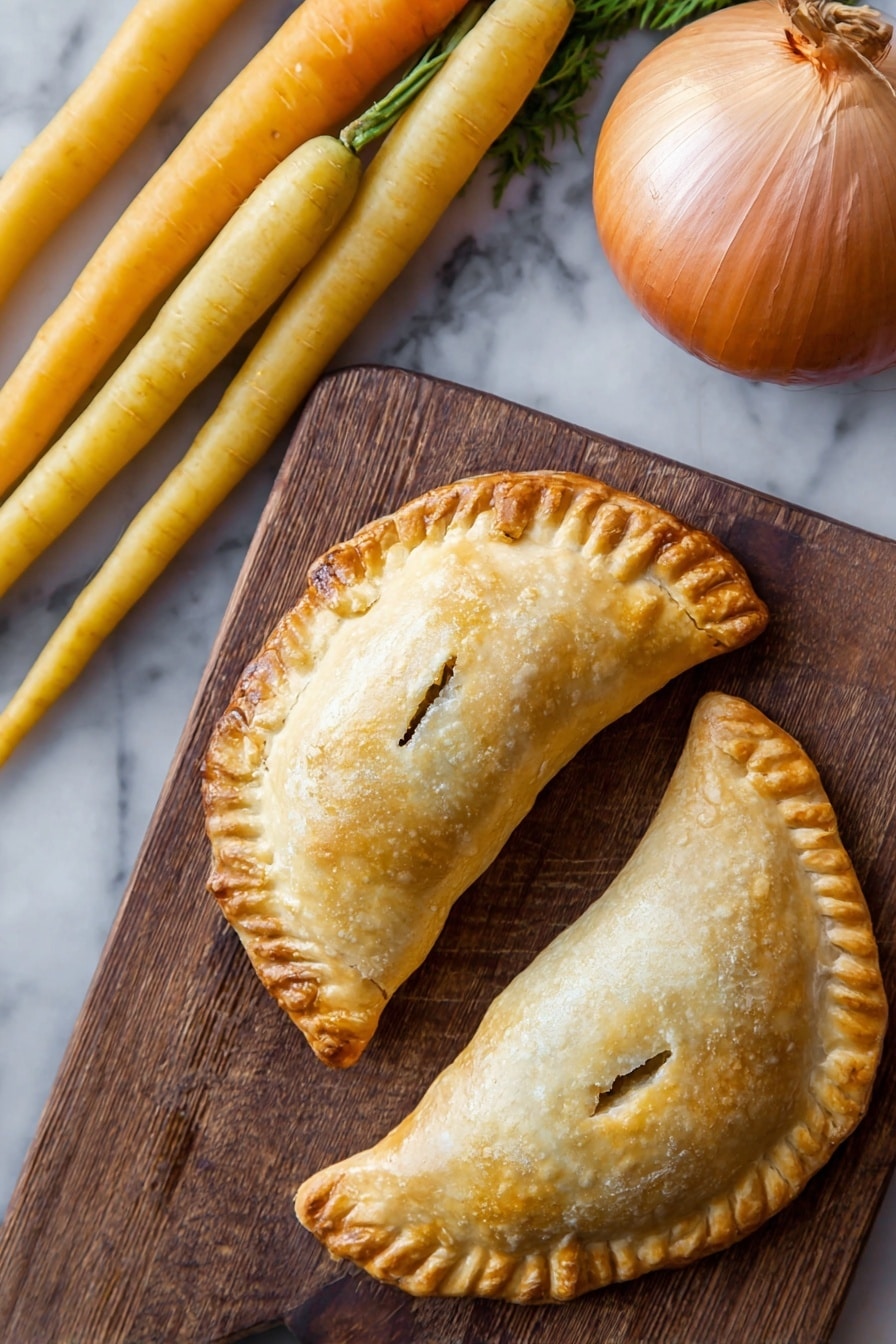
If you’re craving comfort food that’s easy to eat on the go, this Handheld Chicken Pot Pies Recipe is just what you need. I absolutely love how these little pies come together—flaky, buttery crust hugging a rich, savory chicken and veggie filling. They’re perfect for lunch, a cozy dinner, or packing up for picnics and road trips. Stick with me because I’m going to share everything I’ve learned so you can nail these every single time.
Why You’ll Love This Recipe
- Portable Comfort Food: These handheld pies give you all the cozy flavors of a classic chicken pot pie without needing a fork and knife.
- Made-From-Scratch Crust: The buttery, flaky crust is worth the effort and totally transforms the pie experience.
- Customizable Filling: You can easily swap veggies or seasoning to suit your taste or pantry stock.
- Perfect for All Skill Levels: I’ll guide you through every step with tips so even if you’re new to pie-making, you’ll feel confident.

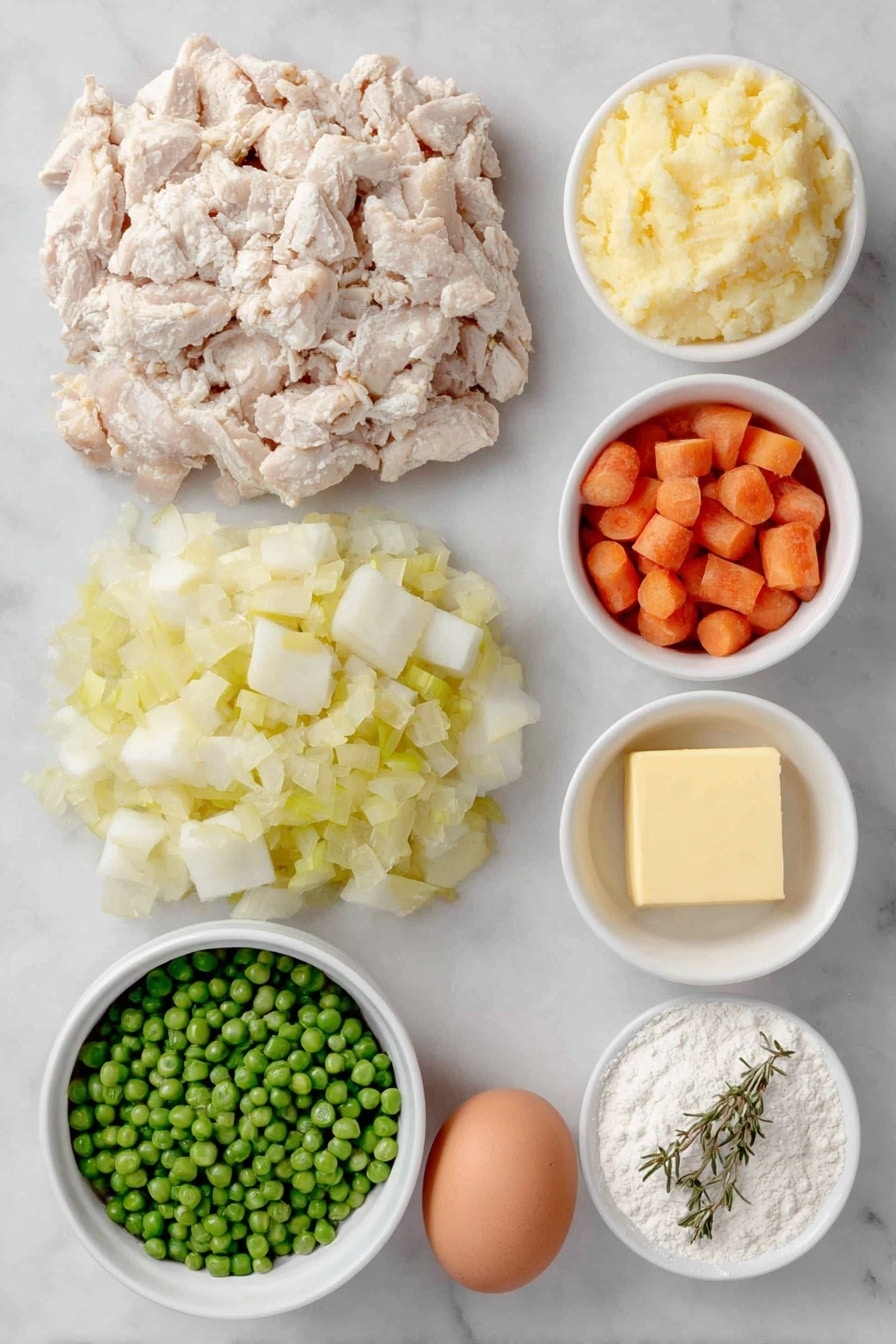
Ingredients You’ll Need
Each ingredient here plays a part in building that rich, cozy filling and buttery crust that makes this Handheld Chicken Pot Pies Recipe so irresistible. If you can, choose fresh veggies and good-quality chicken to bring it home.
- Unsalted Butter: Using unsalted lets you control the seasoning better, and cold butter results in that perfect flaky crust.
- Chopped Celery: Adds a subtle crunch and freshness that balances the rich filling.
- Chopped Carrot: Sweetness and color that make the filling pop.
- Diced Potato: Gives creaminess and helps thicken the filling naturally.
- Chopped Yellow Onion: Brings sweetness and depth when cooked down.
- Dried Thyme and Rosemary: These herbs add a lovely earthy aroma that elevates the flavor.
- Salt: Essential for seasoning every component just right.
- Peas (Frozen Is Fine): I love frozen peas here because they’re sweet and convenient—they hold up well in the filling too.
- Diced Cooked Chicken: Leftover roast chicken works perfectly, or even rotisserie chicken.
- Flour: Used twice here—for thickening the filling and for the crust—so be sure to measure correctly.
- Chicken Stock: For a rich base that ties the filling together beautifully.
- All-purpose Flour (for crust): Gives structure to the dough without too much heaviness.
- Ice Water: Helps keep the dough cold so your crust stays flaky.
- Egg Wash (beaten egg and water): Adds that golden, glossy finish your pies deserve.
Variations
I love playing around with the filling to suit different tastes or seasons. Feel free to make this Handheld Chicken Pot Pies Recipe your own by swapping veggies or trying different herbs—you’ll be surprised how flexible it is!
- Vegetarian Option: Skip the chicken and add mushrooms or lentils for a hearty vegan filling—I’ve done this, and it’s just as satisfying.
- Spicy Kick: Add a pinch of cayenne pepper or a few dashes of hot sauce to the filling for a little zing my family goes crazy for.
- Seasonal Veggies: Swap peas for green beans or corn depending on what’s fresh; I always love adding whatever’s in season.
- Gluten-Free Crust: You can use a gluten-free flour blend for the crust—just be sure to chill the dough well for easier handling.
How to Make Handheld Chicken Pot Pies Recipe
Step 1: Prepare the Filling Like a Pro
Start by melting half the butter in a large skillet over medium heat. Toss in your chopped celery, carrots, diced potato, and onions. Sauté these veggies gently until tender—about 10-12 minutes. You want them soft but not mushy, and that slight golden edge on the onions really amps up flavor. Stir in dried thyme, rosemary, and salt here, so the herbs bloom while the veggies cook. Once those flavors are cozy, sprinkle in the flour and cook for another minute to get rid of that raw taste. Slowly pour in the chicken stock, whisking constantly to avoid lumps. Let this simmer and thicken for around 5 minutes, then stir in the peas and diced cooked chicken. Remove from heat and let it cool slightly while you prepare the crust.
Step 2: Make Your Flaky, Buttery Crust
This crust is truly the star. Mix the flour and cold, cubed butter using your fingertips or a pastry cutter until the mixture resembles coarse crumbs—small chunks of butter are key for flakiness. Add the ice water a bit at a time, just enough so the dough comes together when pressed. Don’t overwork it! Shape into a ball, wrap in plastic, and let it chill in the fridge for 20-30 minutes. This resting time helps the gluten relax and makes rolling out easier.
Step 3: Assemble the Handheld Pies
Roll out the dough on a floured surface to about 1/8-inch thick. Use a round cutter (about 5 to 6 inches in diameter) to cut circles. Spoon a generous amount of your cooled filling onto half of each circle, leaving a border around the edges. Brush edges lightly with water, then fold the dough over the filling to create a half-moon shape. Press the edges firmly with a fork to seal. Brush the tops with your egg wash for that beautiful golden finish.
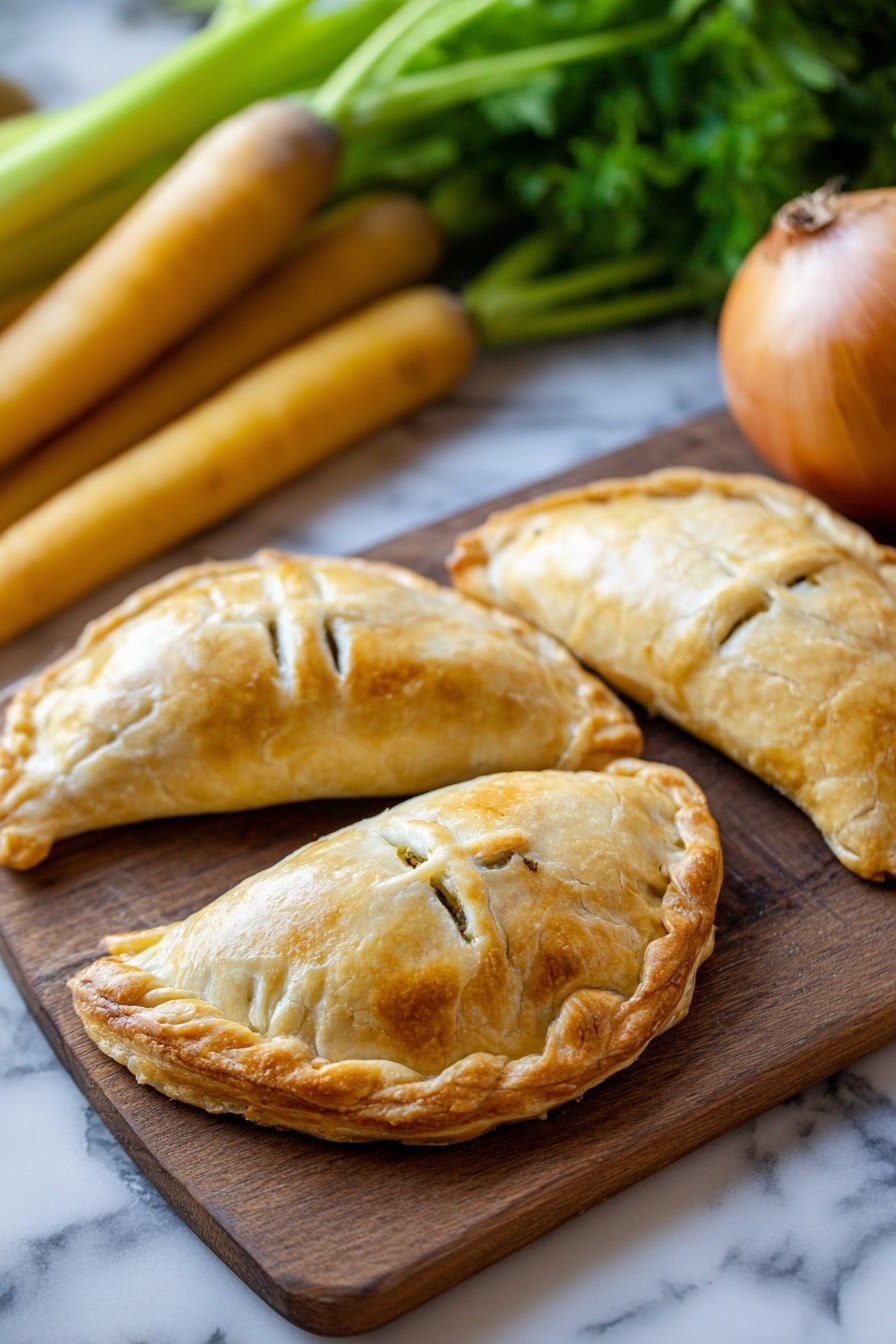
Step 4: Bake to Golden Perfection
Preheat your oven to 400°F (200°C). Place the pies on a parchment-lined baking sheet and bake for 30-35 minutes or until they’re puffed and golden all over. Keep an eye on them around the 25-minute mark so they don’t overbrown. Once out of the oven, let them rest for 5 minutes before diving in—this helps set the filling and avoids burns.
Pro Tips for Making Handheld Chicken Pot Pies Recipe
- Keep Butter Cold: I learned this trick the hard way—warm butter makes a dense crust. Always chill your butter and dough to get those flaky layers.
- Don’t Overfill: Less is more here—if the pies are too full, they tend to leak or burst. Trust me, it’s better to underfill slightly for easy handling.
- Chill Filled Pies Before Baking: If you have time, placing assembled pies in the fridge for 10-15 minutes firms them up, so they keep shape during baking.
- Use Egg Wash Generously: It creates that irresistible golden, shiny crust that makes these pies pop—don’t skip it!
How to Serve Handheld Chicken Pot Pies Recipe
Garnishes
I usually keep it simple with a sprinkle of fresh chopped parsley or thyme on top—it adds a fresh pop of color and herbaceous brightness that balances the rich filling beautifully.
Side Dishes
I like pairing these handheld pies with a crisp green salad tossed in a light vinaigrette. Sometimes, a side of coleslaw or roasted root veggies rounds the meal out perfectly. It’s all about complementing those buttery, savory flavors without overpowering them.
Creative Ways to Present
For casual gatherings, I love serving these mini pies in a rustic basket lined with a checkered cloth—it feels like classic comfort food made charming. For special occasions, garnish each with tiny herb sprigs and place on individual plates with a drizzle of homemade gravy or a side ramekin of dipping sauce.
Make Ahead and Storage
Storing Leftovers
Leftover handheld chicken pot pies keep well in an airtight container in the fridge for up to 3 days. I usually wrap each pie individually in plastic wrap before storing to prevent them from drying out.
Freezing
I’ve had great success freezing these pies before baking. Assemble, freeze on a sheet pan until firm, then transfer to a freezer bag. When you’re ready, bake straight from frozen—just add 10-15 minutes to the baking time. It’s perfect for meal prepping!
Reheating
To reheat, pop leftover pies in a 350°F oven for 10-15 minutes until warmed through and the crust is crisp again. I avoid microwaving because it can make the crust soggy, and that flaky texture is the star of the show.
FAQs
-
Can I use store-bought pie crust for this Handheld Chicken Pot Pies Recipe?
Absolutely! Store-bought pie crust works fine if you’re short on time, though you’ll miss that homemade buttery flakiness. Just thaw the crust completely before using and handle gently to prevent cracking.
-
How do I avoid soggy bottoms in the pies?
Good question! Make sure your filling is thickened and not too wet before assembling. Also, chilling the filled pies before baking helps the crust hold up better. Baking on a preheated baking sheet sometimes helps crisp the bottom crust as well.
-
Can I make these handheld pies ahead of time?
Yes! You can assemble them a day ahead and keep them refrigerated, then bake fresh right before serving. For longer storage, freeze them assembled and bake from frozen when needed.
-
What’s the best way to reheat leftovers without drying them out?
Reheat in the oven at 350°F for about 10-15 minutes until warmed through. Placing a small dish of water in the oven helps keep the filling moist during reheating.
Final Thoughts
This Handheld Chicken Pot Pies Recipe has become one of my family’s favorites because it delivers all the comfort of traditional pot pies but in a fun, easy-to-handle form. Whether you’re cooking for a busy weeknight or a casual gathering, these little pies never disappoint. I can’t wait for you to try them—you might just find yourself making these on repeat like I do!
Print
Handheld Chicken Pot Pies Recipe
- Prep Time: 30 minutes
- Cook Time: 1 hour
- Total Time: 1 hour 30 minutes
- Yield: 8 servings
- Category: Savory Pie
- Method: Baking
- Cuisine: American
Description
These handheld chicken pot pies combine a rich, savory filling with a flaky, buttery crust to create a comforting meal that’s perfect for lunch or dinner. Filled with tender chicken, fresh vegetables, and aromatic herbs, encased in a golden, crisp crust, these individual pies are both satisfying and portable, ideal for potlucks or family meals.
Ingredients
For the Filling:
- 6 tbsp. Unsalted Butter, Divided
- 1 cup Chopped Celery
- 1 cup Chopped Carrot
- 1 cup Diced Potato
- 2 cups Chopped Yellow Onion
- 1/4 tsp. Dried Thyme
- 1/4 tsp. Dried Rosemary
- 1/2 tsp. Salt
- 1 cup Peas (Frozen Is Fine)
- 2 cups Diced Cooked Chicken
- 1/2 cup Flour
- 3 cups Chicken Stock
For the Crust:
- 3 3/4 cups All-purpose Flour
- 3 sticks Unsalted Butter, Cubed
- 1/2 to 2/3 cup Cold Ice Water, As Needed
- 1 Egg, Beaten with 1 Tablespoon Water (Egg Wash)
Instructions
- Prepare the Crust: In a large bowl or food processor, combine the all-purpose flour and cubed unsalted butter. Pulse or mix until the mixture resembles coarse crumbs. Gradually add cold ice water, a few tablespoons at a time, mixing just until the dough begins to come together. Form the dough into a ball, wrap it in plastic wrap, and refrigerate for at least 30 minutes.
- Make the Filling Base: In a large skillet or saucepan, melt 3 tablespoons of unsalted butter over medium heat. Add the chopped celery, carrot, diced potato, and chopped yellow onion. Sauté until the vegetables are tender and the onions are translucent, about 8-10 minutes.
- Add Herbs and Seasonings: Stir in the dried thyme, dried rosemary, and salt into the sautéed vegetables to infuse flavor evenly throughout the filling.
- Create the Roux: Sprinkle the flour over the vegetables and stir well to coat. Cook this mixture for 2-3 minutes to remove the raw flour taste, stirring constantly.
- Add Chicken Stock: Slowly pour in the chicken stock while stirring to avoid lumps. Continue stirring until the mixture thickens into a creamy sauce, about 5-7 minutes.
- Add Peas and Chicken: Stir in the frozen peas and diced cooked chicken. Cook for an additional 3-4 minutes to heat everything through and combine flavors. Remove from heat and let the filling cool slightly.
- Roll Out the Dough: Remove the dough from the refrigerator and divide it into portions, typically 8 for individual pies. On a lightly floured surface, roll each portion into a circle large enough to line and cover your pie tins or molds.
- Assemble the Pot Pies: Grease your pie molds or muffin tin. Press a dough circle into each mold to form the base. Fill with the cooled chicken and vegetable filling. Cover with another dough circle, seal the edges well by pinching or crimping, and cut a few slits on top to vent steam.
- Apply Egg Wash: Brush the tops of each assembled pot pie with the beaten egg wash to achieve a golden, glossy finish when baked.
- Bake: Preheat the oven to 375°F (190°C). Place the pot pies on a baking sheet and bake for about 30-40 minutes, or until the crust is golden brown and cooked through.
- Cool and Serve: Allow the pot pies to cool for 5-10 minutes before removing from the molds to help set the filling and prevent burns. Serve warm and enjoy!
Notes
- This recipe is dedicated to crust lovers who appreciate a flaky, buttery pastry.
- Use cold butter and ice water when making the crust to ensure flakiness.
- Leftover cooked chicken works perfectly for the filling, making this recipe versatile and great for meal prep.
- Feel free to substitute vegetables based on availability or preference.
- Ensure the filling has cooled before assembling to prevent soggy crusts.
Nutrition
- Serving Size: 1 handheld pot pie
- Calories: 480 kcal
- Sugar: 4 g
- Sodium: 520 mg
- Fat: 28 g
- Saturated Fat: 16 g
- Unsaturated Fat: 10 g
- Trans Fat: 0.2 g
- Carbohydrates: 38 g
- Fiber: 4 g
- Protein: 22 g
- Cholesterol: 80 mg


