
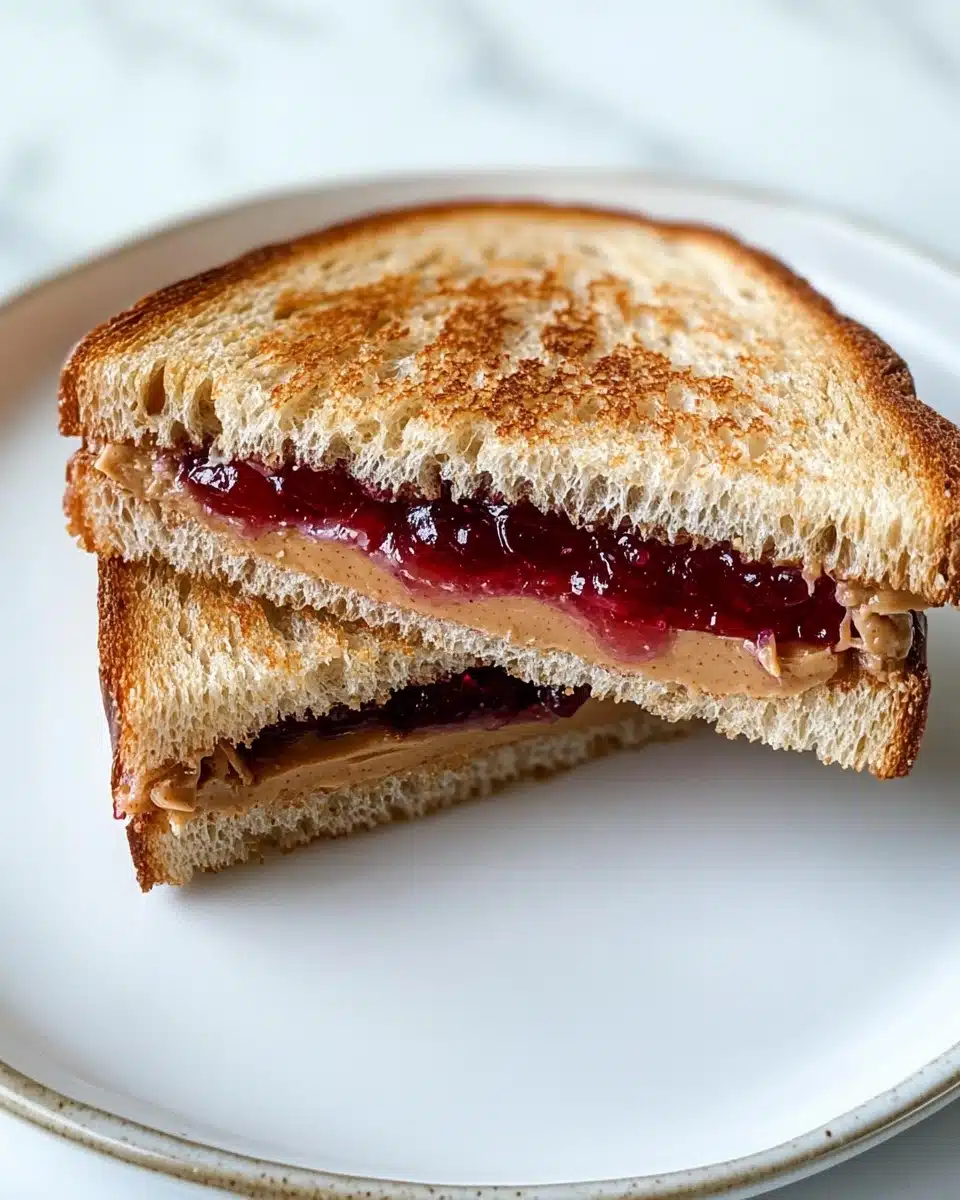
If you thought you’d seen every way to enjoy a peanut butter and jelly, wait until you try the Fried Peanut Butter and Jelly Sandwich. This glorious twist on the classic takes everything you love—gooey peanut butter, bright jelly, and toasty bread—and transforms it into a crisp, buttery delight with just a hint of maple magic in every bite.
Why You’ll Love This Recipe
- Irresistible Crispy Edges: The quick pan-fry in buttery maple syrup creates an outer crust that’s gorgeously crisp and deeply flavorful.
- Classic Nostalgia, All Grown Up: It’s everything you adored as a kid—but with an extra touch of indulgence that makes it feel special and new.
- Totally Customizable: From gluten-free breads to vegan butters and your choice of any jelly, the Fried Peanut Butter and Jelly Sandwich adapts to any craving or dietary need.
- Ready in Minutes: When you want comfort food in a flash, this recipe is prepped, cooked, and stacked up in about 7 minutes.
Ingredients You’ll Need
A Fried Peanut Butter and Jelly Sandwich proves that simple is sometimes best—each ingredient here is chosen for maximum flavor, with the magic happening when they’re all crisped together in a warm skillet. You probably have everything you need in the pantry right now!
- 2 slices regular or gluten free bread: The base of the sandwich; choose your favorite sandwich bread for best texture (soft white, hearty whole wheat, or gluten-free all work well).
- 1 tablespoon creamy peanut butter: Adds that creamy, nutty richness; classic peanut butter melts beautifully for a gooey interior, but you can swap for chunky if you love texture.
- 1 tablespoon jelly, any flavor: Sweet, tangy, and vibrant—use grape for tradition, strawberry for zing, or something fancy like blackberry or apricot for a fresh spin.
- 1 teaspoon regular or vegan butter: Coats the pan for that signature golden, crispy crust while keeping the sandwich dairy-free if you like.
- 1 tablespoon maple syrup: Just a touch caramelizes on the crust, adding sweetness and a subtle, rich aroma that’s alluring without being overpowering.
Variations
One of my favorite things about the Fried Peanut Butter and Jelly Sandwich is how easy it is to make your own. Don’t hesitate to play with your favorite flavors, swaps, and add-ins—you never know when you’ll discover a new tradition!
- Go Nut-Free: Swap peanut butter for sunflower seed or soy nut butter to safely enjoy this treat if you have allergies.
- Add Sliced Fruit: Layer in thin banana or strawberry slices for even more flavor and a tender bite.
- Try a Different Spread: Almond butter, hazelnut spread, or cookie butter give your sandwich a whole new personality.
- Change Up the Bread: Use cinnamon-swirl or brioche bread for even richer results, or a sturdy multigrain for extra crunch.
How to Make Fried Peanut Butter and Jelly Sandwich
Step 1: Assemble the Sandwich
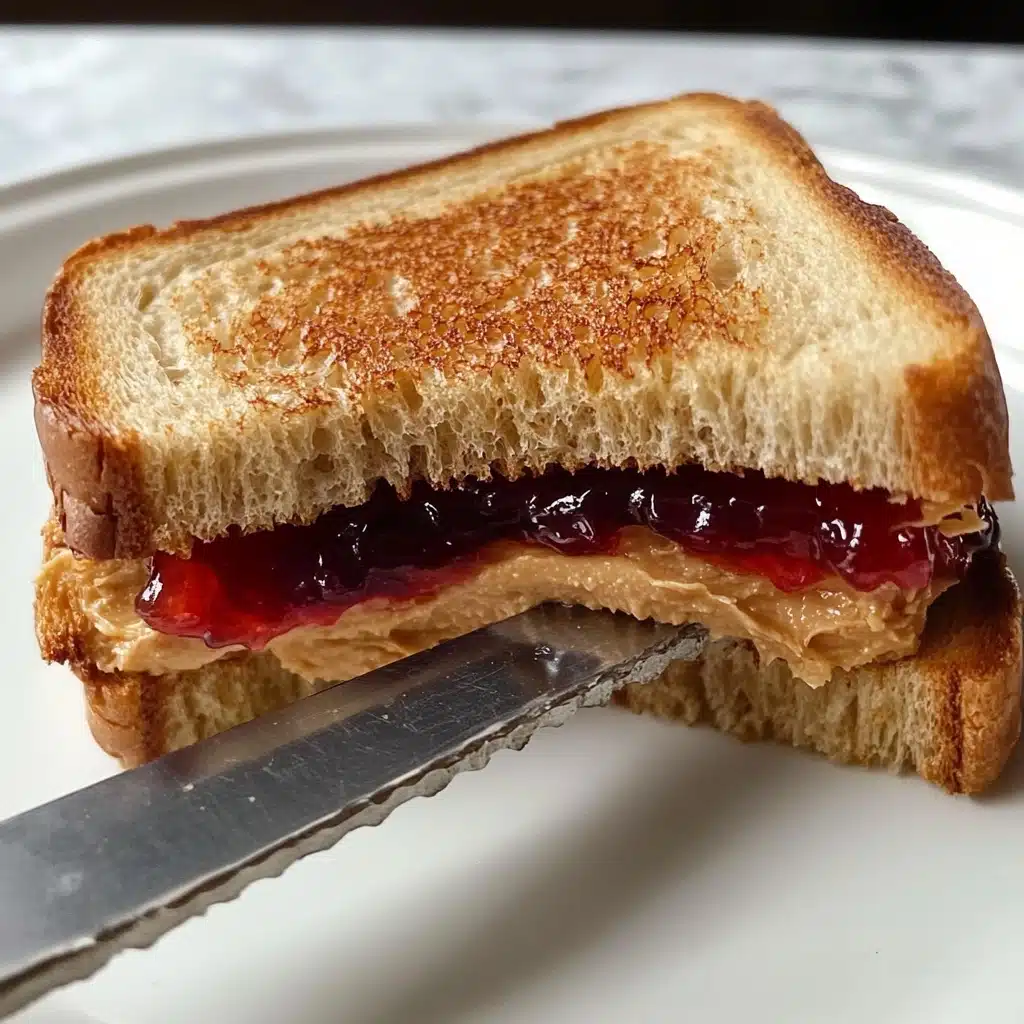
Start by spreading creamy peanut butter on one slice of bread and your favorite jelly on the second slice. Press the two together firmly so the filling doesn’t ooze out during frying—this little “hug” ensures your Fried Peanut Butter and Jelly Sandwich holds its shape in the pan.
Step 2: Heat the Pan and Add Butter & Maple Syrup
Place your skillet over medium heat and add the butter. Once it begins to sizzle (listen for that joyful sound!), drizzle in the maple syrup and swirl to coat the pan evenly. This combination is the secret to a golden, caramelized crust.
Step 3: Fry to Crispy Perfection
Lay your sandwich carefully into the hot pan. Let the first side fry for about a minute or until deep golden and crisp—then flip and repeat for the other side. The high heat melds the peanut butter and jelly into an oozy, molten middle, while the outside becomes crunchy and fragrant.
Step 4: Serve & Enjoy
Remove your Fried Peanut Butter and Jelly Sandwich from the skillet, let it cool very briefly, then slice and dive in! The crispy outside and molten center are at their absolute best when served warm, so gather everyone around for a quick snack or sweet breakfast treat.
Pro Tips for Making Fried Peanut Butter and Jelly Sandwich
- Maple Magic: Don’t skip the maple syrup in the skillet! It caramelizes into the bread’s crust and gives the Fried Peanut Butter and Jelly Sandwich a subtle, toasty sweetness you’ll crave.
- Optimal Skillet Temperature: Medium heat is just right—too hot and the syrup may burn before the sandwich crisps, too low and you’ll miss out on that signature golden sear.
- Spread to the Edges: Make sure your peanut butter and jelly are spread nearly to the crust; this ensures every bite is gooey and satisfying, and prevents burnt, empty edges.
- Choose Your Texture: Prefer a firmer sandwich? Let it rest on a rack for a minute after frying so the interior sets up a bit—otherwise dive in right away for max meltiness!
How to Serve Fried Peanut Butter and Jelly Sandwich

Garnishes
Add a finishing touch by dusting your Fried Peanut Butter and Jelly Sandwich with a light sprinkle of powdered sugar, a drizzle of extra maple syrup, or some fresh berries scattered on the plate. For real decadence, a dollop of whipped cream or vegan coconut whip gives it brunch-worthy style!
Side Dishes
This crispy sandwich pairs perfectly with a tall glass of cold milk (or oat milk for dairy-free!), fresh fruit salad, or even a handful of salty pretzels. Want to make it part of breakfast? Serve with warm coffee, a bowl of yogurt, or crisp apple slices to balance the sweetness.
Creative Ways to Present
Cut your Fried Peanut Butter and Jelly Sandwich into triangles and stack them like tea sandwiches for a playful kids’ snack, slice into strips for dunking in warm chocolate sauce, or serve on a vintage plate for a cozy, diner-inspired treat. Skewering sandwich halves with colorful picks adds a fun party appetizer vibe, too!
Make Ahead and Storage
Storing Leftovers
If you have leftovers (though it’s hard to imagine!), let your Fried Peanut Butter and Jelly Sandwich cool completely. Wrap tightly in foil or place in an airtight container in the refrigerator. They’ll stay yummy for up to two days, though the bread may lose some crispness.
Freezing
To freeze, prepare the sandwiches and let them cool, then wrap each individually in plastic wrap and foil. Freeze for up to a month—this trick is perfect for prepping ahead for school lunches or late-night cravings!
Reheating
Reheat your Fried Peanut Butter and Jelly Sandwich in a skillet over medium heat for the best texture—it brings back the crispy crust! You can also toast it in the oven at 350°F for about 8 minutes, flipping halfway through. Microwaving works in a pinch, but the bread won’t get that lovely crunch.
FAQs
-
Can I make a Fried Peanut Butter and Jelly Sandwich with gluten-free bread?
Absolutely! This recipe is delicious with gluten-free bread—just use your favorite sturdy loaf so the sandwich holds up well during frying. The frying method will still deliver that crisp, golden crust you crave.
-
What types of jelly work best in this sandwich?
Honestly, just about any jelly or jam you love will shine here. Grape and strawberry are go-to classics, but try raspberry, apricot, or even homemade compote for a unique twist. Thicker spreads tend to stay inside the sandwich better during frying.
-
Can I use chunky peanut butter for this sandwich?
Definitely! Chunky peanut butter adds a little crunch to the gooey center of the Fried Peanut Butter and Jelly Sandwich. Just make sure to spread it gently so the bread doesn’t tear, and enjoy those extra peanutty bites.
-
How do I keep the filling from leaking out while frying?
The trick is to spread your peanut butter and jelly about half an inch from the edges of your bread and press the sandwich together gently yet firmly before frying. If your bread is super fresh and soft, chilling the assembled sandwich for a few minutes can help keep everything neatly inside during frying.
Final Thoughts
There’s just something magical about biting into a Fried Peanut Butter and Jelly Sandwich—each mouthful is comfort food at its finest, with melty, sweet, salty, and crispy flavors all working together. If you’ve never tried frying your PB&J, now’s the time! Give it a whirl, and I guarantee your inner child will be thanking you.
Print
Fried Peanut Butter and Jelly Sandwich Recipe
- Prep Time: 2 minutes
- Cook Time: 5 minutes
- Total Time: 7 minutes
- Yield: 1 sandwich
- Category: Snack
- Method: Frying
- Cuisine: American
- Diet: Vegetarian
Description
A delicious twist on the classic PB&J sandwich, this Fried Peanut Butter and Jelly Sandwich is a crispy, gooey treat that will satisfy your sweet and savory cravings. Perfect for a quick and indulgent snack or meal.
Ingredients
Peanut Butter and Jelly Sandwich:
- 1 tablespoon creamy peanut butter
- 1 tablespoon jelly, any flavor
- 2 slices regular or gluten-free bread
Additional Ingredients:
- 1 teaspoon regular or vegan butter
- 1 tablespoon maple syrup
Instructions
- Prepare the Sandwich: Spread one slice of bread with peanut butter and the other with jelly. Combine to make a sandwich.
- Fry the Sandwich: Heat a skillet with butter. Add maple syrup to the sizzling butter. Fry the sandwich on each side until golden and crisp, about 1 minute per side.
Nutrition
- Serving Size: 1 sandwich
- Calories: Approximately 400 kcal
- Sugar: Approximately 20g
- Sodium: Approximately 350mg
- Fat: Approximately 15g
- Saturated Fat: Approximately 3g
- Unsaturated Fat: Approximately 9g
- Trans Fat: 0g
- Carbohydrates: Approximately 60g
- Fiber: Approximately 4g
- Protein: Approximately 10g
- Cholesterol: Approximately 0mg


