
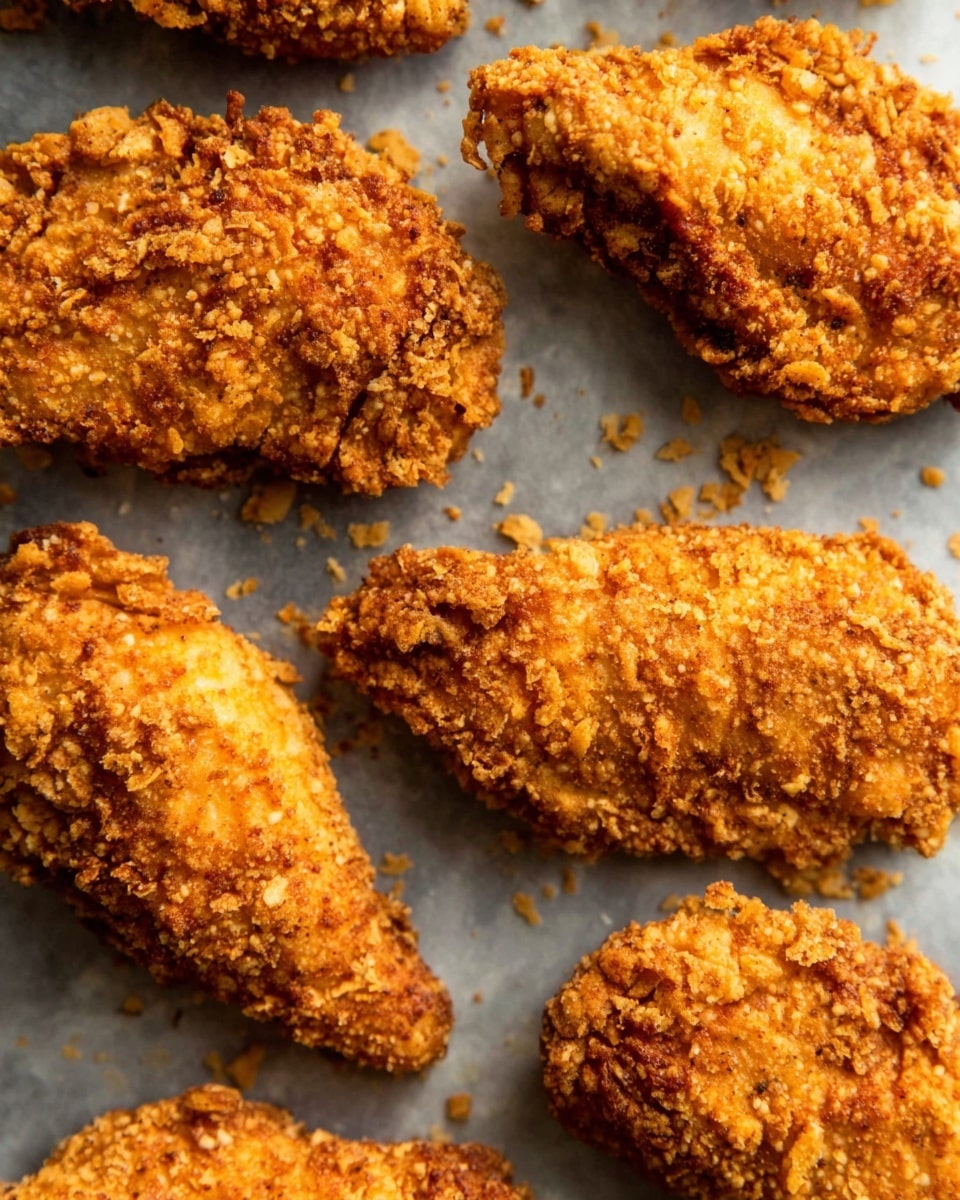
If you’re anything like me, you know there’s just something magical about chicken tenders — especially when they have that perfect extra crispy crust that makes every bite so satisfying. That’s why I’m really excited to share this Extra Crispy Baked Chicken Tenders Recipe with you. It hits that crispy-on-the-outside, juicy-on-the-inside dream that we all crave, but without the mess and calorie overload of frying.
Whether you’re feeding a hungry family, prepping for a game-day spread, or just want a tasty weeknight dinner that feels a little extra, this recipe is a total winner. I love that you don’t have to baby it in the kitchen — just a few simple steps and you’ll have crunchy, golden chicken tenders that everyone raves about. Trust me, once you try these, they’ll become your go-to!
Why You’ll Love This Recipe
- Super Crispy Coating: Toasting the panko breadcrumbs with butter helps create an unbeatable crunch you won’t find in typical baked chicken tenders.
- Easy and Oven-Friendly: No deep frying means less mess and no babysitting the stove – just a quick prep and into the oven they go.
- Flavor-Packed: A blend of spices and Parmesan cheese in the breadcrumbs adds layers of flavor that make every bite exciting.
- Kid (and Adult) Friendly: This Extra Crispy Baked Chicken Tenders Recipe is perfect for picky eaters and grown-ups who want something delicious and wholesome.

Ingredients You’ll Need
These ingredients come together beautifully for the best extra crispy baked chicken tenders. Each component plays a critical role, from the flour that helps the coating stick to the toasted panko for that signature crunch.
- Chicken Tenders or Chicken Breast: I prefer pre-sliced chicken tenders for tenderness, but sliced breast works great too.
- Flour: Helps the egg wash adhere evenly to the meat.
- Panko Breadcrumbs: The secret to extra crispiness – chosen for their chunky texture.
- Butter: Melting it to toast your breadcrumbs adds richness and a golden crunch.
- Parmesan Cheese: Adds savory depth and a little extra crispiness – totally optional but I recommend it!
- Egg and Milk: Create the perfect wash for the breadcrumbs to stick.
- Spices (Paprika, Salt, Onion Powder, Garlic Powder, Black Pepper, Cayenne): A balanced spice blend to give the tenders a flavorful kick without overpowering.
- Oil Spray: To help the tenders crisp up nicely in the oven without frying.
Variations
I love making this recipe my own depending on the mood or occasion, and I encourage you to do the same! Whether you want to dial up the heat, keep it mild for kids, or experiment with coating textures, there’s room for creativity here.
- Spicy Kick: I sometimes add extra cayenne pepper or toss in some smoked paprika for a smoky heat that my family goes crazy for.
- Gluten-Free Option: Swap regular flour and panko for gluten-free alternatives – the crunch is slightly different but still delicious.
- Herb Infusion: Adding dried Italian herbs or fresh chopped parsley to the breadcrumb mixture gives a fresh burst of flavor.
- Cheese-Free: If you don’t have Parmesan, the tenders still turn out fantastic – just toast those breadcrumbs a little longer for maximum crispiness.
How to Make Extra Crispy Baked Chicken Tenders Recipe
Step 1: Toast Your Panko Breadcrumbs to Golden Perfection
This step is where the magic for extra crispy texture begins. Melt the butter in a medium frying pan over medium heat, then add your panko breadcrumbs. Stir them for about 5 minutes until they turn a light golden color and smell irresistible. I discovered this trick after trying plain, untoasted panko and honestly, it didn’t deliver the same crunch. Just keep an eye on them so they don’t burn – you want a light golden toast, not dark brown!
Step 2: Prep Your Breading Stations
Line up three bowls: one with flour mixed with some of your spice blend, another with beaten egg and milk, and the last with the toasted panko, Parmesan, and the remaining spices. This assembly-line setup helps you coat each chicken tender evenly without making a huge mess. Plus, it speeds things up when you’re ready to bread.
Step 3: Double Dip Your Chicken Tenders
One at a time, dip each piece of chicken first into the flour mixture, then into the egg wash, and finally coat it generously in the breadcrumb mixture. Be sure to press gently but firmly to adhere the coating well, especially the breadcrumbs. I find that a good, even coating is key to achieving that extra crispy finish you’re aiming for.
Step 4: Bake on a Wire Rack for Maximum Crispiness
Place your breaded tenders spaced out on a baking tray. If you have a wire rack that fits in your tray, use it! This allows the heat to circulate all around the tenders so the bottoms get crispy too – something I learned the hard way after soggy first attempts. Spray them lightly with oil and bake at 200°C (390°F) for 15-20 minutes. Keep an eye out near the end to avoid charring, and you’ll know they’re done when golden, crispy, and the inside reaches a safe cooking temperature.
Step 5: Rest and Serve
Once out of the oven, let the tenders rest on a cooling rack for a few minutes. This little pause is essential because it lets steam escape, preventing the coating from getting soggy. Serve with your favorite dipping sauces and watch how quickly these tenders disappear!
Pro Tips for Making Extra Crispy Baked Chicken Tenders Recipe
- Toast Panko First: I swear by toasting the panko in butter because it adds a deep, toasty flavor and the crunch is unbeatable.
- Use a Wire Rack: Baking on a wire rack lets airflow crisp each side – no soggy bottoms here!
- Don’t Skip the Rest: Let your tenders cool on a rack before serving; this prevents moisture buildup that softens the crust.
- Control the Heat: If your tenders start to brown too quickly, reduce the oven temperature a bit to avoid burnt spots.
How to Serve Extra Crispy Baked Chicken Tenders Recipe
Garnishes
I like to sprinkle a little freshly chopped parsley or chives over the tenders – it adds a fresh, vibrant touch and balances the richness of the crust. Sometimes I zest a little lemon over the top for a bright, tangy lift that makes these tenders taste even better.
Side Dishes
My go-to sides with these crispy tenders are classic: crispy oven fries, coleslaw, or a simple mixed green salad. For a more indulgent meal, mac and cheese or creamy mashed potatoes complement the crunchy chicken beautifully.
Creative Ways to Present
For parties or meal prep, I like to slice the tenders and serve them over a bed of greens with colorful veggies and a drizzle of ranch or honey mustard. Another fun idea is serving them as sliders with little buns and your favorite toppings – always a hit with guests!
Make Ahead and Storage
Storing Leftovers
Leftover tenders store really well in the fridge for up to 3 days. I recommend placing them in an airtight container lined with paper towels to absorb any moisture and maintain crispiness as much as possible.
Freezing
I’ve frozen these tenders successfully by first freezing them on a tray individually, then transferring to a freezer-safe bag. This way, they don’t stick together and keep their shape. When you’re ready, bake straight from frozen at 200°C (390°F) for about 20-25 minutes.
Reheating
To reheat and revive that crisp texture, I pop leftover tenders in a hot oven or toaster oven at 180°C (350°F) for 8-10 minutes. Microwaving tends to make them soggy, so I avoid that when possible.
FAQs
-
Can I use chicken breast instead of chicken tenders for this Extra Crispy Baked Chicken Tenders Recipe?
Absolutely! You can slice chicken breast into strips that resemble tenders. They’ll work just as well and produce a slightly firmer bite. The key is to try to keep the strips an even thickness so they cook uniformly.
-
Why should I toast the panko breadcrumbs? Can I skip that step?
Toasting the panko breadcrumbs in butter adds a rich, golden flavor and helps the coating crisp up better in the oven. You can skip it, but your tenders won’t have quite the same amazing crunch and flavor depth – trust me, it’s worth the extra 5 minutes!
- What’s the best way to keep the chicken tenders extra crispy after baking?
Placing them on a wire rack to cool is essential to prevent moisture from making the crust soggy. Also, avoid stacking them right out of the oven – give them a few minutes to rest and crisp up fully.
-
Can I make this recipe gluten-free?
Yes! Use gluten-free flour and gluten-free panko breadcrumbs or crushed rice crackers as substitutes. The texture might differ slightly but you’ll still get a deliciously crispy coating.
-
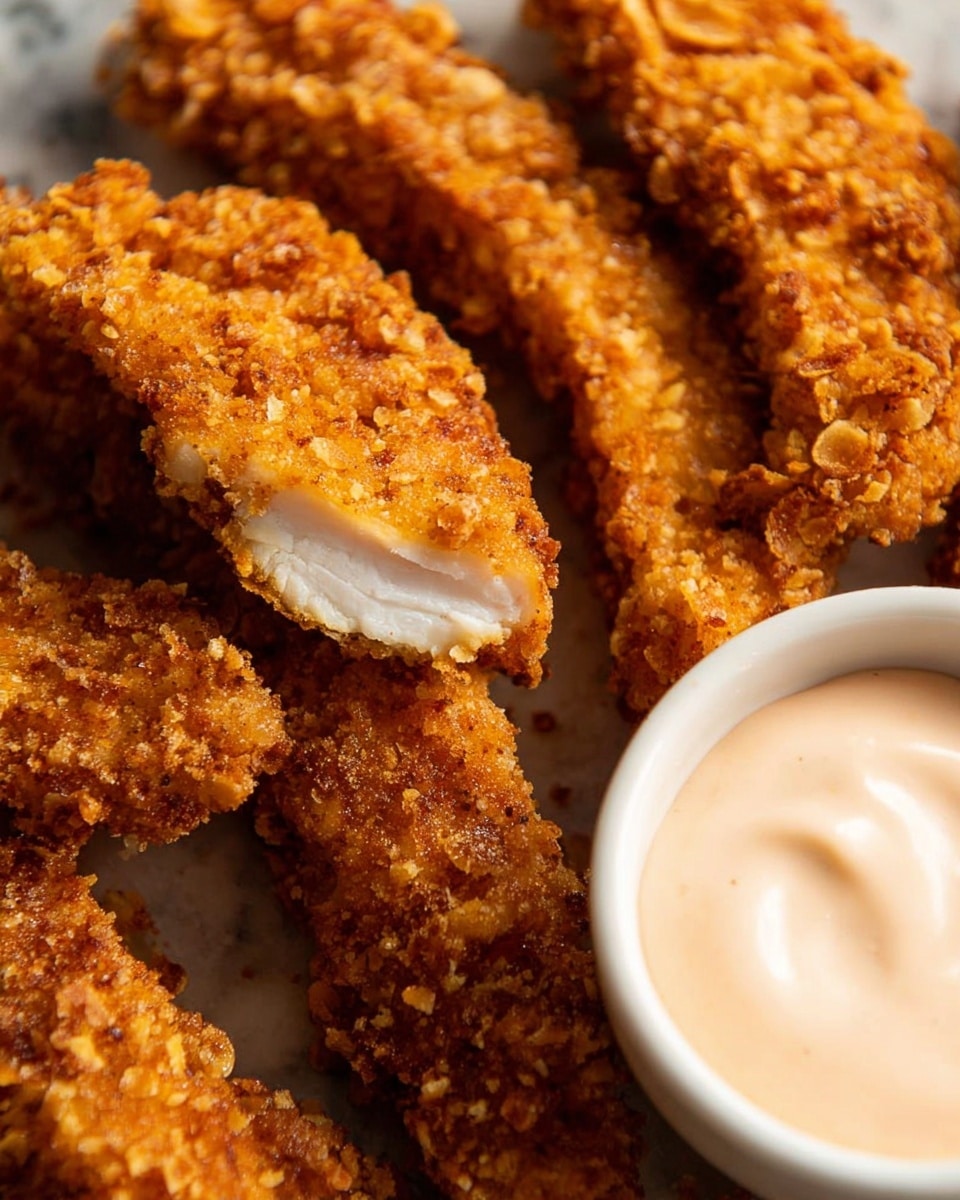
What dips go well with extra crispy baked chicken tenders?
Sweet chili mayo is my family favorite, but ranch, honey mustard, BBQ sauce, or even a tangy sriracha aioli work beautifully. Feel free to experiment and find your perfect pairing!
Final Thoughts
I absolutely love how this Extra Crispy Baked Chicken Tenders Recipe turned out the first time I made it — the crunchy coating that isn’t oily, the juicy chicken inside, and the ease of baking instead of frying really won me over. Now, it’s a staple in my kitchen, coming out for dinners, game days, and when I need something tasty on short notice. I really encourage you to give it a try! You’ll find that with just a little prep and a few simple tricks, you can enjoy restaurant-quality, crispy chicken tenders right from your own oven. Happy cooking!
Print
Extra Crispy Baked Chicken Tenders Recipe
- Prep Time: 15 minutes
- Cook Time: 20 minutes
- Total Time: 35 minutes
- Yield: 16 tenders
- Category: Main Course
- Method: Baking
- Cuisine: American
Description
These EXTRA Crispy Baked Chicken Tenders are golden, crunchy, and bursting with flavor. Using a combination of flour, spiced coatings, and toasted panko breadcrumbs mixed with Parmesan, these tenders bake to perfection in the oven, delivering a healthier alternative to fried chicken without compromising crispiness. Perfect for a quick snack or a delicious main, they pair wonderfully with a variety of dips.
Ingredients
Chicken
- 1.3 lb / 600 g Chicken Tenders OR Chicken Breast, sliced into strips & at room temp
Coating
- 1/3 cup / 50 g Flour
- 1 1/4 cups / 75 g Panko Breadcrumbs
- 1 heaped tbsp Butter
- 1 oz / 30 g freshly grated Parmesan
Wet Mix
- 1 Egg, beaten
- 2 tbsp Milk
Spices
- 1 tsp Paprika
- 1 tsp Salt
- 1/4 tsp Onion Powder
- 1/4 tsp Garlic Powder
- 1/4 tsp Black Pepper
- 1/8 tsp Cayenne Pepper (or to taste)
Others
- Oil Spray
Instructions
- Prepare toasted breadcrumbs: Melt 1 heaped tbsp butter in a frying pan over medium heat. Add 1 1/4 cups (75 g) panko breadcrumbs and stir continuously for about 5 minutes until the breadcrumbs turn light golden and fragrant. Remove from heat and set aside to cool.
- Preheat oven: Set your oven to 200°C (390°F) to ensure it’s ready for baking the tenders once coated.
- Mix spices: In a small bowl, combine 1 tsp paprika, 1 tsp salt, 1/4 tsp onion powder, 1/4 tsp garlic powder, 1/4 tsp black pepper, and 1/8 tsp cayenne pepper to create a flavorful spice blend.
- Set up coating stations: Arrange three large bowls: first bowl with 1/3 cup (50 g) flour mixed with 1 tsp of the spice blend; second bowl with a beaten egg mixed with 2 tbsp milk; third bowl with the toasted panko breadcrumbs, grated Parmesan, and the remaining spice mix.
- Coat the chicken tenders: Dip each chicken tender first into the flour mixture, ensuring full coverage; then into the egg wash; and finally into the breadcrumb-Parmesan coating, pressing gently to adhere. Repeat with all tenders.
- Arrange for baking: Place coated tenders spaced apart on a baking tray. For best results, use a wire rack over the tray to allow air circulation. Spray each tender lightly with oil spray to enhance crisping.
- Bake: Bake in the preheated oven for 15-20 minutes until golden, crispy, and fully cooked through. Monitor closely; if tenders begin to brown too quickly, reduce oven temperature slightly.
- Rest and serve: Transfer tenders to a cooling rack for a few minutes to let steam escape and crisp up further. Serve warm with your favorite dips, such as Sweet Chilli Mayo.
Notes
- Chicken Tenders: These are the strips of meat located under the chicken breast and tend to be more tender. If unavailable, sliced chicken breast strips work well, with one breast yielding approximately 5-6 tenders.
- Panko Breadcrumbs: Japanese-style breadcrumbs that are chunkier and produce extra crispiness. Typically found in the Asian section of supermarkets.
- Parmesan: Adds extra flavor and crispiness to the coating but can be omitted if not available; the tenders remain delicious either way.
- Dips: These tenders pair excellently with Sweet Chilli Mayo or other favorite creamy or spicy dips.
- Calories: Nutritional estimates assume the entire recipe is divided into 4 servings with Parmesan included and no dip.
Nutrition
- Serving Size: 4 tenders
- Calories: 320
- Sugar: 0.5 g
- Sodium: 550 mg
- Fat: 12 g
- Saturated Fat: 5 g
- Unsaturated Fat: 6 g
- Trans Fat: 0 g
- Carbohydrates: 22 g
- Fiber: 1.5 g
- Protein: 34 g
- Cholesterol: 110 mg
