
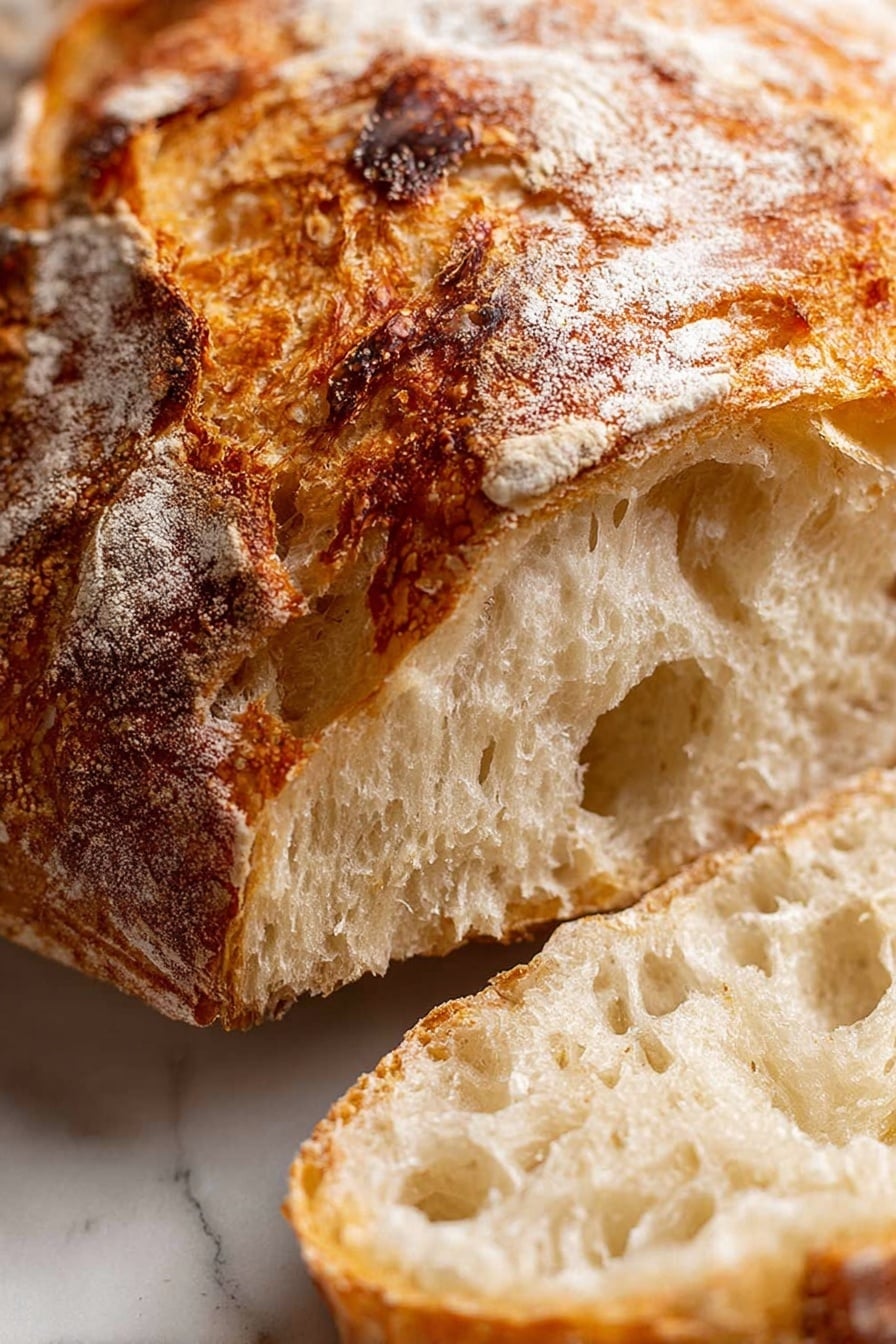
If you’ve been dreaming of bakery-quality bread at home without the crazy effort, then you’re going to absolutely love this Easy No-Knead Artisan Yeast Bread Recipe. I first tried this method when I wanted a rustic, crusty loaf but without spending hours kneading or fussing—and I was blown away. The crust is perfectly crisp, the inside has those gorgeous big holes like a French boulangerie loaf, and the best part? You barely have to do anything. Keep reading because I promise you’ll want to have this bread ready weekly—it’s that good!
Why You’ll Love This Recipe
- No Kneading Required: Just mix and wait, perfect for beginners or busy folks.
- Super Crispy Crust: The Dutch oven technique gives you that bakery-quality crunch every time.
- Big, Airy Crumb: Gorgeous holes inside the bread, making it light yet chewy.
- Flexible Timing: You can bake right away or refrigerate for up to 3 days to develop flavor.

Ingredients You’ll Need
The magic of this Easy No-Knead Artisan Yeast Bread Recipe is in its simplicity—just a few pantry staples that come together effortlessly for a homemade loaf you’ll be proud of. Don’t worry about fancy ingredients; good quality flour and yeast are all you really need to get started.

- Flour: I usually use bread flour for better gluten development, but all-purpose flour works great too.
- Instant or Rapid Rise Yeast: I love instant yeast because you don’t have to proof it, making it even easier.
- Salt: Use kosher or cooking salt, not table salt, to avoid overly salty bread.
- Warm Water: Make sure it’s warm, not hot—around 130°F (55°C) is perfect to activate the yeast without killing it.
- Extra Flour: For dusting so the dough doesn’t stick when you shape it.
Variations
I love tweaking this recipe depending on what I’m craving or what I have in the pantry. It’s super flexible, so feel free to make it your own—whether you want a cheesy upgrade or a whole grain twist, you’ve got options!
- Cheese Bread: Adding shredded cheese right into the dough before the rise makes for an incredible cheesy crust—we literally can’t get enough of this version at my house.
- Herb-Infused: Toss in some fresh rosemary or thyme for an aromatic loaf that pairs perfectly with soups.
- Whole Wheat Addition: Swap half the white flour for whole wheat for nuttier flavor and extra fiber—just expect a slightly denser crumb.
- Garlic Bread: Brush with garlic butter as soon as it’s out of the oven for an easy, flavorful twist.
How to Make Easy No-Knead Artisan Yeast Bread Recipe
Step 1: Mix it All Up
Start by combining the flour, yeast, and salt in a large bowl. Use a wooden spoon’s handle to stir in the warm water until the dough just comes together. It’ll be wet and sticky—don’t be tempted to add a ton of flour to make it stiff; this wet consistency is key for that open crumb structure. If it feels more like batter or is too dry, adjust with tiny amounts of water or flour. This step only takes a few minutes, but it’s the foundation of your amazing loaf.
Step 2: Let it Rise – No Fuss Required
Cover your bowl with cling wrap or a plate and leave it on the counter for 2 to 3 hours. You’ll know it’s ready when it’s doubled in size, looks bubbly on top, and feels wobbly, almost like jelly. If your kitchen is cold and it’s not rising after an hour, just move it somewhere warmer, like near the stove or a sunny window. This hands-off rise is where the magic happens, so be patient!
Step 3: Optional Chill for Extra Flavor
If you have time, refrigerate the dough for up to 3 days after the initial rise. This slow fermentation deepens the flavor, making the crust even tastier. When ready to bake, just bring it back to room temperature for about 45–60 minutes while the oven preheats.
Step 4: Preheat the Oven and Dutch Oven
Place your Dutch oven with its lid inside your oven and preheat to 230°C/450°F (or 220° fan) for at least 30 minutes. This step is crucial—getting the pot screaming hot before the dough goes in helps create that unforgettable crust. Don’t have a Dutch oven? Don’t worry—I’ve got notes on alternatives below.
Step 5: Shape and Prep the Dough
Lightly dust your work surface with 1 tablespoon of flour, then gently scrape your dough onto it. Sprinkle a little more flour on top so it’s easier to handle. Using a dough scraper or any wide flat tool like a cake server, fold the edges inward about six times to form a rough round. You don’t need perfect shape—those little imperfections create the best crunch and rustic look!
Step 6: Transfer Dough to the Dutch Oven
Place a big sheet of parchment paper next to the dough, then flip the dough seam side down onto the paper, smooth side up. Slide the dough using the paper into your preheated Dutch oven. Pop the lid on and slide it back into the oven.
Step 7: Bake Until Golden
Bake covered for 30 minutes, then remove the lid and bake for an additional 12 minutes or until your bread is deep golden and crusty. The aroma that fills your kitchen at this point is seriously next level!
Step 8: Cool and Enjoy
Remove the bread from the Dutch oven and let it cool on a wire rack for about 10 minutes before slicing. I know it’s tempting to dive right in, but that brief rest helps finish the bake and keeps the crumb from getting gummy.
Pro Tips for Making Easy No-Knead Artisan Yeast Bread Recipe
- Perfect Dough Consistency: The dough should be sticky and loose, like thick batter—not stiff. This creates those signature big holes inside.
- Warmspot Magic: Yeast loves warmth, so if your kitchen is chilly, pop the dough somewhere warm—near a heater or on top of the fridge works wonders.
- Preheat Properly: Don’t skip heating the Dutch oven; the hot pot traps steam and crisps the crust beautifully.
- Handling the Dough: When shaping, try not to punch down all air bubbles—some trapped air helps build that lovely airy texture.
How to Serve Easy No-Knead Artisan Yeast Bread Recipe
Garnishes
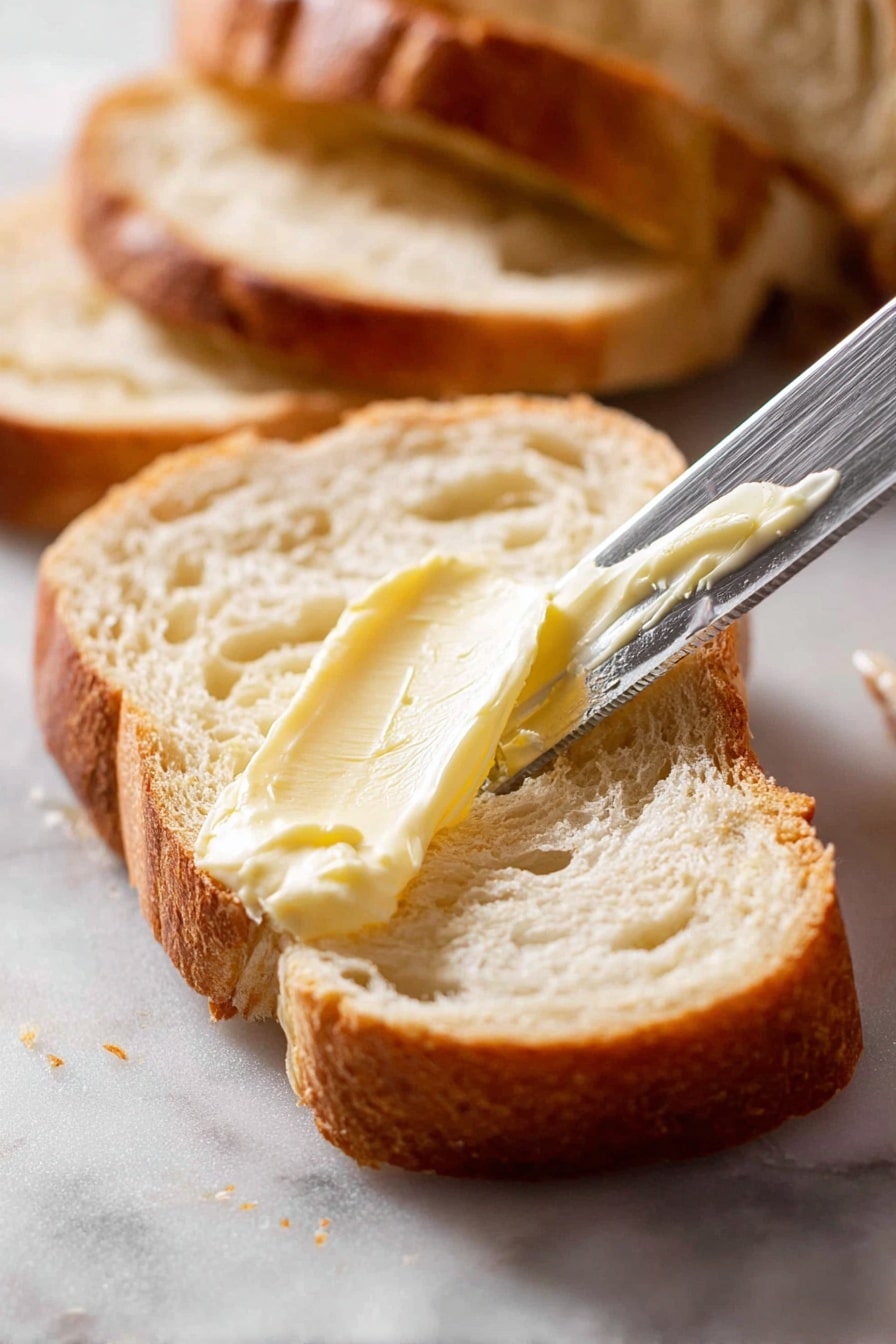
I love serving this bread with a drizzle of good olive oil and a sprinkle of flaky sea salt for dipping—simple but oh-so-satisfying. Fresh herbs like rosemary or thyme also make great garnishes if you’re feeling fancy, and a little garlic butter spread right after baking turns it into an instant crowd-pleaser.
Side Dishes
This bread is perfect alongside hearty soups, stews, or chili. My favorite combo? A steaming bowl of tomato basil soup with a chunk of this rustic bread for dunking—my family goes crazy for it every time!
Creative Ways to Present
For special occasions, I like to slice the bread, toast it lightly, and arrange it in a basket with various flavored butters, cheeses, and spreads for a gorgeous bread board. You could also hollow out a round loaf and use it as a bread bowl for chili or creamy dips—a guaranteed showstopper.
Make Ahead and Storage
Storing Leftovers
I usually store leftover bread in a paper bag inside a bread box or wrapped loosely in a tea towel to keep the crust crisp. Plastic bags make the crust soggy too quickly, and that chewy crust is what makes this bread special.
Freezing
If I have extra, I cut the bread into slices and freeze them wrapped tightly in foil or freezer bags. Freezing slices instead of the whole loaf makes it easy to pull out just what you need without thawing the entire thing.
Reheating
To bring back that fresh-baked crispness, I usually reheat slices in a toaster oven or a 350°F (175°C) oven for about 5–7 minutes. This helps restore the crunch without drying out the bread.
FAQs
-
Can I use active dry yeast instead of instant yeast?
Yes, you absolutely can! If using active dry yeast, it’s best to proof it first in warm water with a pinch of sugar for about 5-10 minutes until bubbly before mixing with the flour and salt. This recipe notes that adjustment—instant yeast just skips the proofing step, making things quicker.
-
What if I don’t have a Dutch oven?
No worries! You can use any heavy, oven-safe pot with a lid, like a cast iron skillet with a lid or even an oven-safe roasting pan. Alternatively, bake the dough on a preheated baking stone or sheet and create steam in the oven by placing a pan of hot water on the bottom rack to help crisp the crust.
-
Can I make this bread gluten-free?
This recipe relies on gluten development for structure, so it’s not suitable for gluten-free flours without major modifications. However, there are specialized gluten-free no-knead bread recipes out there that might fit your needs better.
-
How long does this bread stay fresh?
When stored in a paper bag or bread box, this bread stays fresh for about 2 days. After that, the crust softens but the flavor remains fantastic. For longer storage, freezing is your best option.
-
Why is my bread dense and not airy?
This can happen if the dough is too dry or if you punch down all the air bubbles during shaping. Make sure your dough stays wet and sticky, and be gentle when shaping to keep those lovely air pockets intact.
Final Thoughts
This Easy No-Knead Artisan Yeast Bread Recipe holds a special place in my kitchen—it’s proof that wonderful bread doesn’t have to mean hours of effort or fancy equipment. Whether you’re a novice baker or just someone who loves fresh bread without the fuss, this recipe will quickly become your go-to. Give it a try and watch your family’s faces light up with each crusty, chewy slice. Trust me, once you taste it, there’s no going back!
Print
Easy No-Knead Artisan Yeast Bread Recipe
- Prep Time: 5 minutes
- Cook Time: 40 minutes
- Total Time: 2 hours 45 minutes (including rising time)
- Yield: 1 loaf, approximately 10 – 12 slices
- Category: Bread
- Method: Baking
- Cuisine: Artisan/Western
- Diet: Vegetarian
Description
This World’s Easiest Yeast Bread is an artisan-style no-knead bread that delivers an incredible crispy, chewy crust with big holes like sourdough. Perfect for beginners and busy bakers, this recipe requires minimal effort, just mixing and resting, yielding a bakery-quality homemade loaf with a tender crumb and complex flavor.
Ingredients
Dry Ingredients
- 3 cups (450g) flour (bread or plain/all purpose)
- 2 tsp instant or rapid rise yeast
- 2 tsp cooking/kosher salt (NOT table salt)
- 1 1/2 tbsp flour (for dusting)
Wet Ingredients
- 1 1/2 cups (375 ml) very warm tap water (up to 55°C/130°F, not boiling)
Instructions
- Mix Dough: In a large bowl, combine the flour, instant yeast, and kosher salt. Add the warm water and use the handle of a wooden spoon to mix until all the flour is incorporated. The dough will be wet and sloppy, not kneadable but not runny either. Adjust consistency with more water or flour if necessary.
- Rise: Cover the bowl with cling wrap or a plate and leave it on the counter for 2 to 3 hours until doubled in volume. The dough will look wobbly and jelly-like with bubbles on top. If it has not risen after 1 hour, move it to a warmer spot.
- Optional Refrigeration: For enhanced flavor, you can refrigerate the dough for up to 3 days at this stage. When ready to bake, bring the cold dough to room temperature by leaving it on the counter for 45 to 60 minutes.
- Preheat Oven and Dutch Oven: Place a Dutch oven with lid (26cm/10″ or larger) inside your oven and preheat to 230°C/450°F (220° fan) for 30 minutes.
- Shape Dough: Sprinkle 1 tbsp flour on a work surface. Scrape dough onto it and sprinkle the top with 1/2 tbsp flour. Using a dough scraper or similar tool, fold the sides inward about 6 times to form a rough round shape, deflating bubbles gently.
- Transfer Dough to Parchment Paper: Slide a large piece of parchment paper next to the dough. Flip the dough upside down onto the parchment (seam side down, smooth side up). Push it towards the middle and reshape roughly. Imperfections are good for crust texture.
- Bake: Remove the hot Dutch oven from the oven. Using the parchment paper, lift and place the dough into the pot. Cover with the lid and bake for 30 minutes. Then remove the lid and bake an additional 12 minutes uncovered until the crust is deep golden and crispy.
- Cool: Remove the bread from the pot and cool on a rack for 10 minutes before slicing and serving.
Notes
- Use instant or rapid rise yeast for best results; active dry yeast can be substituted but will require longer rising times.
- Do not use table salt; kosher or cooking salt is recommended for flavor and texture.
- Water should be very warm but not hot enough to kill the yeast, ideally around 55°C/130°F.
- If you don’t have a Dutch oven, you can bake on a preheated baking stone or sheet; place a metal pan with water in the oven to create steam and mimic the crust effect.
- This dough can be refrigerated for up to 3 days to develop complex flavors and accommodate your schedule.
- The dough is forgiving; slight variations in hydration or rising times can be adjusted with small flour or water additions.
- For a cheese bread version, add your favorite grated cheese before the final bake.
Nutrition
- Serving Size: 1 slice (approximate)
- Calories: 155 kcal
- Sugar: 1 g
- Sodium: 469 mg
- Fat: 1 g
- Saturated Fat: 0.1 g
- Unsaturated Fat: 0.8 g
- Trans Fat: 0 g
- Carbohydrates: 32 g
- Fiber: 2 g
- Protein: 5 g
- Cholesterol: 0 mg


