
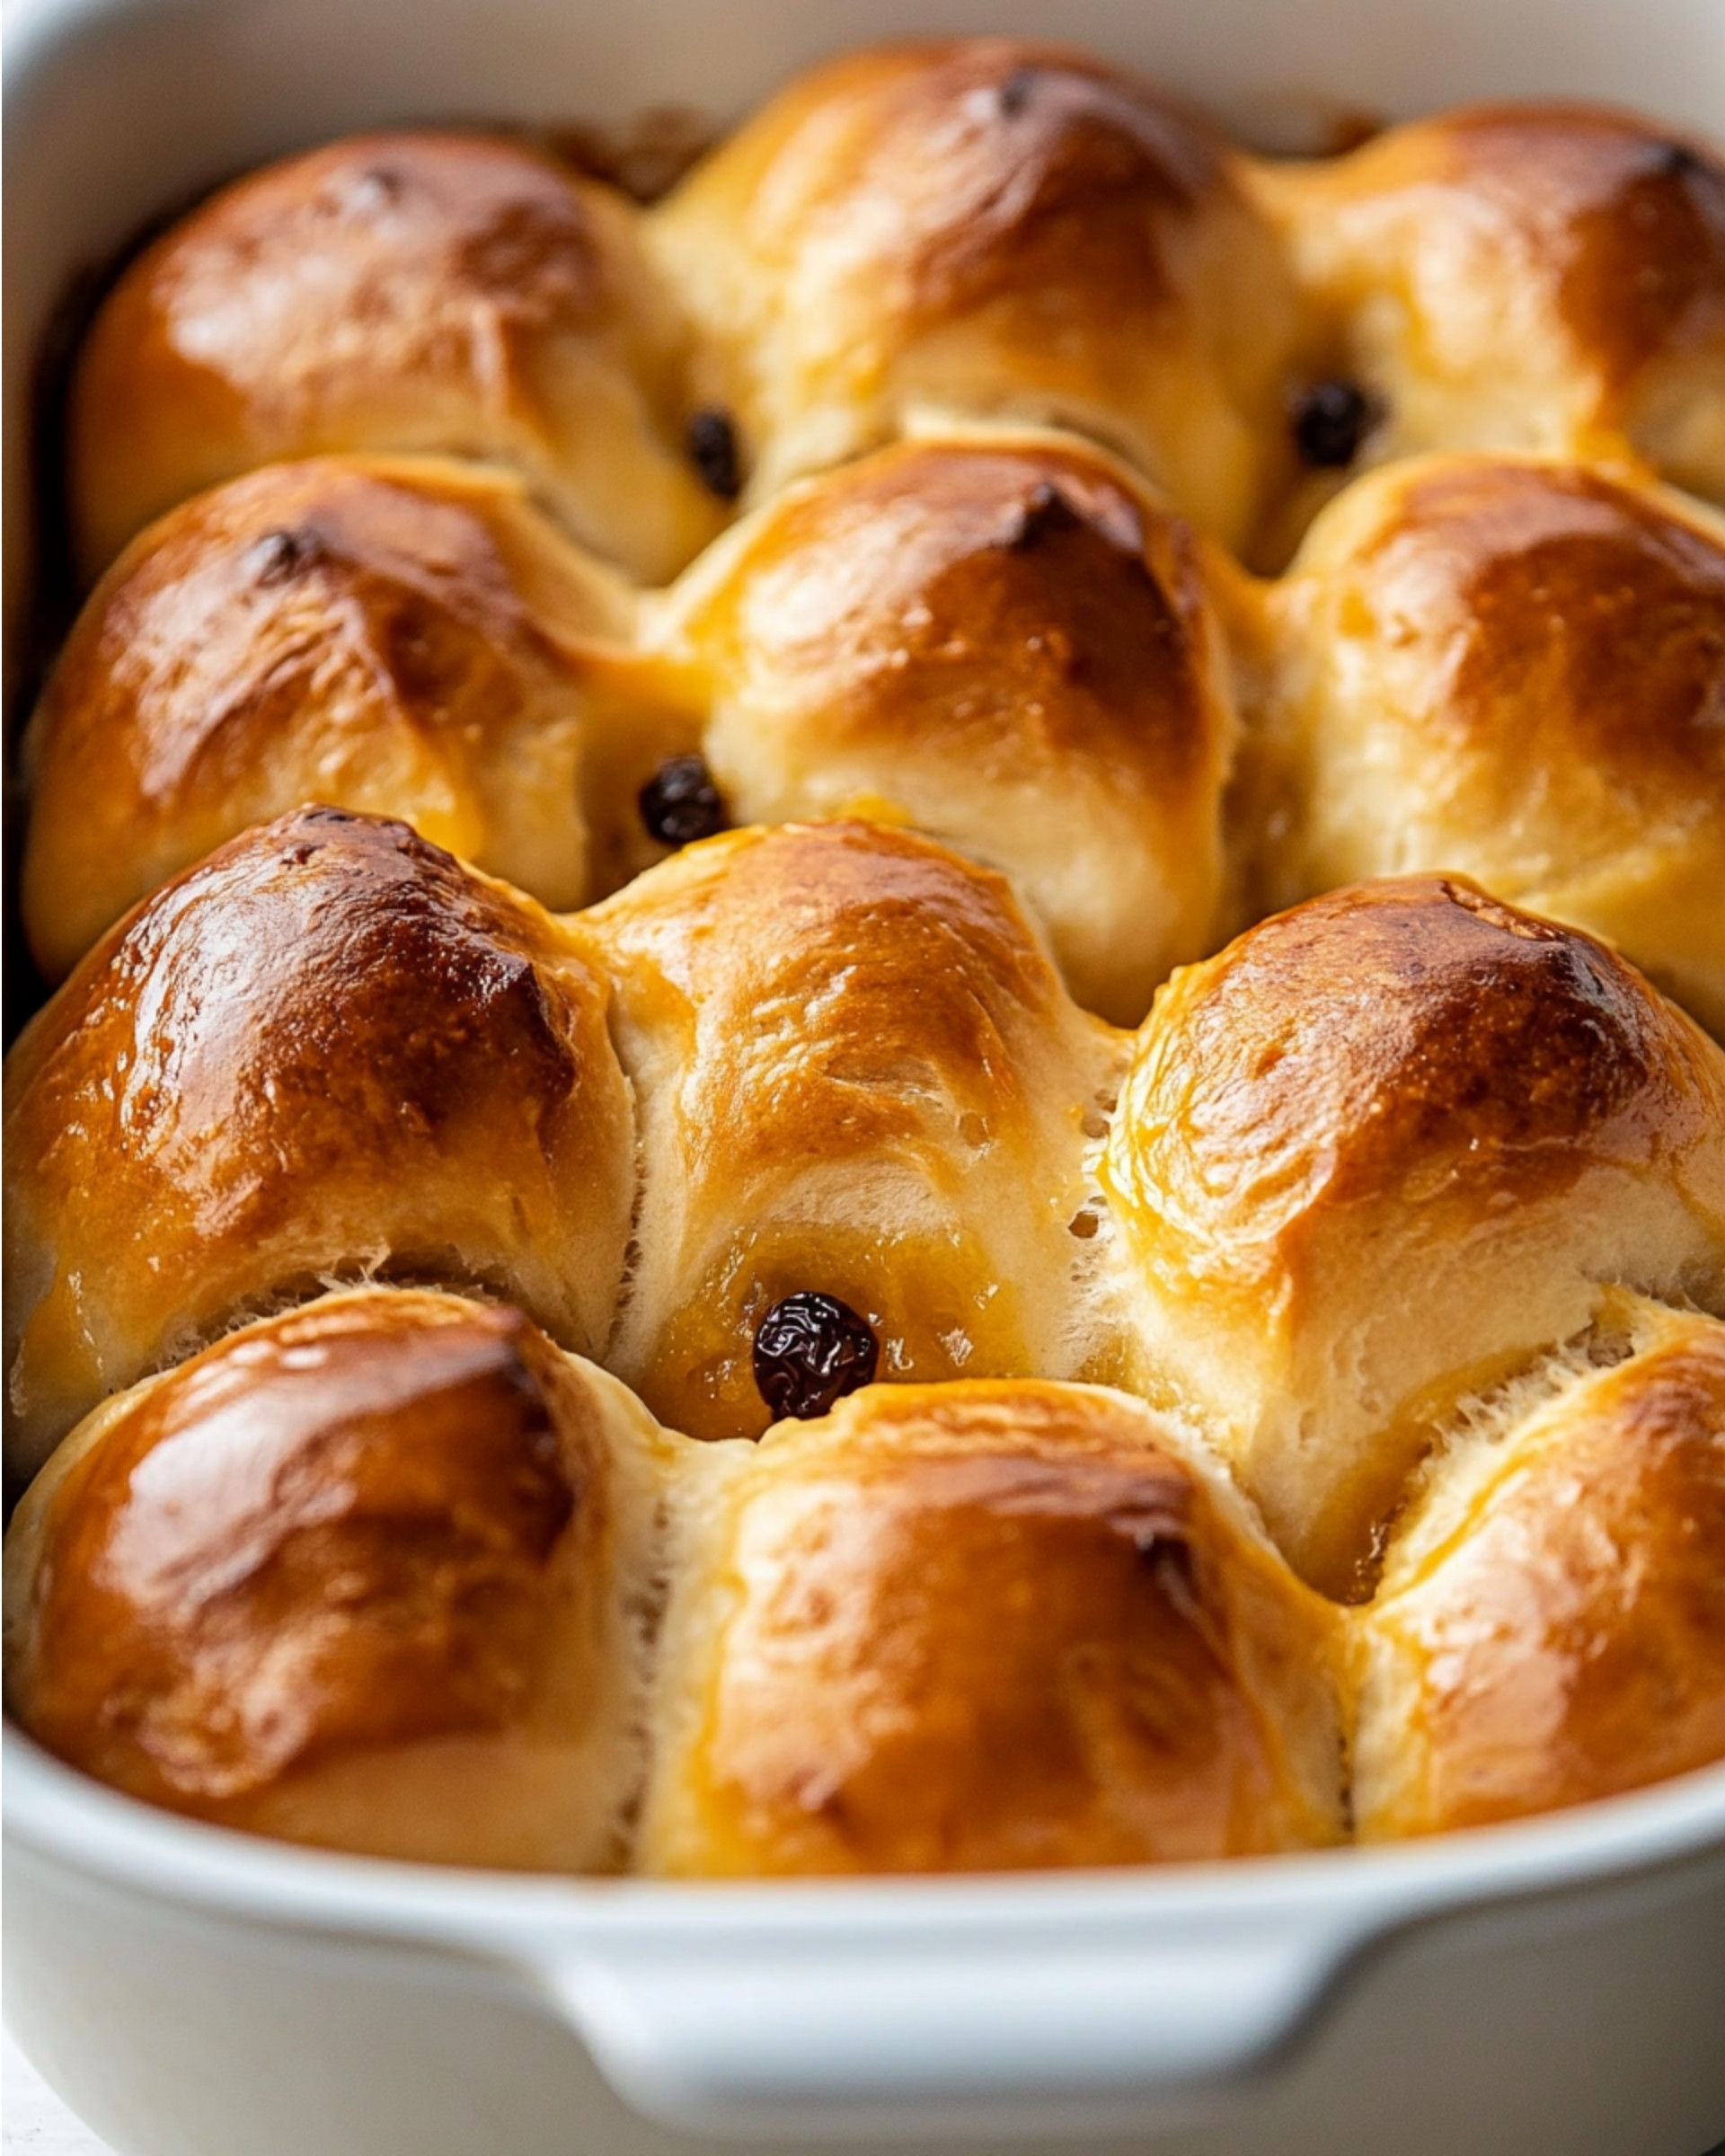
These delightful homemade Hot Cross Buns blend warm spices, plump raisins, and fluffy dough into a treat that’s surprisingly simple to make. The signature cross on top isn’t just decorative—it’s part of a centuries-old tradition that makes these buns special. Perfect for Easter celebrations or weekend breakfasts, these buns strike the perfect balance between sweetness and spice, with a wonderfully soft texture that makes store-bought versions pale in comparison.
Why You’ll Love This Recipe
- Easier Than You Think: Don’t be intimidated by yeast! This recipe breaks everything down into manageable steps that even first-time bread makers can handle.
- Make-Ahead Friendly: You can prepare the dough the night before and let it do its final rise in the morning for fresh-baked buns without the early wake-up call.
- Customizable: Whether you prefer traditional raisins, dried currants, or want to throw in some orange zest for a citrusy twist, these buns adapt to your taste preferences.
- Impressive Results: There’s something magical about pulling freshly baked, cross-topped buns from your oven. The aroma alone will make you feel like a professional baker!

Ingredients You’ll Need
- Raisins or dried currants: These provide little bursts of natural sweetness throughout the buns. Soaking them first ensures they stay plump and juicy rather than drying out during baking.
- Milk: Creates a rich, tender crumb in the dough. Using warm milk helps activate the yeast and brings the dough together more smoothly.
- Sugar: Adds sweetness and helps feed the yeast for proper rising. These buns aren’t overly sweet, which makes them versatile for breakfast or an afternoon snack.
- Butter: Provides richness and that melt-in-your-mouth quality. Make sure it’s properly softened for easy incorporation into the dough.
- Yeast: The magic ingredient that makes the dough rise. Active dry yeast needs to be proofed first in warm liquid to ensure it’s alive and working.
- Eggs: Add richness, color, and structure to the dough, resulting in that classic soft but sturdy hot cross bun texture.
- Flour: Forms the foundation of your dough. The protein in all-purpose flour creates just enough structure without making the buns too dense.
- Spices: The blend of cinnamon, nutmeg, and cloves creates that distinctive hot cross bun flavor profile that’s gently warming without overwhelming.
- Baking powder: Gives the buns an extra lift, ensuring they’re perfectly fluffy.
- Apricot jam: Creates that signature glossy finish that makes hot cross buns look as good as they taste.
Note: You’ll find the complete list of ingredients, along with their exact measurements, in the printable recipe card at the bottom of this post.
Variations
Want to put your own spin on this classic? Here are some delicious ways to make these buns your own:
- Chocolate Lover’s Version: Add 1/2 cup chocolate chips instead of (or alongside) the raisins for a modern twist.
- Orange Spice: Mix in the zest of one orange to the dough and replace the apricot jam with orange marmalade for the glaze.
- Mixed Fruit: Substitute the raisins with a mixture of dried cranberries, chopped dried apricots, and candied citrus peel for a more complex flavor.
- Cinnamon Cream Cheese Crosses: Instead of the flour paste, pipe crosses using a mixture of softened cream cheese, powdered sugar, and cinnamon after baking.
How to Make Easy Hot Cross Buns
Step 1: Prepare the Fruit and Yeast
Begin by soaking your raisins or currants in boiling water for 10 minutes – this plumps them up beautifully. While they’re soaking, combine 1/4 cup warm milk with a teaspoon of sugar and the yeast in a small bowl. Let this mixture rest until it becomes foamy and bubbly, about 10 minutes. This tells you your yeast is alive and ready to work its magic!
Step 2: Create the Dough Base
In your stand mixer bowl, combine the remaining warm milk, sugar, softened butter, and salt. Add the beaten eggs, your bubbly yeast mixture, and all those wonderful spices – cinnamon, nutmeg, cloves, and baking powder. This fragrant mixture is the foundation of your buns’ flavor.
Step 3: Form the Dough
With your mixer running on low with the dough hook, gradually add the flour one cup at a time. You’ll see the mixture transform from a shaggy mess into a smooth, elastic dough as it kneads for about 10 minutes. Drain and pat dry your plumped raisins, then mix them into the dough just until they’re evenly distributed.
Step 4: First Rise
Transfer your dough to a greased bowl, cover it with plastic wrap, and let it rise in a warm spot until doubled in size, about an hour. This is where patience pays off – the yeast is doing important work creating that fluffy texture we’re after!
Step 5: Shape and Second Rise
Once doubled, divide the dough into 12 equal portions. Shape each piece into a smooth ball by pulling the edges toward the bottom and pinching them together. Place the balls in a greased 9×13-inch baking dish, cover again, and let them rise for another 45 minutes to an hour until they’re puffy and touching.
Step 6: Add the Crosses and Bake
Preheat your oven to 375°F while the buns are on their final rise. Mix the flour and water for the crosses until smooth, transfer to a zip-top bag, snip the corner, and pipe crosses over each bun. Bake until the buns are golden brown and sound hollow when tapped on the bottom, about 20-24 minutes.
Step 7: Glaze and Serve
While still warm from the oven, brush the buns with the warmed apricot jam mixture. This gives them that irresistible shine and adds a subtle sweetness to the crust. Serve warm for the ultimate experience!
Pro Tips for Making the Recipe
- Check Your Yeast: If your yeast doesn’t foam up during the proofing step, it might be inactive. Better to find out and replace it before you’ve mixed everything together!
- Don’t Rush the Rise: The rising time is when flavor develops and texture is created. If your kitchen is cold, create a warm environment by placing the covered dough in an oven with just the light turned on.
- The Windowpane Test: To check if your dough is properly kneaded, take a small piece and stretch it. If you can stretch it thin enough to see light through without it breaking, you’re good to go!
- Weigh Your Dough: For perfectly even buns, weigh the entire dough and divide by 12 to know exactly how much each bun should weigh.
- Keep Your Hands Greased: These buns have a sticky dough. Keep your hands lightly greased with butter or cooking spray when shaping to prevent sticking.
How to Serve
Hot cross buns are traditionally enjoyed around Easter, but they’re delicious year-round! Here are my favorite ways to serve them:
Breakfast Pairing
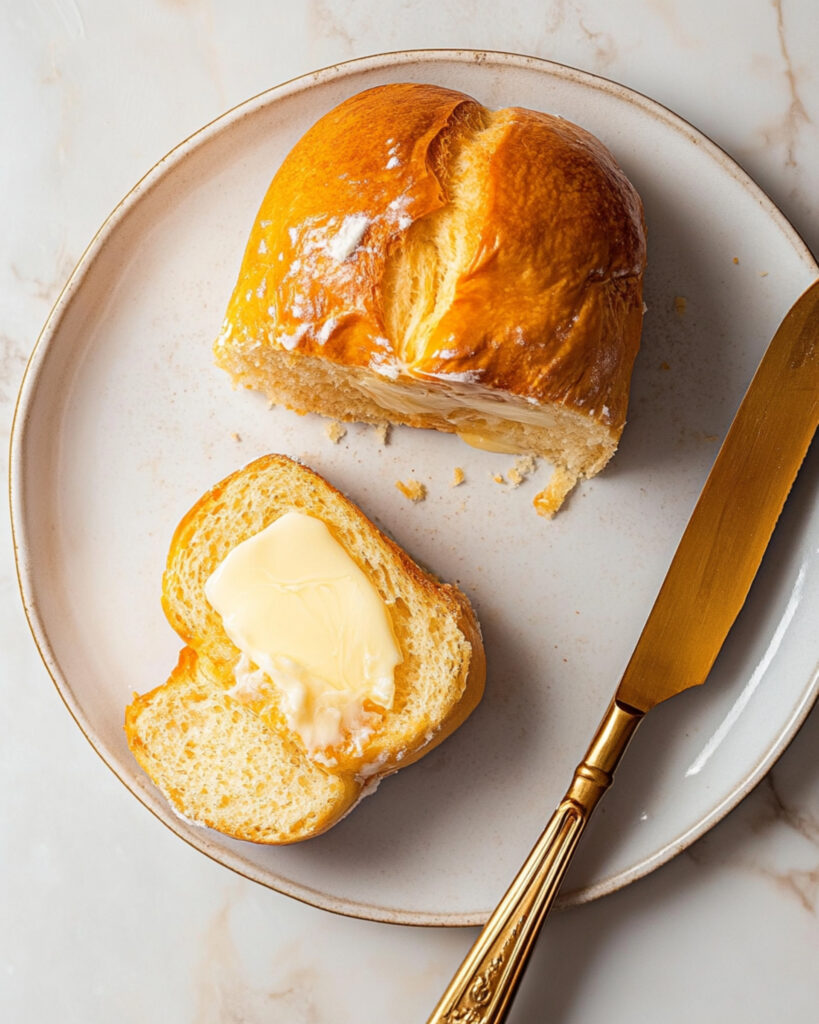
Split and toast the buns lightly, then spread with salted butter for a simple but perfect breakfast alongside a cup of tea or coffee.
Elevated Brunch
Serve as part of an Easter or spring brunch spread alongside scrambled eggs, fresh fruit, and yogurt parfaits.
Dessert Transformation
Turn leftover buns into an incredible bread pudding by cutting them into cubes, soaking in custard, and baking until golden and puffy.
Make Ahead and Storage
Storing Leftovers
Store cooled buns in an airtight container at room temperature for up to 2 days. For longer storage, refrigerate for up to 5 days, though the texture will be best in the first 48 hours.
Freezing
These buns freeze beautifully! Place completely cooled buns in a freezer-safe container or bag and freeze for up to 3 months. Thaw at room temperature or overnight in the refrigerator.
Reheating
For that fresh-baked taste, wrap buns in foil and warm in a 300°F oven for about 10 minutes. Alternatively, split and toast them, or give them a quick 15-20 second zap in the microwave.
FAQs
-
Why didn’t my dough rise properly?
The most common culprits are inactive yeast or temperature issues. Make sure your milk is warm (about 110°F) but not hot, which would kill the yeast. Also check that your yeast isn’t expired, and be sure to place the dough in a warm, draft-free spot for rising. If your kitchen is cold, create a warm environment by placing the covered dough in an oven with just the light turned on.
-
Can I make these without a stand mixer?
Absolutely! You can mix the dough by hand in a large bowl, then knead on a floured surface for about 10-12 minutes until smooth and elastic. The dough will be slightly sticky, so resist the temptation to add too much extra flour, which could make the buns dense.
-
How do I know when the buns are fully baked?
Perfectly baked hot cross buns should be golden brown on top and sound hollow when tapped on the bottom. If you have an instant-read thermometer, the internal temperature should read around 190°F. If they’re browning too quickly but aren’t done inside, cover them loosely with foil for the remainder of baking time.
-
Can I prepare the dough the night before?
Yes! After the first rise, shape the buns and place them in the baking dish, then cover and refrigerate overnight. The next morning, let them come to room temperature and complete their second rise (this may take a bit longer since they’re starting cold) before adding the crosses and baking.
Final Thoughts
There’s something deeply satisfying about creating these traditional Hot Cross Buns from scratch. The process connects you to centuries of baking tradition, while filling your home with the most incredible spiced aroma. Don’t worry about perfection – even slightly imperfect homemade buns have character and taste far better than anything store-bought. Give yourself the gift of this baking experience, and watch as friends and family gather around to enjoy the fruits of your labor. I promise the first bite of that warm, spiced bun will convince you that the effort was absolutely worth it!
Print
Easy Hot Cross Buns Recipe
- Prep Time: 20 minutes
- Cook Time: 24 minutes
- Total Time: 2 hours (including rise time)
- Yield: 12 rolls
- Category: Bread
- Method: Baking
- Cuisine: British/European
- Diet: Vegetarian
Description
Soft, lightly sweetened, and fragrantly spiced, these easy hot cross buns are perfect for any occasion, particularly during Easter. These homemade buns are enriched with dried fruit and topped with their iconic cross and a delicate glaze. Whether served warm or at room temperature, they are guaranteed to delight your taste buds.
Ingredients
For the Dough:
- 1/2 cup raisins or dried currants
- 3/4 cup warm milk, divided
- 1/2 cup granulated sugar, divided
- 1/4 cup unsalted butter, softened
- 1/2 teaspoon salt
- 1 envelope (2 1/4 teaspoons) active dry yeast
- 2 large eggs, beaten
- 3 1/2 cups all-purpose flour
- 1/2 teaspoon ground cinnamon
- 1/4 teaspoon ground nutmeg
- 1/4 teaspoon ground cloves
- 2 teaspoons baking powder
For the Crosses:
- 1/2 cup all-purpose flour
- 5 tablespoons water
For the Glaze:
- 1 tablespoon apricot jam
- 2 teaspoons water
Instructions
- Prepare the Raisins/Currants
In a small bowl, pour 1 cup of boiling water over the raisins or dried currants. Let sit for 10 minutes to rehydrate. Drain and set aside. - Activate the Yeast
Combine 1/4 cup of warm milk, 1 teaspoon sugar, and active dry yeast in a small bowl. Stir well and let it rest for about 10 minutes, or until bubbly and activated. - Mix the Wet Ingredients
In the bowl of a stand mixer, combine the remaining warm milk, the rest of the sugar, softened butter, and salt. Add the beaten eggs, yeast mixture, ground spices (cinnamon, nutmeg, and cloves), and baking powder. Mix until combined. - Form the Dough
Attach the dough hook to the mixer. Gradually add the all-purpose flour, one cup at a time, mixing until a soft dough forms. Let it knead on low speed for about 10 minutes or until the dough is smooth and elastic. - Incorporate the Raisins/Currants
Pat dry the rehydrated raisins/currants if damp and add them to the dough. Mix briefly until uniformly distributed. - First Rise
Lightly grease a large bowl with butter or cooking spray. Transfer the dough into the bowl, cover with plastic wrap, and let it rise in a warm place until it doubles in size, about 1 hour. Alternatively, place it in a warm oven with the light on for proofing. - Shape the Dough
Once risen, divide the dough into 12 equal portions (approximately 1/3 cup each). Shape into balls using greased hands, then place them into a greased 9×13-inch baking dish, slightly spaced apart. - Second Rise
Cover the baking dish with plastic wrap and allow the dough balls to rise for another 45 minutes to 1 hour, until puffed. Preheat the oven to 375°F midway through the rising time. - Prepare and Pipe the Crosses
Mix together the flour and water for the crosses. Transfer the mixture into a zip-top bag and snip a small corner. Pipe a cross over the top of each bun. - Bake the Buns
Place the baking dish in the preheated oven and bake for 20-24 minutes, or until the buns are golden brown on top. - Glaze the Buns
While the buns are baking, microwave the apricot jam and water until warm, then stir to combine. Brush the glaze over the warm buns after baking. Serve warm or at room temperature.
Notes
- For a richer flavor, you can soak the raisins or currants in warm orange juice instead of water.
- If you want fluffier buns, let the dough rise longer during both proofing stages.
- The buns can be stored in an airtight container at room temperature for up to 2 days or refrigerated for up to 5 days. Reheat slightly before serving.
- Feel free to customize by adding citrus zest or substituting the raisins with dried cranberries.
Nutrition
- Serving Size: 1 bun
- Calories: 220
- Sugar: 10g
- Sodium: 150mg
- Fat: 5g
- Saturated Fat: 3g
- Unsaturated Fat: 2g
- Trans Fat: 0g
- Carbohydrates: 38g
- Fiber: 2g
- Protein: 5g
- Cholesterol: 35mg
