

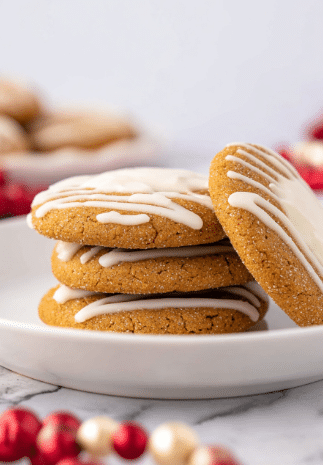
If you adore simple, buttery treats that just melt in your mouth, then you’re going to fall head over heels for this Danish Butter Cookies Recipe. These cookies are crisp, tender, and impossibly easy to make, using just four everyday ingredients. I remember the first time I baked these—I was amazed at how such a straightforward recipe could taste so luxurious. Whether you’re gifting them or sneaking a few for yourself, these cookies quickly become a family favorite.
Why You’ll Love This Recipe
- Simplicity at its Best: Only four ingredients create cookies that feel fancy but are super easy to make.
- Perfect Texture: Light, crisp edges and a delicate melt-in-your-mouth center every time.
- Lovely Presentation: Using a piping bag lets you shape these cookies beautifully with minimal effort.
- Versatile Delight: Great for tea time, gifts, or holiday celebrations—always a crowd pleaser.

Ingredients You’ll Need
These simple ingredients blend perfectly to create buttery, crisp cookies with just a hint of vanilla sweetness. Picking good quality butter and fresh vanilla extract really makes a difference here.
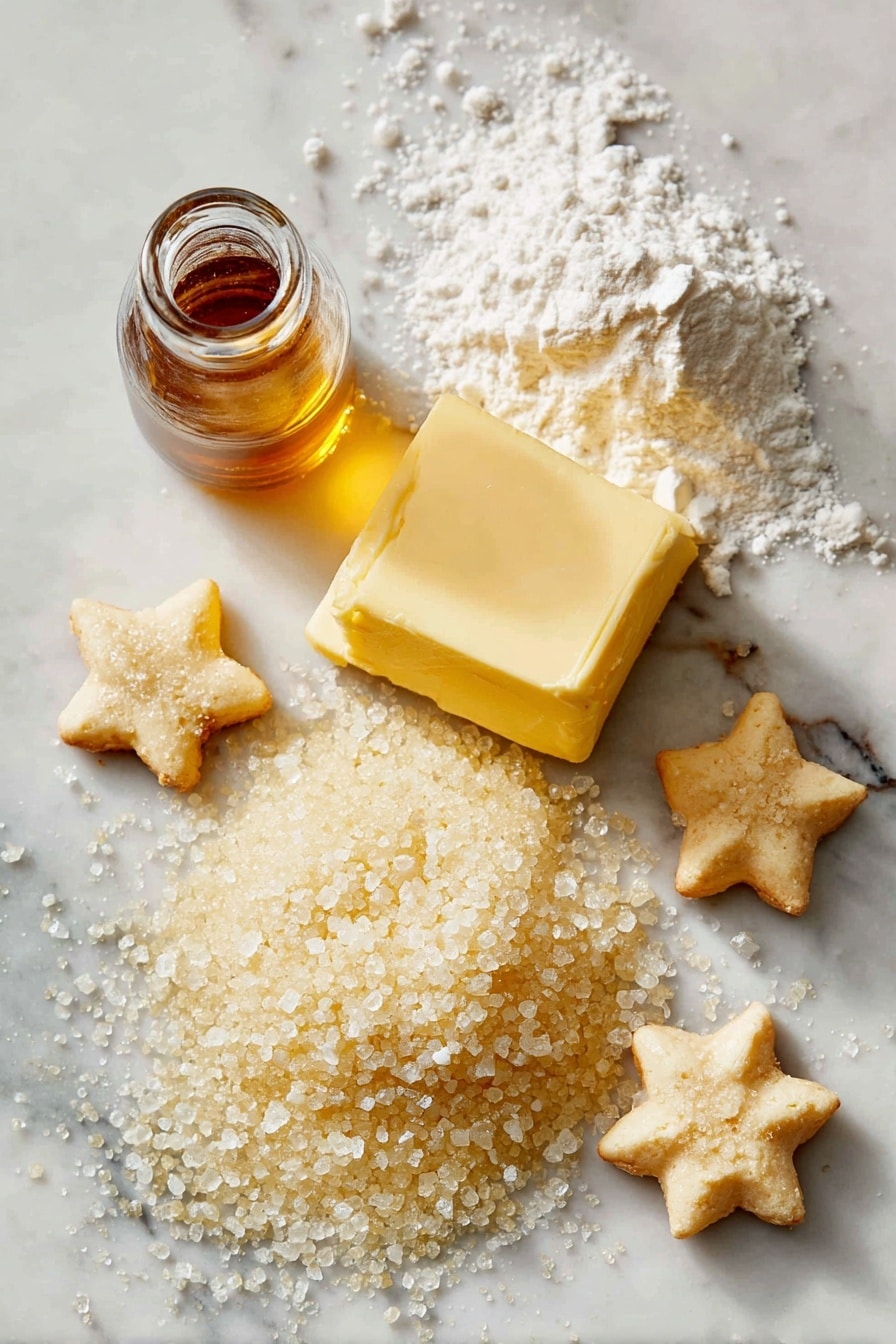
- Butter: Use unsalted butter at room temperature to control the saltiness and create that dreamy creamy texture.
- Powdered sugar: It ensures your dough stays smooth and delicate, avoiding any gritty texture.
- Vanilla extract: Adds a fragrant warmth that lifts this humble cookie to something special.
- Cake flour or all-purpose flour: Cake flour yields an extra tender crumb, but all-purpose works fine if that’s what you have on hand.
Variations
One of the great things about my Danish Butter Cookies Recipe is how easily you can make it your own. I often tweak the flavors or textures depending on the occasion—and you should too!
- Almond Twist: I love adding a sprinkle of finely chopped almonds right on top before baking for a nutty crunch.
- Chocolate Dip: Dip half of each cookie in melted dark chocolate—my family goes crazy for this indulgence.
- Gluten-Free Adaptation: Swap in a gluten-free flour blend; just be gentle when folding to maintain the delicate texture.
- Flavored Variations: Try citrus zest or a pinch of cardamom in the dough for a subtle twist that impresses guests.
How to Make Danish Butter Cookies Recipe
Step 1: Bring Butter to the Perfect Softness
This is a crucial step! Take the butter out of the fridge at least an hour before baking so it’s soft but not melty. When you press it, it should give slightly without being oily. This lets you cream it easily with the sugar for that light, fluffy texture that makes these cookies so special.
Step 2: Cream Butter, Sugar, and Vanilla Until Fluffy
Using a mixer, whip together the butter, powdered sugar, and vanilla extract for 5 to 8 minutes until the mixture looks pale and fluffy. This aeration step is what gives the cookies their delicate crumb—so don’t rush it! Occasionally scrape down the sides of your bowl with a spatula to mix everything evenly.
Step 3: Gently Fold in the Flour
Sift your flour and add it in thirds to the creamed butter mixture, folding carefully each time with a spatula. You want the flour fully incorporated without overmixing—overworking the dough can make your cookies tough. The dough should be soft and hold together well but still pipeable.
Step 4: Prepare the Dough for Piping
Transfer your beautiful dough onto a sheet of plastic wrap and shape it into a long log. Poke a hole in one end of the wrap and fit it into a piping bag with a large open star nozzle. This is my favorite trick for those iconic ridged Danish butter cookies! If the dough feels too stiff to pipe, just add a tablespoon of warm milk and mix gently—it’ll loosen right up.
Step 5: Pipe and Chill the Cookies
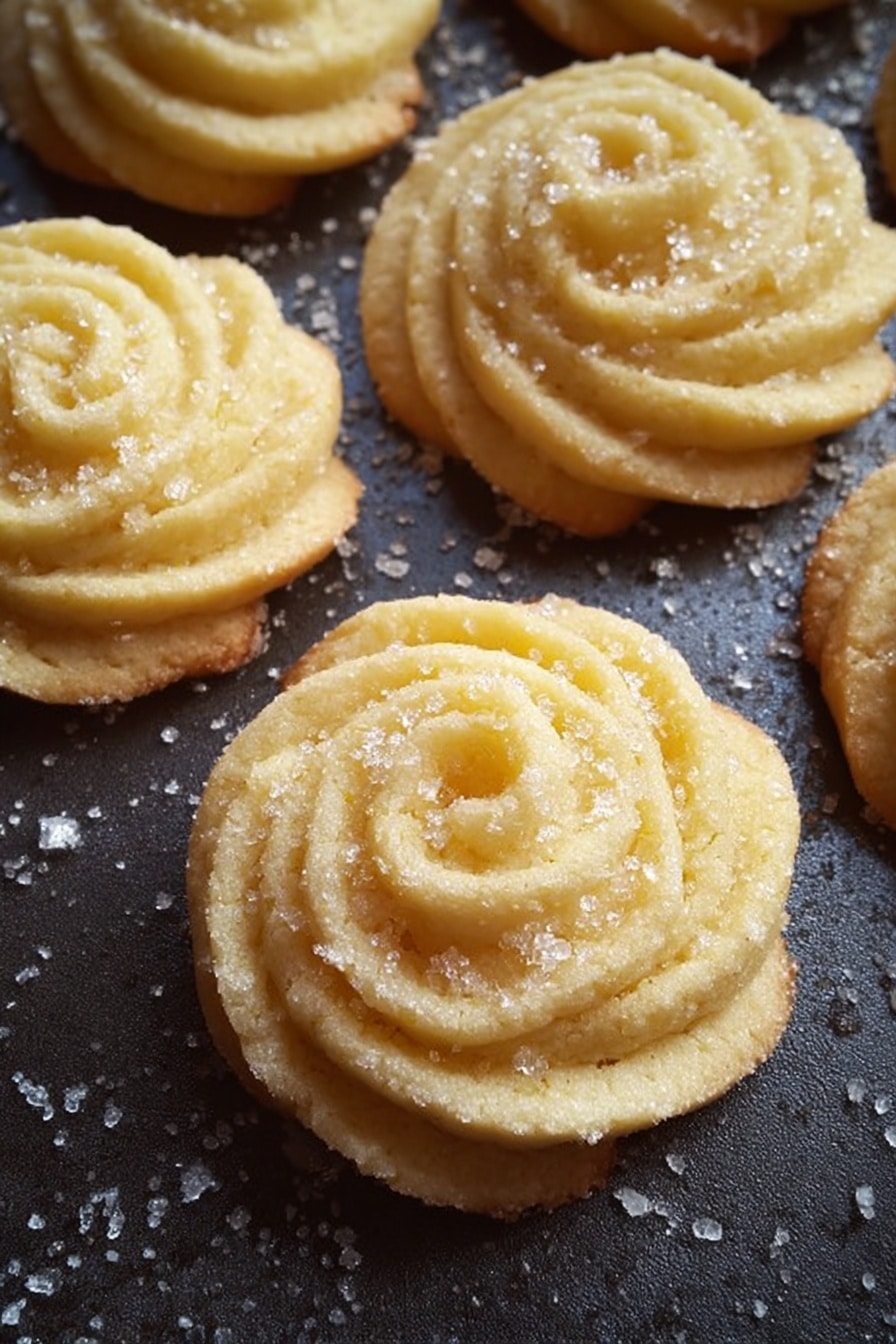
Pipe the dough into swirled cookies on a lined baking sheet, spacing them a couple of inches apart. Pop the sheet into the fridge for 30 minutes to firm up the cookie shapes—this step is a game changer for keeping those delicate designs crisp and defined when baked.
Step 6: Bake to Golden Perfection
Preheat your oven to 300°F (150°C) and bake the cookies for about 15 minutes, or until the edges just begin to turn golden. I like to sprinkle some granulated sugar over the tops before baking for extra sparkle and crunch, but they’re just as lovely plain. Once out, let them cool on the sheet for 10 minutes—they’ll firm up more as they cool, making them perfect for nibbling or storing.
Pro Tips for Making Danish Butter Cookies Recipe
- Butter Temperature Matters: Using butter that’s too cold or melted will affect the creamy texture of the dough—soft, slightly cool butter is best.
- Don’t Skip Chilling: Refrigerating the piped cookies ensures they hold their shape instead of spreading into flat discs.
- Flour Folding Technique: Fold flour gently to keep the dough light, giving you that iconic tender crumb.
- Baking Time Awareness: Keep an eye on the edges turning gold—they can go from perfect to overdone really fast at 300°F.
How to Serve Danish Butter Cookies Recipe
Garnishes
I often sprinkle mine with coarse sugar or a light dusting of powdered sugar for that elegant touch. Sometimes, I’ll dip one end in melted chocolate or press a few sugar crystals on top before baking to add texture and visual appeal. They make any cup of tea feel fancy.
Side Dishes
These cookies pair wonderfully with hot beverages like black tea, coffee, or even a creamy latte. I also love serving them alongside fresh fruit or a small cheese platter for an afternoon snack or light dessert.
Creative Ways to Present
For holidays or parties, I like arranging them in pretty tins or stacking them in clear jars tied with a ribbon. You can also group colored sprinkles into the dough or drizzle iced sugar glaze for seasonal flair—it’s a lovely way to personalize these classic Danish Butter Cookies.
Make Ahead and Storage
Storing Leftovers
I store leftover cookies in an airtight container at room temperature. They keep their crunch and flavor beautifully for up to a week — perfect if you want to bake ahead for gatherings or gifts.
Freezing
If I’m making a big batch, I freeze some cookies in a sealed bag with parchment between layers to prevent sticking. They thaw at room temperature in about 30 minutes, tasting just as fresh as the day they were baked.
Reheating
To refresh the cookies, I like to warm them gently in a 300°F oven for 3–4 minutes—this revives the crisp edges without drying them out. Avoid the microwave, which can make them chewy rather than crunchy.
FAQs
-
Can I make Danish Butter Cookies Recipe without a piping bag?
Absolutely! While piping gives the classic look, you can also shape the dough into small balls and flatten them lightly with a fork or your palm. The texture will still be delicious, just with a different appearance.
-
What’s the best flour for Danish Butter Cookies Recipe?
Cake flour is ideal because it produces a lighter, more delicate crumb. However, if you only have all-purpose flour, you can use that—just be gentle when mixing to keep your cookies tender.
-
Can I use salted butter in this recipe?
Yes, but be mindful of the salt level. Salted butter can vary in saltiness, so you might want to skip adding any extra salt elsewhere, and taste carefully to avoid overly salty cookies.
-
How long do Danish Butter Cookies last fresh?
Stored in an airtight container at room temperature, these cookies stay fresh and crunchy for up to a week—perfect for enjoying over several days or sharing with friends.
-
Can I add flavors or toppings to the cookies?
Definitely! Feel free to mix in citrus zest, a pinch of cardamom, or sprinkle sugar or nuts before baking. These little tweaks give your Danish Butter Cookies a personalized touch.
Final Thoughts
I absolutely love how this Danish Butter Cookies Recipe brings out that classic, buttery flavor with such ease and elegance. It’s the kind of recipe you’ll come back to time and again, whether you’re baking for a cozy afternoon, special celebrations, or just because you need a little treat. Give it a try—you’ll enjoy the process as much as the tasty results, I promise!
Print
Danish Butter Cookies Recipe
- Prep Time: 15 minutes
- Cook Time: 15 minutes
- Total Time: 1 hour
- Yield: 14 cookies
- Category: Dessert
- Method: Baking
- Cuisine: Danish
Description
Classic Danish Butter Cookies that are light, crisp, and delicate with a melt-in-your-mouth texture. Made with just four simple ingredients, these buttery treats are piped into charming shapes and baked to golden perfection, perfect for any occasion or simply enjoying with a cup of tea.
Ingredients
Dough Ingredients
- ½ cup butter (at room temperature)
- ½ cup powdered sugar
- 1 teaspoon vanilla extract
- 1 cup cake flour OR all-purpose flour
Optional Topping
- Granulated sugar for sprinkling (optional)
- 1 tablespoon warm milk (only if dough is too stiff to pipe)
Instructions
- Prepare the Butter: Take the butter out of the refrigerator at least an hour before baking so it becomes soft to the touch but not melted, enabling easier creaming with sugar.
- Cream Butter and Sugar: Using a handheld or stand mixer, cream the butter, powdered sugar, and vanilla extract for 5 to 8 minutes until the mixture is light in color and fluffy in texture. Scrape down the sides of the bowl with a spatula during mixing to ensure even incorporation.
- Incorporate Flour: Sift the flour to remove lumps. Add the flour in thirds (about 40g at a time) to the creamed butter mixture, gently folding each portion in with a spatula until fully combined to form the cookie dough.
- Prepare Dough for Piping: Transfer the dough onto plastic wrap and roll it into a log. Cut an opening at one end of the plastic wrap and fit this end into a piping bag fitted with an open star (1M) piping tip.
- Pipe the Cookies: Pipe the dough onto a baking sheet lined with a silicone mat or parchment paper, creating flower-shaped cookies. If the dough feels too stiff to pipe, add a tablespoon of warm milk to soften it slightly and improve pipeability.
- Chill the Cookies: Place the baking sheet with piped cookies in the refrigerator for 30 minutes to firm up the dough. This step helps maintain the beautiful piped shapes during baking by preventing spreading.
- Optional Sugar Topping: Before baking, sprinkle granulated sugar over the cookies if desired for added sweetness and texture.
- Bake: Preheat the oven to 300°F (150°C or 148°C fan). Bake the cookies for approximately 15 minutes, or until the edges start to turn a golden color.
- Cool and Store: Remove the cookies from the oven and let them cool on the baking sheet for 10 minutes. Once cooled, serve immediately or store them in an airtight container to maintain freshness.
Notes
- This recipe yields light, crisp, and delicate butter cookies that melt in your mouth.
- Only four basic ingredients are required, making it a super easy and quick bake.
- If the dough is too stiff for piping, add a tablespoon of warm milk to soften it without altering the texture.
- Chilling the piped cookies ensures they keep their intricate shapes while baking.
- Sprinkling granulated sugar on top before baking is optional but adds a nice crunch and sweetness.
Nutrition
- Serving Size: 1 cookie
- Calories: 47 kcal
- Sugar: 3 g
- Sodium: 9 mg
- Fat: 1 g
- Saturated Fat: 1 g
- Unsaturated Fat: 0 g
- Trans Fat: 0 g
- Carbohydrates: 9 g
- Fiber: 0 g
- Protein: 0.5 g
- Cholesterol: 1 mg


