

If you want to wow your friends and family this holiday season, you have to try this Christmas Pavlova Wreath Recipe. It’s not just beautiful, it’s a showstopper with crisp, marshmallow-soft meringue crowned with whipped cream and vibrant fruits—perfect for lighting up your festive table. Keep reading because I’m sharing all the tips that’ll make you nail this stunning dessert every single time.
Why You’ll Love This Recipe
- Spectacular Presentation: The wreath shape makes it a festive centerpiece that’s almost too pretty to eat.
- Perfect Texture: Crispy outside with that soft, marshmallow goo inside—a true meringue dream.
- Flexible Decorating: Top with whatever seasonal fruits you love, making it totally customizable.
- Make-Ahead Friendly: You can make the meringue in advance to save yourself holiday stress.

Ingredients You’ll Need
The magic of this Christmas Pavlova Wreath Recipe starts with simple, quality ingredients that come together beautifully. Each one plays a key role in creating that airy, light texture and festive flavor.
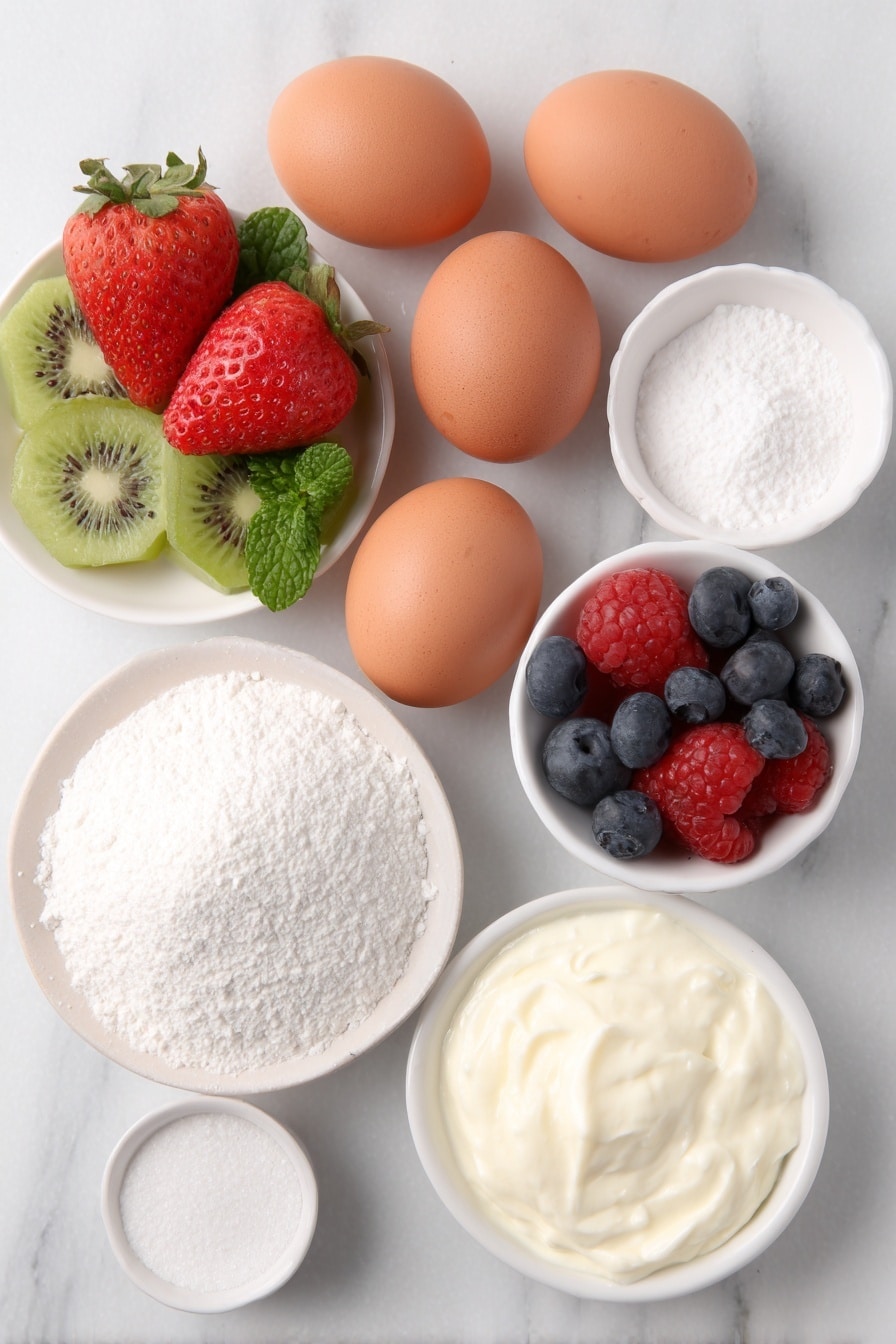
- Egg whites: Fresh, large eggs give the best volume—make sure there’s no yolk mixed in for perfect peaks.
- Caster sugar: Fine sugar dissolves quickly into the egg whites for that glossy finish.
- White wine vinegar: Adds a subtle tang and helps stabilize the meringue for a better structure.
- Cornflour: Keeps the meringue soft inside while the outside crisps up beautifully.
- Double cream: Choose the richest cream you can find for luscious whipped topping.
- Vanilla bean paste: It’s a little flavor upgrade over extract, giving a wonderful vanilla aroma.
- Fruit of your choice: Berries, kiwi, pomegranate arils—you name it! Fresh, colorful fruits make this wreath pop.
- Mint leaves: For a fresh green contrast that adds to the wreath’s festive look.
- Icing sugar: A light dusting for that classic snowy finish on top.
Variations
I love that this Christmas Pavlova Wreath Recipe is so adaptable. Whether you want to keep it traditional or try a different spin, there are lots of ways to personalize it to suit your taste or dietary needs.
- Tropical Twist: I once swapped the berries for mango, passionfruit, and kiwi—such a bright and fresh variation that wowed my guests.
- Dairy-Free Option: You can use coconut cream instead of double cream to keep things vegan without sacrificing richness.
- Nutty Crunch: Toasted nuts like pistachios or almonds sprinkled on top add a delightful crunch and holiday flair.
- Chocolate Drizzle: For an indulgent touch, drizzle with melted dark chocolate just before serving—Christmas magic on a plate.
How to Make Christmas Pavlova Wreath Recipe
Step 1: Whisking the Egg Whites to Perfect Peaks
Start with your room-temperature egg whites in a clean, dry bowl—any grease will stop them from whipping properly. Whisk them until you get soft peaks, which means when you lift the whisk, the peaks just hold but droop slightly. I love using an electric mixer for this—it saves your arms and is so consistent. Then, gradually add the caster sugar a spoonful at a time while whisking on high speed. The mixture should become glossy and hold stiff peaks—think shiny and firm. This step really sets the stage for a stable meringue.
Step 2: Gentle Folding and Shaping the Wreath
Mix the cornflour and white wine vinegar to a smooth slurry and fold it carefully into the meringue—this little trick helps keep the inside soft and chewy. Then, on a lined baking tray, draw two concentric circles—a big 30cm one and a smaller 15cm one inside—to create the wreath shape. Spoon and carefully spread the meringue between the circles, flattening the top so it’s even. Remember, the meringue will puff up a bit while baking, so avoid spreading it too thin. It’s like sculpting your own edible Christmas decoration!
Step 3: Baking Low and Slow
Bake the meringue initially at a higher temperature for 10 minutes, then lower it to 140˚C (fan 120˚C) for about an hour to an hour and 15 minutes. This slow drying is what gives you that crisp shell and soft center. Resist the urge to open the oven door too often—each peek can cause cracks or collapse. Once baked, switch off the oven and leave the meringue inside to cool and dry out for at least an hour, or even overnight if you can wait. I learned this patience pays off with perfectly set pavlova every time.
Step 4: Whipping the Cream and Decorating
Whip your double cream with vanilla bean paste till you get soft but firm peaks—be careful not to overwhip or it’ll turn grainy. Spread the cream generously over your cooled pavlova wreath and start layering your chosen fruits on top. I usually go for a mix of bright berries and shiny pomegranate arils to give that true Christmas feeling. Finish with fresh mint leaves and a dusting of icing sugar to mimic a delicate blanket of snow.
Pro Tips for Making Christmas Pavlova Wreath Recipe
- Use Room Temperature Eggs: They whip up faster and to a higher volume than cold eggs straight from the fridge.
- Add Sugar Slowly: Pouring sugar in slowly lets it dissolve properly—this helps prevent a gritty meringue texture.
- Don’t Skip the Slurry: That cornflour and vinegar mix is the secret to keeping your pavlova soft inside, not just crispy all over.
- Cool in the Oven: Avoid drastic temperature changes by letting the pavlova cool gradually inside the oven—keeps cracks at bay.
How to Serve Christmas Pavlova Wreath Recipe
Garnishes
I love to keep my garnishes fresh and festive: juicy red berries, bright pomegranate seeds, and those little bursts of green mint leaves. The contrast in color and flavor brings the wreath to life, and the mint adds a nice freshness that cuts through the sweet cream. A light dusting of icing sugar is the perfect final touch—it looks like snow and makes it instantly more festive.
Side Dishes
This pavlova pairs beautifully with a sparkling dessert wine or a warm cup of spiced tea to balance all that sweetness. If you want to make it a fuller holiday feast, try serving it alongside some rich Christmas pudding or traditional mince pies for a mix of textures and flavors that keep everyone coming back for more.
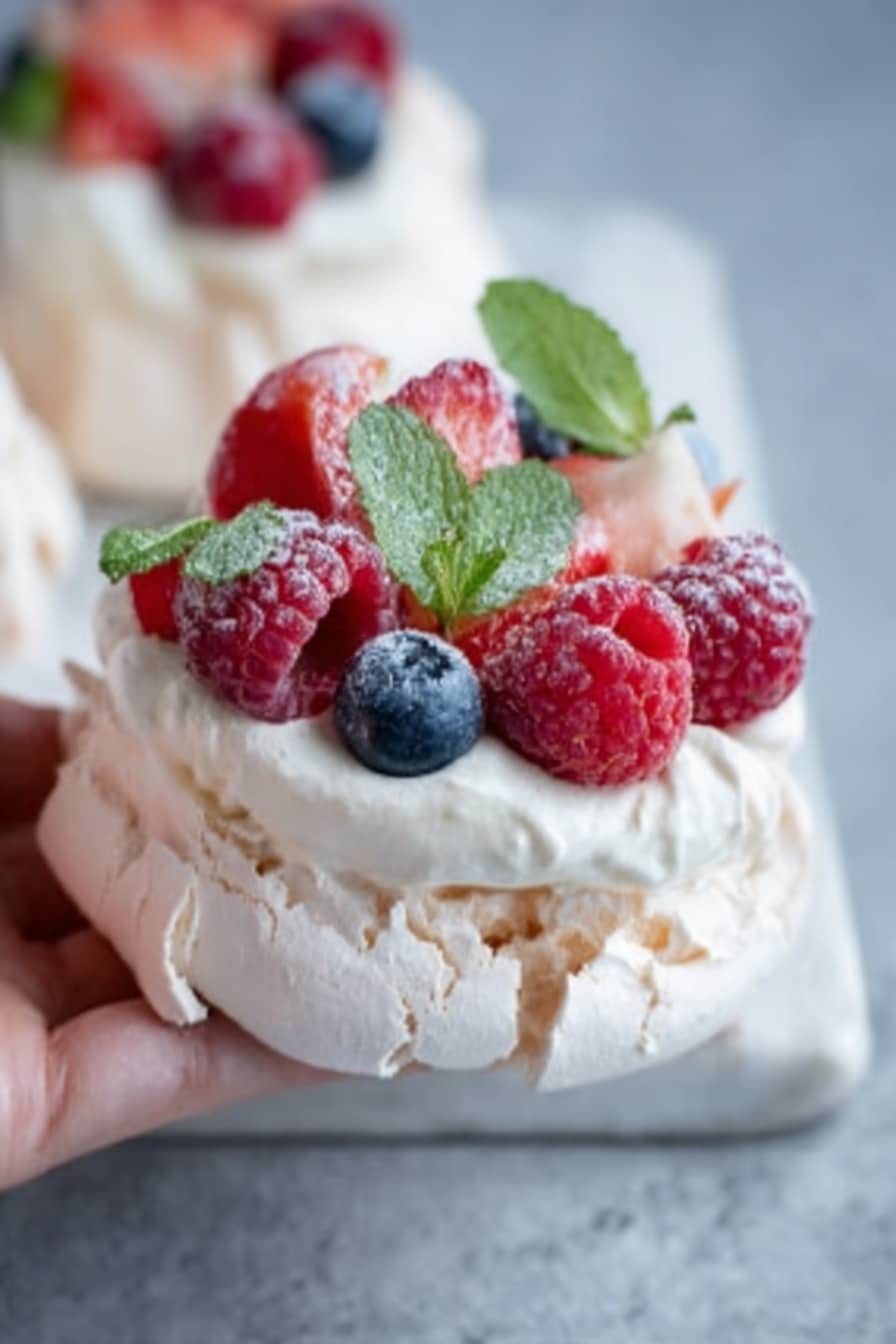
Creative Ways to Present
Once, I made mini pavlova wreaths for individual servings—so cute and perfect for parties! You can also assemble the wreath directly on a festive platter lined with holly or pine sprigs to amp up the holiday vibe. Another idea is to thread edible flowers or cranberries onto toothpicks and stick them into the cream for an edible “wreath garland.” These little touches make the dessert even more memorable.
Make Ahead and Storage
Storing Leftovers
If you happen to have leftovers (lucky you!), store the pavlova wreath in an airtight container in the fridge. However, keep in mind the meringue will soften over time from the moisture of the cream and fruit, so it’s best eaten within 24 hours for that classic crisp-tender texture.
Freezing
I don’t recommend freezing the fully assembled wreath because the cream and fruit won’t thaw well. But if you want to prep ahead, you can freeze the baked pavlova base wrapped well in plastic wrap and foil for up to a month. When ready, just thaw it at room temperature and assemble with fresh cream and fruit.
Reheating
Meringue pavlovas aren’t really suited to reheating—the magic is in the cool, crisp shell and fluffy inside. If your wreath softens a bit after storage, serving it chilled or at room temperature is best. Just add fresh whipped cream and fruits to refresh the flavors.
FAQs
-
Can I make the meringue base ahead of time?
Absolutely! You can bake the pavlova base up to a day before your event. Store it in an airtight container at room temperature. Just add the cream and fruit just before serving to keep everything fresh and crisp.
-
Why did my pavlova crack?
Cracks are often caused by rapid temperature changes or opening the oven door too frequently while baking. To avoid this, bake at a low temperature and cool the pavlova slowly inside the oven once it’s turned off. Also, don’t stir the meringue too much — gentle folding is key.
-
What fruits work best on a Christmas Pavlova Wreath?
I love using seasonal fruits like strawberries, raspberries, blueberries, pomegranate seeds, and kiwi. These offer a mix of sweetness, tartness, and color that complement the creamy whipped topping beautifully.
-
Can I use a different shape instead of a wreath?
Of course! While the wreath shape is festive and fun, you can shape your pavlova into a circle, free form, or even into individual nests if you prefer. Just adjust the baking time accordingly.
Final Thoughts
This Christmas Pavlova Wreath Recipe has been a game changer for my holiday celebrations. I love how effortlessly it brings a bit of magic and sparkle to the table, impressing guests without needing hours of complicated prep. If you’ve been hesitant about making meringue, don’t be—follow the tips here, and you’ll have a dessert that’s as delightful to make as it is to eat. Give it a go this year, and let me know how your wreath turns out—I’m betting it’ll be the star of your Christmas feast!
Print
Christmas Pavlova Wreath Recipe
- Prep Time: 30 minutes
- Cook Time: 1 hour
- Total Time: 1 hour 30 minutes
- Yield: 16 servings
- Category: Dessert
- Method: Baking
- Cuisine: Western, Christmas
- Diet: Vegetarian
Description
This festive Christmas Pavlova Wreath is a stunning dessert centerpiece featuring crisp meringue, whipped cream, and a colorful arrangement of fresh fruits. Light, airy, and sweet, it’s perfect for holiday celebrations and is sure to impress your guests with its beautiful presentation and delicious flavors.
Ingredients
Meringue
- 6 large egg whites
- 350g caster sugar
- 1 tsp white wine vinegar
- 1 tsp cornflour
Cream Topping
- 600ml (20fl oz) double cream
- 5ml (1 tsp) vanilla bean paste
Decoration
- 700g (1½lb) fruit of your choice
- Mint leaves, to decorate
- Icing sugar, for dusting
Instructions
- Preheat oven and prepare baking sheet: Preheat the oven to 160˚C/fan 140˚C/320˚F/gas 3. Line a baking sheet with baking parchment and draw a 30cm circle on the paper, then draw a 15cm circle in the centre to create a ring shape for the pavlova.
- Whisk egg whites: Place the egg whites in the K-Mojo DigiMaster’s bowl and attach the whisk attachment. Whisk on medium speed until soft peaks form, which means the egg whites should hold a peak but still be soft and flexible.
- Add sugar gradually: Slowly add the caster sugar a little at a time while whisking on maximum speed. Continue whisking until the mixture becomes stiff and glossy, indicating a perfect meringue base.
- Incorporate vinegar and cornflour: In a separate cup, mix the cornflour and white wine vinegar to form a slurry. Gently fold this into the meringue mixture to help stabilize it and create the characteristic texture.
- Shape the pavlova ring: Spoon the meringue onto the ring traced on the baking parchment. Carefully spread and flatten the mixture to maintain the ring shape with an even thickness, keeping in mind it will expand during baking.
- Bake the meringue: Place the meringue into the oven, immediately reducing the temperature to 140˚C/fan 120˚C/280˚F/gas 1. Bake for 1 hour to 1 hour and 15 minutes until the outer shell is crisp and dry. You may leave it in the turned-off oven overnight to dry further, but rest it for at least one hour before continuing.
- Whip cream with vanilla: In a clean bowl, whip the double cream and vanilla bean paste until barely stiff peaks form. The cream should hold its shape but remain soft enough to spread easily.
- Assemble the pavlova wreath: Spoon the whipped cream onto the cooled meringue ring, spreading it evenly. Arrange your chosen fresh fruit attractively on top, covering the cream with a colorful layer.
- Garnish and serve: Decorate with fresh mint leaves for a festive touch and lightly dust with icing sugar for added sweetness and visual appeal. Serve a thick slice as an elegant holiday dessert.
Notes
- Christmas Pavlova makes a beautiful and impressive centerpiece dessert for holiday meals.
- Customize the fruit toppings using seasonal favorites such as berries, kiwi, pomegranate seeds, or citrus slices.
- For best texture, allow the pavlova to dry out sufficiently in the oven or overnight before adding the cream and fruit.
- Use fresh, high-quality eggs and cream for optimal taste and stability.
Nutrition
- Serving Size: A thick slice
- Calories: 201
- Sugar: 31.7 g
- Sodium: 26.7 mg
- Fat: 7 g
- Saturated Fat: 4.4 g
- Unsaturated Fat: 2.4 g
- Trans Fat: 0.2 g
- Carbohydrates: 33.6 g
- Fiber: 0.9 g
- Protein: 2.2 g
- Cholesterol: 21.5 mg
