

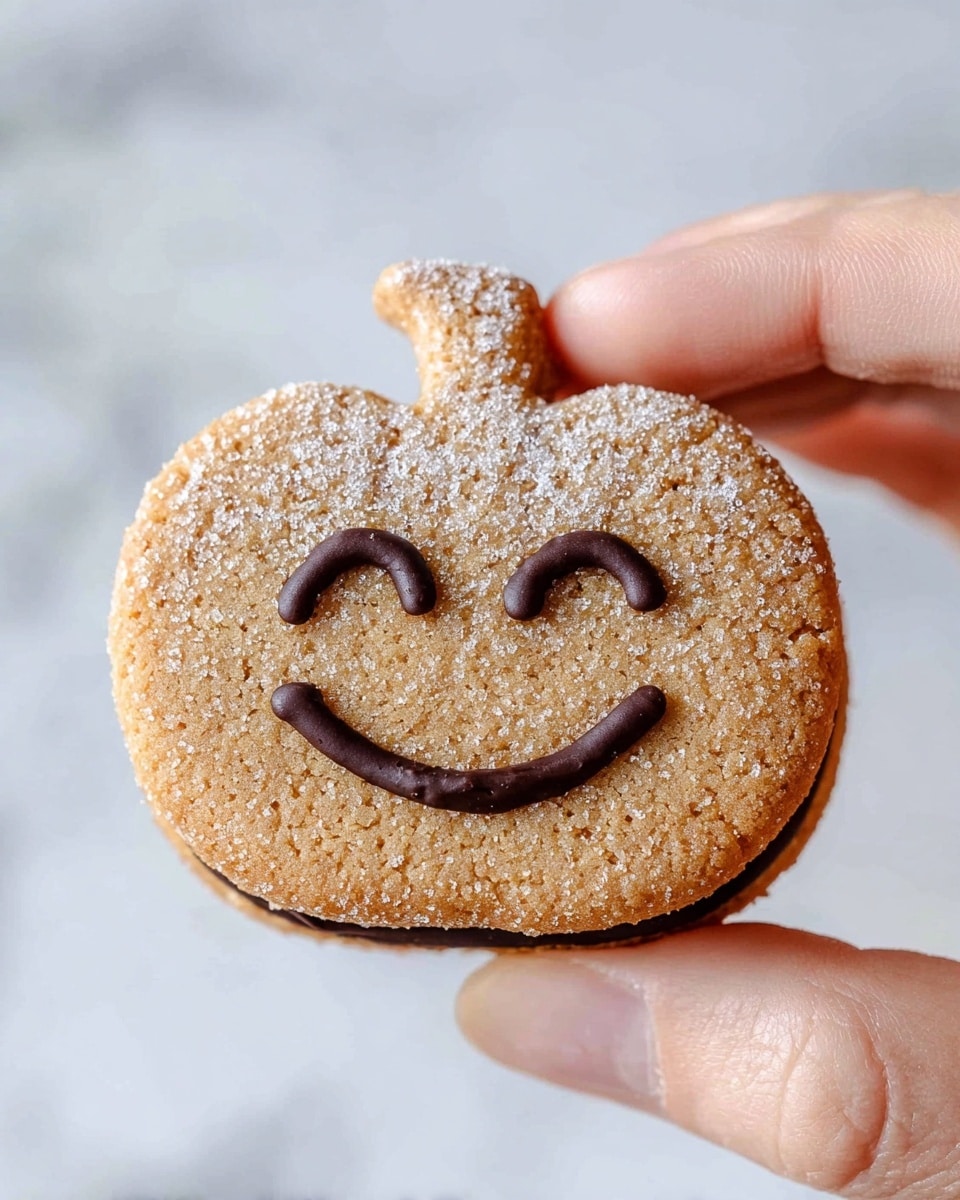
If you’re on the hunt for the perfect festive treat this fall, I absolutely love sharing this Chocolate Filled Halloween Pumpkin Cookies Recipe with friends and family. It’s one of those recipes that brings simple ingredients to life with a fun Halloween twist—soft, spiced pumpkin-shaped cookies sandwiched with creamy hazelnut spread and topped with a gooey chocolate filling in the cutest pumpkin faces. Trust me, the mix of textures and flavors here is fan-freaking-tastic, and I’ll walk you through everything so you can nail it on your first try.
Why You’ll Love This Recipe
- Perfect Fall Flavors: The cinnamon and brown sugar combo creates a warm aroma that screams cozy autumn days.
- Fun and Festive: Those pumpkin-shaped cookies with cute chocolate faces are a big hit at Halloween parties.
- Simple Yet Impressive: You don’t need fancy skills or weird ingredients to pull this off beautifully.
- Great for Sharing: Kids and adults alike go crazy for these – they make wonderful gifts too!

Ingredients You’ll Need
The ingredients for this Chocolate Filled Halloween Pumpkin Cookies Recipe come together in a way that’s approachable but packs big flavor. Each one plays a role to create the soft, sweet, and cuddly texture these cookies are loved for. I always recommend using good quality butter here because it really makes the difference in taste and texture!
- All-purpose flour: The base of the cookie dough, gives structure without being too dense.
- Salt: Enhances the sweetness and balances flavors.
- Baking powder: Helps the cookies rise just a touch to keep them tender.
- Cinnamon: Brings that lovely warming pumpkin-pie vibe.
- Unsalted butter: Use softened for the dough and melted for brushing – quality matters!
- Brown sugar: Adds moisture and that rich, caramel-like sweetness.
- Vanilla extract: For a subtle, deep flavor boost.
- Large egg: Binds ingredients and adds richness.
- Caster sugar: For sprinkling with cinnamon on top – finer texture than regular sugar.
- Hazelnut spread: The star of the filling – creamy and chocolatey with hazelnut goodness.
Variations
While I love the classic version, sometimes tweaking this Chocolate Filled Halloween Pumpkin Cookies Recipe keeps things exciting. You’ll find it’s easy to cater to different tastes or dietary needs without losing the recipe’s charm. Feel free to switch it up and make it your own!
- Nut-free option: Instead of hazelnut spread, I’ve tried sunflower seed butter with a drizzle of dark chocolate – still rich and creamy for the filling.
- Spice it up: Add a pinch of nutmeg or ginger to the dough for a more layered pumpkin spice flavor; my family loved this twist last Halloween.
- Vegan adaptation: Use vegan butter and an egg substitute like flax egg, plus a dairy-free chocolate-hazelnut spread. I experimented with this for a friend’s party and the results were surprisingly just as indulgent!
How to Make Chocolate Filled Halloween Pumpkin Cookies Recipe
Step 1: Whisk Dry Ingredients Together
Start by mixing the flour, salt, baking powder, and cinnamon in a medium bowl—just whisk to combine everything evenly. This little prep step will make sure your dough is consistently spiced and that your cookies bake evenly. I learned this trick makes a big difference, especially with cinnamon!
Step 2: Cream Butter and Sugar Until Fluffy
In a separate large bowl, whip the softened butter, brown sugar, and vanilla extract using an electric mixer until it’s pale and fluffy, about 5 minutes. Don’t rush this because it’s what makes your dough light and will help the cookies get that soft but tender texture I love. I always take a peek mid-mix to make sure everything’s blending well.
Step 3: Combine Dry and Wet Ingredients, Chill the Dough
Fold the dry flour mixture into the buttery sugar mix gently with a spatula until combined. Then split the dough into two discs and wrap them tightly in plastic wrap. Pop these in the fridge for at least an hour or, if you can, overnight. This chilling helps the dough firm up — which is crucial for rolling out and cutting perfect pumpkin shapes without them spreading too much when baked.
Step 4: Roll Out and Cut Pumpkin Shapes
Dust your work surface and rolling pin generously with flour and roll one disc of dough out to about 1/4 inch thick. Grab your pumpkin cookie cutter and get cutting – I usually get around 36 cookies from my batch. The colder your dough, the easier this will be. Transfer the cookies onto lined baking sheets, then chill them for another 30 minutes before baking. This step really helped me keep those cute shapes intact!
Step 5: Cut Faces and Bake
Use a small, sharp knife to carve little smiling mouths and eyes into half of your cookies—these will become the “jack-o’-lantern” tops. Then bake the sheet for about 15 minutes or until edges start to look golden. Baking time can vary depending on your oven, but there’s nothing worse than overbaking these tender cookies, so keep an eye on them from about 12 minutes onward.
Step 6: brush, sprinkle, and assemble
While the cookies cool, melt your butter for brushing and mix sugar with cinnamon for that final kick. Brush the plain cookie bottoms with melted butter and sprinkle cinnamon sugar on top for a sweet crunch I can’t get enough of. Then, add a dollop of warmed hazelnut spread, sandwich with the cookie faces, and finally pipe in the warm hazelnut spread to fill the eyes and mouth cutouts. This filling trick makes every bite a surprise, and my family always raves about the gooey chocolate pockets inside.
Pro Tips for Making Chocolate Filled Halloween Pumpkin Cookies Recipe
- Chill Twice for Shape: Chilling the dough before rolling and the shaped cookies before baking helps prevent spreading and keeps those cute pumpkin shapes clear.
- Use a Sharp Knife for Faces: I found a small craft or Stanley knife works perfectly for cutting clean, precise little eyes and mouths.
- Warm the Hazelnut Spread: Slightly warming it in the microwave makes it easier to spread on cookies and pipe into the faces smoothly.
- Avoid Overbaking: Cookies continue to firm up as they cool, so pull them out as soon as edges turn golden to keep them soft and chewy.
How to Serve Chocolate Filled Halloween Pumpkin Cookies Recipe
Garnishes
I love dusting a little extra cinnamon sugar on the finished cookies just before serving—it adds a sparkly, festive look and a bit of extra crunch you’ll appreciate. Sometimes, I garnish the platter with fresh rosemary sprigs or little candy corns around the edges to boost that Halloween vibe.
Side Dishes
These cookies pair wonderfully with a warm mug of spiced apple cider or a rich hot chocolate. I often set up a little dessert table with these drinks alongside the cookies—and trust me, the combo sends the party into full festive mode!
Creative Ways to Present
For a fun Halloween party, I’ve arranged these cookies in a giant pumpkin shape on a large white platter. Another time, I stacked them in clear jars tied with orange and black ribbons for sweet edible favors. The key is to embrace the pumpkin theme and go all out with colors and presentation!
Make Ahead and Storage
Storing Leftovers
After they’ve fully cooled, I store these cookies in an airtight container in the fridge, stacking them with parchment paper between layers so they don’t stick together. They stay fresh and delicious like this for up to two weeks—which is great if you want a little Halloween treat stash to last.
Freezing
You can freeze these cookies unassembled — the dough shaped but not baked — by wrapping the cookie shapes tightly in plastic wrap and placing them in a freezer bag. When you’re ready, just bake straight from frozen, adding a couple extra minutes to the bake time. I’ve also frozen the baked, filled cookies wrapped well, and they thaw beautifully without losing their texture.
Reheating
If you want to warm these cookies before serving, I pop them in a 325°F (160°C) oven for about 5 minutes. This slightly melts the hazelnut filling again, making the chocolate faces extra gooey and irresistible—not that they need any help getting devoured!
FAQs
-
Can I use store-bought cookie dough for this Chocolate Filled Halloween Pumpkin Cookies Recipe?
You could, but I recommend the homemade dough as outlined above for the best flavor and texture. Store-bought dough often lacks the cinnamon spice and buttery richness that really make these pumpkin cookies special. Plus, cutting out pumpkin shapes and faces is part of the fun!
-
What can I substitute for hazelnut spread if I have nut allergies?
Try using a seed butter like sunflower seed or tahini, paired with a drizzle of melted chocolate to mimic the creamy and rich filling. Just keep in mind the flavor will be different but still delicious. I’ve done this for friends with allergies and they loved the results.
-
Can I make these cookies vegan?
Yes! Swap the butter with a vegan butter alternative and replace the egg with a flax or chia egg. Use a dairy-free chocolate hazelnut spread, and you’re good to go. The texture will be slightly different but still incredibly tasty and festive.
-
How do I keep the cookies from spreading too much?
Chilling the dough twice—first before rolling and then after cutting shapes—really helps maintain those sharp pumpkin outlines. Also, avoid overworking the dough which can cause spreading. A cold oven helps as well, so make sure it’s preheated properly before baking.
-
Can I make these cookies in advance for a party?
Absolutely! You can bake them a day or two ahead and store in an airtight container. If you want the freshest filling, pipe the chocolate hazelnut spread into the faces just before serving. It’s a great way to save time on the day of your party.
Final Thoughts
This Chocolate Filled Halloween Pumpkin Cookies Recipe quickly became one of my all-time favorites because it’s both charming and delicious without complicated steps. I love how these cookies bring a smile to everyone’s face — literally! If you’re looking to impress guests or just treat yourself during the Halloween season, this recipe is a total winner. Give it a try, have fun crafting those little faces, and enjoy the pumpkin-spiced hug in every bite. You’re going to love how easy and rewarding this bake is, just like I do.
Print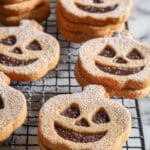
Chocolate Filled Halloween Pumpkin Cookies Recipe
- Prep Time: 20 minutes
- Cook Time: 15 minutes
- Total Time: 35 minutes
- Yield: Approximately 36 pumpkin-shaped cookies
- Category: Dessert
- Method: Baking
- Cuisine: American
Description
Delight in these festive Chocolate Filled Halloween Pumpkin Cookies, featuring soft brown sugar cookies shaped like pumpkins with cut-out faces filled with rich hazelnut spread and chocolate. Perfect for Halloween celebrations, these cookies combine warm spices like cinnamon with a creamy, chocolaty surprise inside.
Ingredients
Brown Sugar Cookies
- 2 1/2 cups all-purpose flour
- 1/4 tsp salt
- 1/4 tsp baking powder
- 1 tsp cinnamon
- 3/4 cup unsalted butter
- 3/4 cup brown sugar
- 1 tsp vanilla extract
- 1 large egg
Decorations
- 1/2 cup unsalted butter (melted)
- 1/2 cup caster sugar
- 1 tsp cinnamon (for cinnamon sugar mix)
- 1 cup hazelnut spread
- Remaining melted chocolate (for piping and filling faces)
Instructions
- Prepare Dry Ingredients: In a medium bowl, whisk together the all-purpose flour, salt, baking powder, and cinnamon until well combined. Set aside for later use.
- Cream Butter and Sugar: In a large mixing bowl, add the unsalted butter, brown sugar, and vanilla extract. Use an electric hand mixer to whip the mixture for about 5 minutes until it becomes pale and fluffy.
- Combine Ingredients: Gradually add the flour mixture to the butter and sugar mixture. Use a spatula to fold everything together until a uniform dough forms.
- Chill Dough: Divide the dough into two equal portions, wrap them tightly in plastic wrap, and refrigerate for at least 1 hour or overnight to firm up.
- Preheat Oven and Prepare Baking Sheets: Set your oven to 175°C (350°F). Line two baking trays with baking paper and set them aside.
- Roll Out Dough and Cut Shapes: Lightly flour your work surface and rolling pin. Roll out the dough and use a pumpkin-shaped cookie cutter to cut out as many cookies as possible, approximately 36.
- Chill Shaped Cookies: Place the cookies on the lined baking sheets. Refrigerate the trays for 30 minutes to help cookies hold their shape during baking.
- Cut Faces on Half the Cookies: Using a small or Stanley knife, carefully cut out small smiles and eyes on half of the pumpkin cookies.
- Bake Cookies: Bake the cookies in the preheated oven for 15 minutes or until golden brown around the edges.
- Prepare Cinnamon Sugar: While the cookies bake, mix 1/2 cup caster sugar with 1 tsp cinnamon to create cinnamon sugar.
- Cool and Decorate: Once baked, brush the cookies with melted butter and sprinkle them with the cinnamon sugar mix. Allow cookies to cool to room temperature.
- Fill and Assemble: Warm the hazelnut spread slightly and spread a small amount on the flat side of each uncut cookie. Sandwich each filled cookie with one of the cookies that have cut-out faces.
- Fill Faces with Chocolate: Place the remaining melted chocolate into a piping bag and carefully fill the cut-out eyes and smiles on the pumpkin faces for a festive, chocolaty finish.
Notes
- Storage: Store cookies in an airtight container in the refrigerator for up to two weeks to maintain freshness.
- Chilling the Dough: Chilling helps the cookies hold their shape and makes cutting easier.
- Custom Faces: Get creative with your pumpkin faces by changing the expression or using different shapes.
- Hazelnut Spread Substitute: You can substitute hazelnut spread with any chocolate or nut butter of preference.
Nutrition
- Serving Size: 1 cookie
- Calories: 150 kcal
- Sugar: 10 g
- Sodium: 90 mg
- Fat: 8 g
- Saturated Fat: 4 g
- Unsaturated Fat: 3 g
- Trans Fat: 0 g
- Carbohydrates: 18 g
- Fiber: 1 g
- Protein: 2 g
- Cholesterol: 25 mg


