

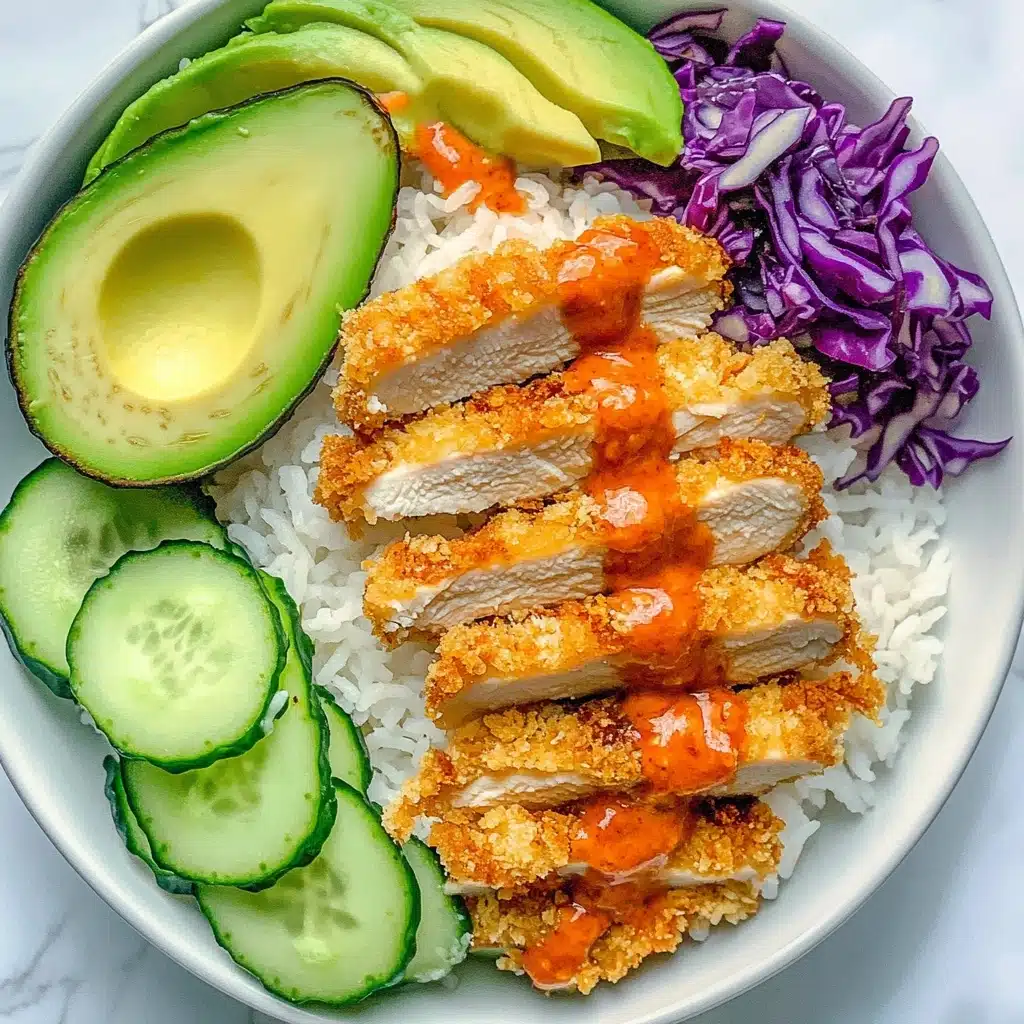
If you’re craving a dish that marries heartwarming comfort with bold and irresistible flavor, look no further than Chicken Katsu Bowls! This colorful meal layers golden, crispy chicken cutlets over a bed of fluffy rice, fresh veggies, and not one, but two mouthwatering sauces. Every bite is a symphony of crunch, zest, and creaminess you’re sure to love.
Why You’ll Love This Recipe
- Crispy Without the Guilt: Air-frying the chicken delivers the perfect golden crunch—no deep frying required!
- Two Incredible Sauces: You get the iconic, tangy-sweet tonkatsu sauce and a creamy curry drizzle, so every bite bursts with flavor.
- Wholesome and Colorful: Served with rice and a vibrant mix of fresh veggies, these Chicken Katsu Bowls are as nourishing as they are beautiful.
- Customizable for Any Palate: Whether you love it spicy or mild, veggie-packed or protein-forward, these bowls flex to fit your mood.

Ingredients You’ll Need
This recipe keeps things simple but delivers big, thanks to a handful of essentials that each bring something special. Together, these ingredients create the signature crunch, richness, and pop of color you expect from the best Chicken Katsu Bowls.
- Chicken Breasts: Use boneless, skinless breasts, sliced and pounded thin for ultra-tender cutlets that cook fast and evenly.
- Kosher Salt & Coarse Black Pepper: Just the right seasoning for flavorful, juicy chicken.
- Panko Breadcrumbs: Light and flaky Japanese breadcrumbs are the secret to that famously crisp katsu coating.
- Eggs: The key to getting the breading to cling like a pro.
- Cooking Spray: Ensures an evenly golden crust without excess oil.
- Ketchup, Worcestershire Sauce, Soy Sauce, Mirin, Dijon Mustard: This dream team creates the signature sweet, tangy tonkatsu sauce.
- Mayonnaise & Full-Fat Yogurt: The base for a lusciously creamy curry sauce that pairs beautifully with crispy chicken.
- Yellow Curry Powder & Lemon Juice: Brighten the curry sauce for a gently spiced, aromatic finish.
- Garlic: Fresh and punchy in the curry for an extra layer of flavor.
- White Rice: The perfect, fluffy foundation for your Katsu Bowl.
- Persian Cucumbers, Red Cabbage, Mixed Greens, Scallions: Add cool crunch, freshness, and color for a balanced bowl.
Variations
Chicken Katsu Bowls are endlessly flexible—think of them as your personal canvas! It’s so simple to swap in ingredients based on dietary needs, or just whatever you’re craving tonight.
- Make It Gluten-Free: Use gluten-free panko and tamari or coconut aminos to enjoy all the crispiness without any gluten.
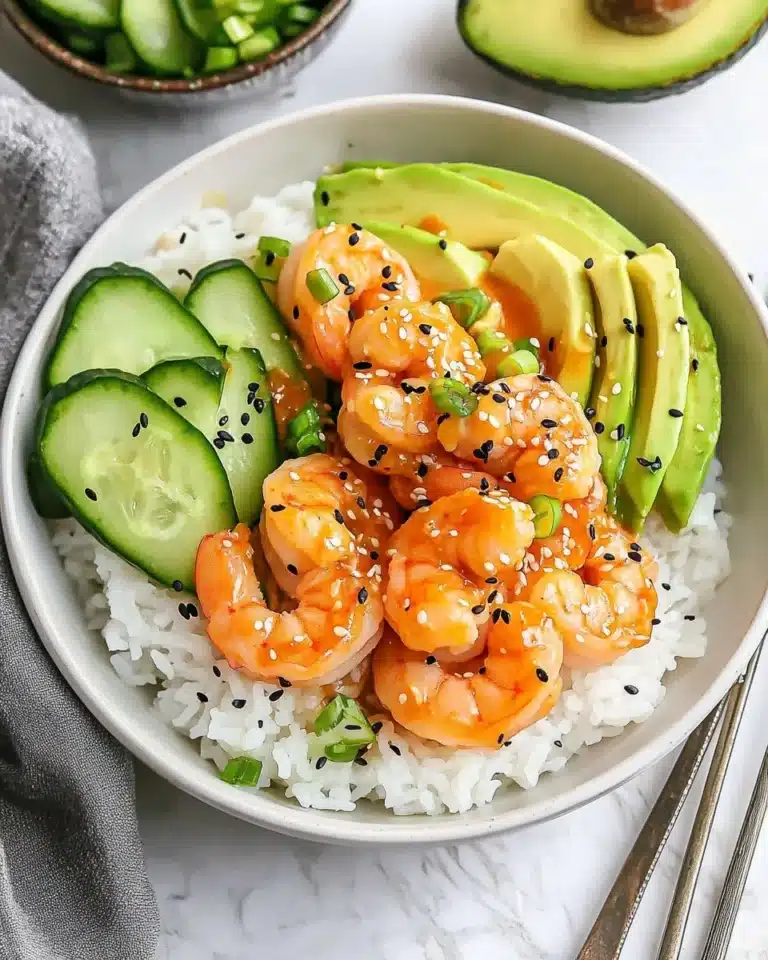
- Try Different Proteins: Swap chicken for tofu, pork, or even shrimp for a fun twist on classic katsu.
- Add a Spicy Kick: Toss some chili flakes into your tonkatsu or curry sauce, or serve with a swirl of Sriracha for heat lovers!
- Low-Carb Option: Serve your katsu cutlets over cauliflower rice or extra veggies for a lighter bowl.
How to Make Chicken Katsu Bowls
Step 1: Prep and Pound the Chicken
Slice chicken breasts in half horizontally, then gently pound them into ½-inch-thick cutlets. This creates juicy, even pieces that fry up perfection—don’t skip pounding, it’s the secret to restaurant-style katsu in your own kitchen!
Step 2: Bread the Chicken
Crush or process your panko until extra-fluffy, and whisk the eggs for a smooth dredge. Dip each chicken cutlet in egg, shake off the excess, then firmly press into panko so the crumbs stick. Let the coated chicken rest on a rack for a few minutes—it helps that glorious crust stay put during frying!
Step 3: Air Fry Until Crispy
Preheat the air fryer to 350°F. Spray the basket and arrange cutlets in a single layer (work in batches if needed). Spray the tops, fry for about 10 minutes, flip, spray again, and give them 3–5 more minutes until deeply golden and crisp. The kitchen will smell amazing, and your cutlets will be cooked to juicy perfection.
Step 4: Mix the Sauces
In one bowl, whisk together ketchup, Worcestershire, soy sauce, mirin, and Dijon for that sweet-savory tonkatsu sauce. In another, blend mayo, yogurt, ketchup, fresh garlic, curry powder, and lemon—the creamy curry drizzle. Both sauces keep well, so feel free to make them ahead!
Step 5: Assemble Your Chicken Katsu Bowls
Slice the chicken into strips using a gentle, rocking knife motion to avoid crushing the crisp crust. Build your bowls with rice, shredded cabbage, crisp cucumbers, greens, and scallions. Top with plenty of freshly fried katsu, then drizzle generously with your favorite sauce (or both!). Dig in and taste pure happiness.
Pro Tips for Making Chicken Katsu Bowls
- Panko Perfection: For the crispiest chicken, crush your panko lightly for smaller, fluffier crumbs that cling and brown beautifully in the air fryer.
- Let It Rest: After breading, let your chicken rest on a rack for 5–10 minutes—this little pause helps the coating set and stick during cooking.
- Sauce Ahead: Both sauces can be mixed up a day in advance, letting the flavors meld and saving you time on a busy night.
- Check Doneness: Always use a thermometer and cook to 165°F in the thickest part—juicy chicken is key to dreamy Chicken Katsu Bowls!
How to Serve Chicken Katsu Bowls
Garnishes
A sprinkle of sliced scallions, toasted sesame seeds, or a flurry of nori strips brings color and aroma to every bowl. For a little heat, add a few dabs of sriracha or a dusting of chili flakes—these finishing touches truly make Chicken Katsu Bowls feel restaurant-worthy.
Side Dishes
Pair Chicken Katsu Bowls with a simple miso soup, lightly pickled veggies, or steamed edamame for a complete meal. Japanese potato salad or a bright carrot-ginger slaw also add a gorgeous, crunchy contrast alongside your main dish.
Creative Ways to Present
You can serve these bowls family-style, arranging all the toppings in colorful platters so everyone builds their own. Or, layer the ingredients “deconstructed” on a large tray for an eye-catching spread—perfect for parties! Bento-style lunchboxes with neatly packed katsu strips and veggies also make a fun on-the-go option.
Make Ahead and Storage
Storing Leftovers
Cool leftover chicken katsu completely, then store slices and rice in airtight containers for up to 3 days. Keep veggies and sauces separate to help everything stay fresh and maintain the best textures.
Freezing
Chicken katsu freezes beautifully! Let cutlets cool, slice if you like, then wrap well and freeze for up to 2 months. For best results, freeze without veggies or sauce, and thaw fully before reheating so the coating stays crisp.
Reheating
To revive that delicious crunch, reheat chicken katsu in an oven or air fryer at 350°F until hot—about 6–8 minutes. Avoid microwaving, as it tends to soften the breading. Sauce and assemble fresh bowls just before serving for peak deliciousness!
FAQs
-
Can I bake the chicken instead of air frying?
Yes! Bake breaded cutlets on a wire rack over a baking sheet in a preheated 425°F oven for 18–22 minutes, flipping once. They’ll come out crisp and golden, though air frying gives even more crunch.
-
Can I make Chicken Katsu Bowls gluten-free?
Absolutely—swap in gluten-free panko, use tamari in place of soy sauce, and double-check your Worcestershire is gluten free. The process and flavor stay just as satisfying!
-
What kind of rice works best for these bowls?
Short-grain white rice is classic, but jasmine, sushi rice, or even brown rice all work. The key is fluffy, slightly sticky rice that soaks up those delicious sauces without getting mushy.
-
Can I prep the sauces ahead of time?
Definitely! Both the tonkatsu and curry sauces can be whisked up and refrigerated for up to 3 days, making assembly even quicker on busy nights.
Final Thoughts
I hope you’re feeling inspired to treat yourself (and maybe a few lucky friends) to Chicken Katsu Bowls very soon. Few meals balance so much crunch, comfort, and freshness in one bite. Pour on those sauces, pile your bowl high, and enjoy—this is crave-worthy food, made joyfully at home!
Print
Chicken Katsu Bowls Recipe
- Prep Time: 20 minutes
- Cook Time: 15 minutes
- Total Time: 35 minutes
- Yield: 6 Servings
- Category: Air Frying
- Method: Air Frying
- Cuisine: American, Japanese
Description
Delicious and crispy Chicken Katsu Bowls with flavorful tonkatsu and curry sauces, served over rice and fresh vegetables. A perfect blend of textures and flavors in every bite.
Ingredients
For the Chicken Katsu:
- 3 (6-ounce) chicken breasts, trimmed, halved, and pounded 1/2-inch cutlets
- 1 teaspoon kosher salt
- 1 teaspoon coarse black pepper
- 2 cups Panko breadcrumbs
- 2 large eggs
- cooking spray, as needed
For the Tonkatsu Sauce:
- 1/2 cup ketchup
- 2 tablespoons Worcestershire sauce
- 2 teaspoons soy sauce
- 1/2 teaspoon Mirin
- 1 teaspoon Dijon mustard
For the Curry Sauce:
- 1/3 cup mayonnaise
- 1/3 cup full-fat yogurt
- 1 tablespoon ketchup
- 1 garlic clove, minced
- 2 teaspoons yellow curry powder
- 1 teaspoon lemon juice
For the Bowls:
- 2 cups white rice, cooked according to the package
- 2 Persian cucumbers, thinly sliced
- 1/4 head red cabbage, shredded
- 2 cups mixed greens
- 3 scallions, finely chopped
Instructions
- Prepare the Katsu Chicken: Slice the chicken breasts in half horizontally, then gently pound them into ½-inch-thick cutlets using a meat tenderizer. Season with salt and pepper. Process Panko breadcrumbs and set up a dredging station with eggs. Coat chicken with breadcrumbs, air fry until crispy.
- Make the Sauces: Whisk ingredients for tonkatsu and curry sauces separately in bowls.
- Assemble the Bowls: Slice cooked chicken, prepare rice and vegetables. Arrange in bowls, top with chicken and sauces.
Notes
- Use thin chicken cutlets for even cooking.
- Pound chicken to ½ inch thickness for uniform cooking.
- Dredge chicken well in egg and breadcrumbs for a crispy crust.
- Preheat air fryer and avoid overcrowding for best results.
- Use a thermometer to ensure chicken reaches 165°F (74°C) internal temperature.
Nutrition
- Serving Size: 1 Bowl
- Calories: 420
- Sugar: 7g
- Sodium: 780mg
- Fat: 12g
- Saturated Fat: 3g
- Unsaturated Fat: 7g
- Trans Fat: 0g
- Carbohydrates: 56g
- Fiber: 4g
- Protein: 22g
- Cholesterol: 120mg

