

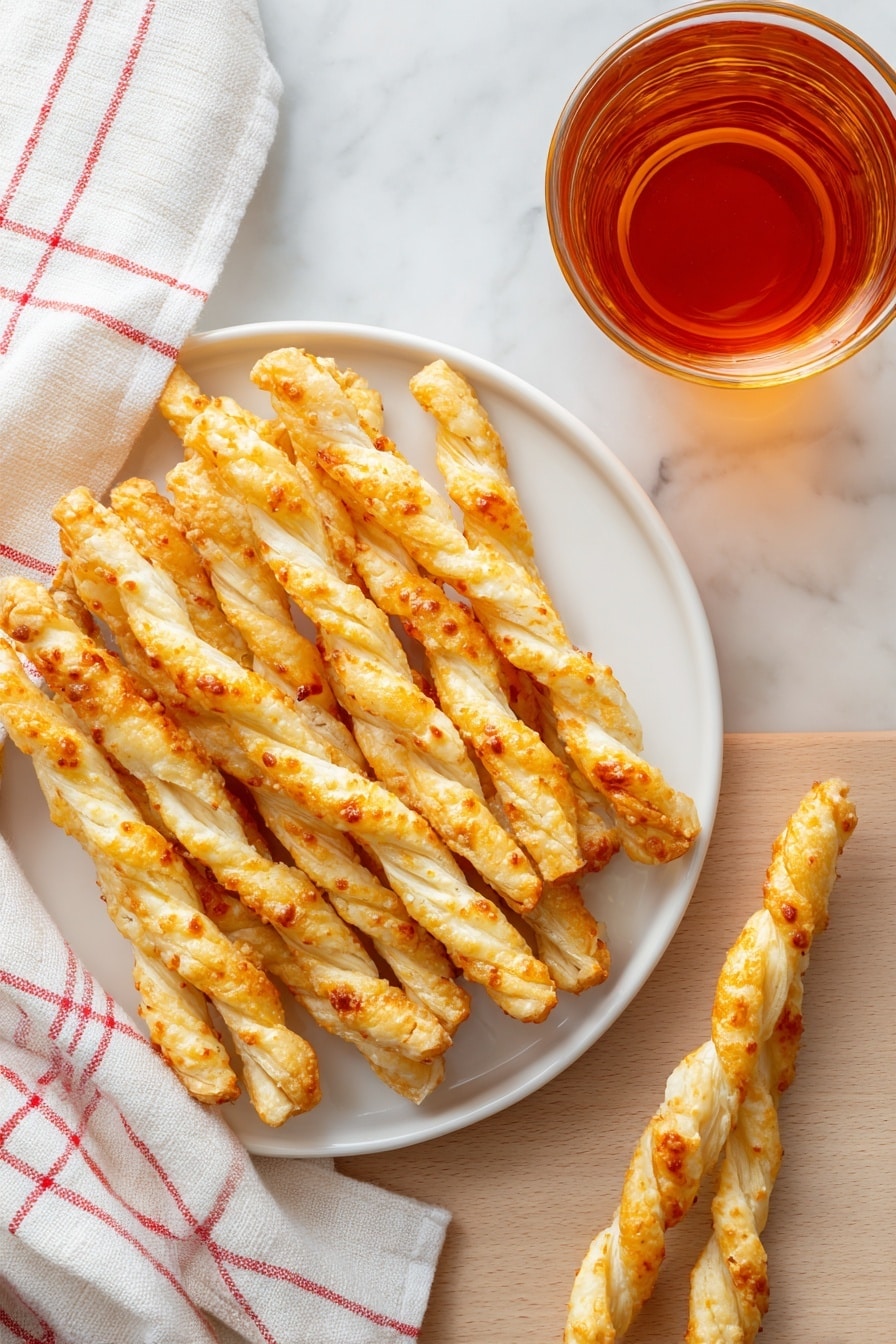
If you’re craving a snack that’s satisfyingly crispy, cheesy, and utterly addictive, then you’re going to want to stick around for this Cheese Straws Recipe for Crispy Savory Snacks Recipe. I absolutely love this recipe because it’s a perfect balance of sharp cheddar, a hint of smoky paprika, and just the right texture to crunch without crumbling. Whether you’re serving them at a party or just nibbling while binge-watching your favorite show, these cheese straws will quickly become your go-to snack.
Why You’ll Love This Recipe
- Simple Ingredients: You only need pantry staples and sharp cheddar to whip these up, making it convenient for any day craving.
- Crisp and Flavorful: The balance of spices and cheese creates savory straws that are perfectly crispy every time.
- Versatile Snack: Great for wine pairings, kid’s lunchboxes, or casual get-togethers.
- Easy to Make Ahead: Store them for a week or freeze for longer, so you’re always ready for a snack attack.

Ingredients You’ll Need
These ingredients come together in such a straightforward way, yet the result is incredibly tasty. I recommend using a sharp or extra-sharp cheddar—you’ll find that fresh shredding really boosts flavor and melt quality.
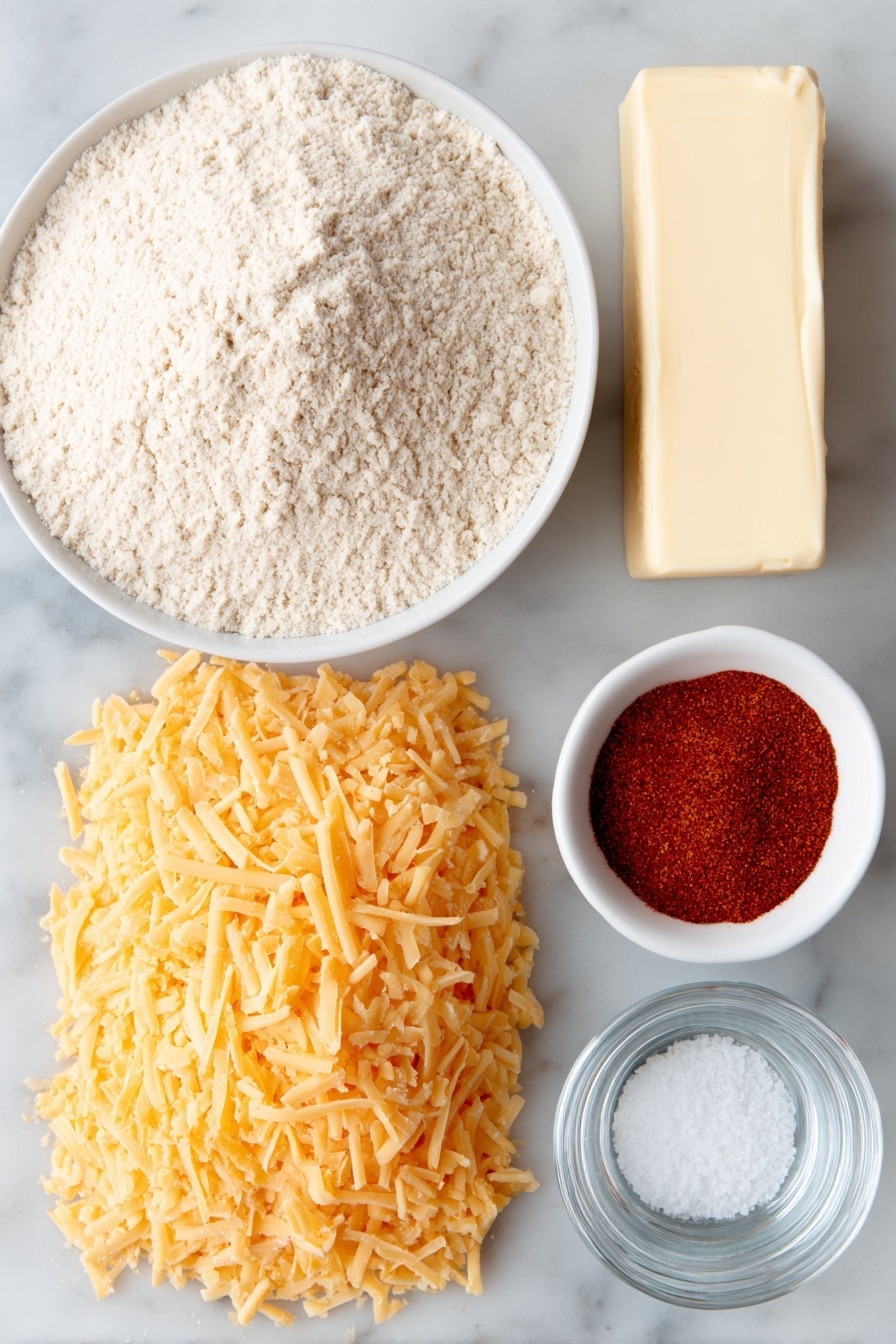
- Self-rising flour: It already has baking powder and salt, which simplifies the dough and gives just the right structure.
- Smoked or sweet paprika: Adds a subtle smoky warmth that’s my favorite twist on classic cheese straws.
- Cayenne pepper: Just a touch amps up the flavor without overpowering.
- Kosher salt: Enhances all the savory flavors, especially from the cheese.
- Sharp or extra-sharp cheddar cheese: Freshly grated cheese melts better and gives that rich, sharp bite.
- Unsalted butter: Room temperature butter blends smoothly, making the dough tender and flaky.
- Water: Added as needed to bring the dough together just right—not sticky, not dry.
Variations
I love to switch things up with this basic cheese straws recipe. Once you nail the original, feel free to get creative and make it your own with little tweaks. It’s a forgiving dough that welcomes bold flavors.
- Spicy Kick: I once added a bit more cayenne and a pinch of chili flakes for an extra spicy batch that my family went crazy for.
- Herby Twist: Fresh chopped rosemary or thyme stirred into the dough adds such a fresh, aromatic note.
- Cheese Swap: Using a strong Parmesan or Gruyère instead of cheddar creates a different depth of flavor that’s lovely for cheese lovers looking to mix it up.
- Gluten-Free Version: I’ve experimented with gluten-free flour blends and they work well, but I recommend checking the dough texture carefully—it might need a tad more water or resting time.
How to Make Cheese Straws Recipe for Crispy Savory Snacks Recipe
Step 1: Whisk and Prepare Your Dry Ingredients
Begin by whisking the self-rising flour, smoked paprika, cayenne, and kosher salt in a medium bowl until everything’s blended well. This layering of spices in the flour makes sure that every Cheese Straw Recipe for Crispy Savory Snacks Recipe bite is bursting with flavor. Make sure your paprika and cayenne are fresh for the most punch!
Step 2: Beat the Cheese and Butter to Creamy Perfection
Using a stand mixer fitted with a paddle attachment, or just a hand mixer in a big bowl, beat together the butter and freshly shredded cheddar cheese on medium speed for around 2 minutes. You want the butter soft, but not melted, to fully meld with the cheese so the dough will be tender yet sturdy. This step helps distribute the cheese evenly—a game changer for texture and flavor.
Step 3: Combine Dry and Wet Ingredients Into Dough
Add the dry flour mixture to your cheese-butter blend and mix on low speed just until combined. Start adding water one teaspoon at a time until the dough comes together like soft play dough. It should feel pliable—not sticky or cracked. I discovered this trick prevents dry, crumbly straws and makes shaping so much easier.
Step 4: Shape Your Cheese Straws
Line two large sheet pans with parchment paper and preheat your oven to 350°F (177°C). You have two options here: either load your dough into a cookie press with a large star disk and pipe out 2- to 3-inch lines—leaving a little space between them—or roll half the dough on a lightly floured surface and cut into ½-inch strips. I like giving mine a gentle twist for that rustic look, but plain strips bake beautifully too!
Step 5: Bake to Crispy Perfection
Bake your cheese straws for about 14 to 17 minutes until they’re crispy, golden brown on top, and a little darker underneath. If you cook two sheets at once, swap their positions halfway for even browning. Let them cool fully on the pan before handling because warm cheese straws are fragile and can break easily—the first time I learned this the hard way! Once cooled, you’ll have irresistible treats you’ll want to hide from everyone.
Pro Tips for Making Cheese Straws Recipe for Crispy Savory Snacks Recipe
- Use Freshly Shredded Cheese: Pre-shredded cheese often contains anti-caking agents that can affect the texture, so freshly grate your cheddar for best results.
- Don’t Overwork the Dough: Mix just until combined to keep your straws tender and flaky, over-mixing can make them tough.
- Watch the Oven Closely: These bake quickly and can go from golden to burnt in a minute—start checking at 14 minutes to avoid disappointment.
- Cool Completely Before Storing: Storing warm straws causes steam that softens them, so cool fully on the baking pan before transferring to an airtight container.
How to Serve Cheese Straws Recipe for Crispy Savory Snacks Recipe
Garnishes
I often sprinkle a little flaky sea salt or extra smoked paprika right after baking for an extra flavor pop. For festive occasions, I like to stand them up in a decorative glass to make grabbing easy and fun. A little fresh thyme or rosemary garnish on the serving plate adds a lovely aroma too.
Side Dishes
Cheese straws go perfectly with dips like a creamy spinach-artichoke dip, or alongside a charcuterie board with cured meats and pickles. They’re also fantastic with a glass of crisp white wine or a rich red—trust me, the salty-cheesy combo pairs beautifully.
Creative Ways to Present
For fancy gatherings, I like to tie bundles of 5–6 straws with a little twine ribbon or place them in mini mason jars lined with parchment paper. It turns them from simple snacks into irresistible party treats that spark conversation. Plus, kids love pulling one from the bunch!
Make Ahead and Storage
Storing Leftovers
I store leftover cheese straws in an airtight container at room temperature, where they keep perfectly crisp for up to a week. I learned that keeping moisture out is key, so make sure the container seals well and your kitchen isn’t too humid.
Freezing
These freeze beautifully! After baking and cooling, I place the straws in a freezer-safe bag with parchment paper between layers so they don’t stick. When I want a snack, I just pop them in the oven for a few minutes to thaw and crisp back up.
Reheating
To bring back their fresh-baked crunch, I reheat cheese straws in a toaster oven or regular oven at 325°F for about 5 minutes. Avoid microwaving, which can turn them chewy rather than crispy.
FAQs
-
Can I use different types of cheese in this Cheese Straws Recipe for Crispy Savory Snacks Recipe?
Absolutely! While sharp cheddar is traditional and works wonderfully for its melt and flavor, you can try Gruyère, Parmesan, or even a smoked cheese for unique twists. Just keep in mind the moisture content of the cheese—too soft or wet cheese can make the dough sticky.
-
What’s the best way to shape these cheese straws if I don’t have a cookie press?
No worries if you don’t have a cookie press! Roll out the dough into a thin rectangle and cut into strips with a pizza cutter or sharp knife. You can twist the strips for a rustic look or leave them plain—they’ll bake just as delicious.
-
How long will these cheese straws stay fresh?
Stored in an airtight container at room temperature, cheese straws stay crispy and fresh for up to a week. Just make sure they’ve cooled completely before storing to avoid moisture build-up and sogginess.
-
Can I make these cheese straws gluten-free?
Yes, you can try using a gluten-free self-rising flour blend, but the texture might be slightly different. I recommend testing with small batches first and adjusting water amounts since gluten-free flours absorb moisture differently.
Final Thoughts
I used to struggle finding a crispy, cheesy snack that didn’t feel heavy or bland, and this Cheese Straws Recipe for Crispy Savory Snacks Recipe really changed that for me. It’s such a satisfying treat that comes together quickly, and once you try it you’ll see why my family goes crazy for these straws. Whether you’re new to baking savory snacks or looking for a reliable, crowd-pleasing recipe, this one’s a winner. Give it a go—you might just find your new favorite snack!
Print
Cheese Straws Recipe for Crispy Savory Snacks Recipe
- Prep Time: 20 minutes
- Cook Time: 15 minutes
- Total Time: 35 minutes
- Yield: 70 cheese straws (approximately 12 servings)
- Category: Snack
- Method: Baking
- Cuisine: Southern American
Description
Classic Southern cheese straws are a delightful snack combining sharp cheddar cheese with a crispy, buttery dough. These savory treats are perfect for serving with wine or enjoying anytime you want a crunchy, cheesy bite. Made with simple ingredients and baked to a crispy golden brown, cheese straws offer a satisfying snack that’s both flavorful and easy to prepare.
Ingredients
Dry Ingredients
- 1 3/4 cups (228g) self-rising flour
- 1/2 teaspoon smoked or sweet paprika
- 1/4 teaspoon cayenne pepper, or to taste
- 1/4 teaspoon kosher salt
Wet Ingredients
- 1/2 pound sharp or extra-sharp cheddar cheese, freshly grated
- 1 stick (1/2 cup) unsalted butter, room temperature
- 1 to 4 tablespoons water, or as needed
Instructions
- Mix Dry Ingredients: In a medium bowl, whisk together the self-rising flour, smoked or sweet paprika, cayenne pepper, and kosher salt until well combined to evenly distribute the spices throughout the flour.
- Combine Cheese and Butter: Add the freshly shredded sharp cheddar cheese and softened unsalted butter to the bowl of a stand mixer fitted with the paddle attachment. Beat on medium speed for about 2 minutes until the mixture is smooth and thoroughly combined. Alternatively, use a hand mixer in a large mixing bowl.
- Add Dry Ingredients and Form Dough: With the mixer on low speed, gradually add the dry ingredient mixture to the cheese and butter blend. If the dough is too dry and crumbly, add water one teaspoon at a time until the dough reaches a consistency similar to soft play dough—not sticky but pliable.
- Rest the Dough: Press a piece of plastic wrap directly against the dough to prevent drying out and let it rest while preheating the oven. This rest helps hydrate the flour and relaxes the dough for easier handling.
- Prep Baking Sheets: Line two large sheet pans with parchment paper to prevent sticking and allow for even baking and easy cleanup.
- Shape the Cheese Straws: Using a cookie press fitted with a large star disk, pipe the dough directly onto the parchment-lined baking sheets in lines about 2 to 3 inches long, spacing them approximately 1/2 inch apart. Alternatively, roll out half of the dough on a lightly floured surface into a 1/8-inch thick rectangle, then cut into 1/2-inch strips with a pizza cutter or sharp knife. Twist the strips several times or leave them plain, then arrange on the baking sheets. Repeat with remaining dough.
- Bake the Cheese Straws: Bake in a preheated oven until the cheese straws are crisp, golden on the bottom, and lightly browned on top, about 14 to 17 minutes. If baking on two sheets at once, rotate the pans halfway through baking to ensure even cooking.
- Cool and Store: Let the cheese straws cool completely on the pan before handling, as they can be brittle when warm. Store in an airtight container for up to a week. To restore crispness if softened, reheat briefly in a toaster oven and cool before serving.
Notes
- Cheese straws are a classic Southern snack, combining the crispness of a cracker with the richness of a savory cookie.
- They pair beautifully with wine and are perfect for entertaining or casual snacking.
- Use freshly grated sharp or extra-sharp cheddar cheese for maximum flavor and the best texture.
- If you prefer a bit more heat, adjust the cayenne pepper to your taste.
- Re-crisp cheese straws in a toaster oven if they lose crunch after storage.
Nutrition
- Serving Size: 1 serving (about 6 cheese straws)
- Calories: 213 kcal
- Sugar: 0 g
- Sodium: 376 mg
- Fat: 14 g
- Saturated Fat: 8 g
- Unsaturated Fat: 6 g
- Trans Fat: 0 g
- Carbohydrates: 15 g
- Fiber: 1 g
- Protein: 7 g
- Cholesterol: 39 mg
