

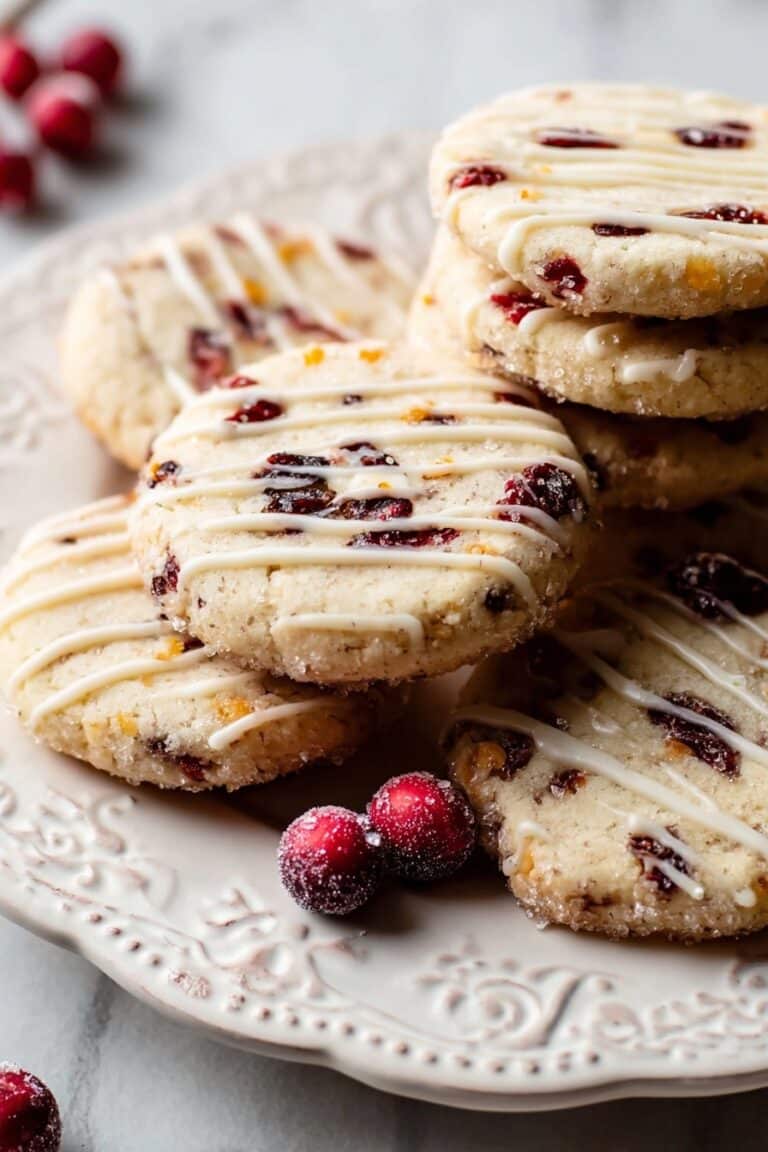
If you’re on the hunt for the perfect holiday treat, look no further because this Candy Cane Cookie Recipe is absolutely fan-freaking-tastic. I absolutely love how these cookies come together with that classic peppermint flavor and the fun, twisted red-and-white candy cane look. They’re a festive, delicious way to impress friends, family, or just satisfy your sweet tooth during the holidays. Stick around—I’m about to walk you through every detail so your Candy Cane Cookies come out perfectly every time!
Why You’ll Love This Recipe
- Easy Peppermint Flavor: The peppermint extract adds just the right festive kick without overpowering.
- Fun Candy Cane Twist: Twisting red and white dough is a simple technique that delivers big visual impact.
- Soft Yet Crisp Texture: These cookies strike a great balance between tender bites and a crisp snap.
- Perfect for Gifting: They look beautiful in holiday tins or wrapped up as sweet little presents.

Ingredients You’ll Need
I love how simple and straightforward the ingredients are—no fancy stuff needed—and most of what you need likely lives in your pantry. The combination of all-purpose flour, cornstarch, and leavening agents helps create that perfectly tender texture, while the peppermint extract brings in the holiday cheer.
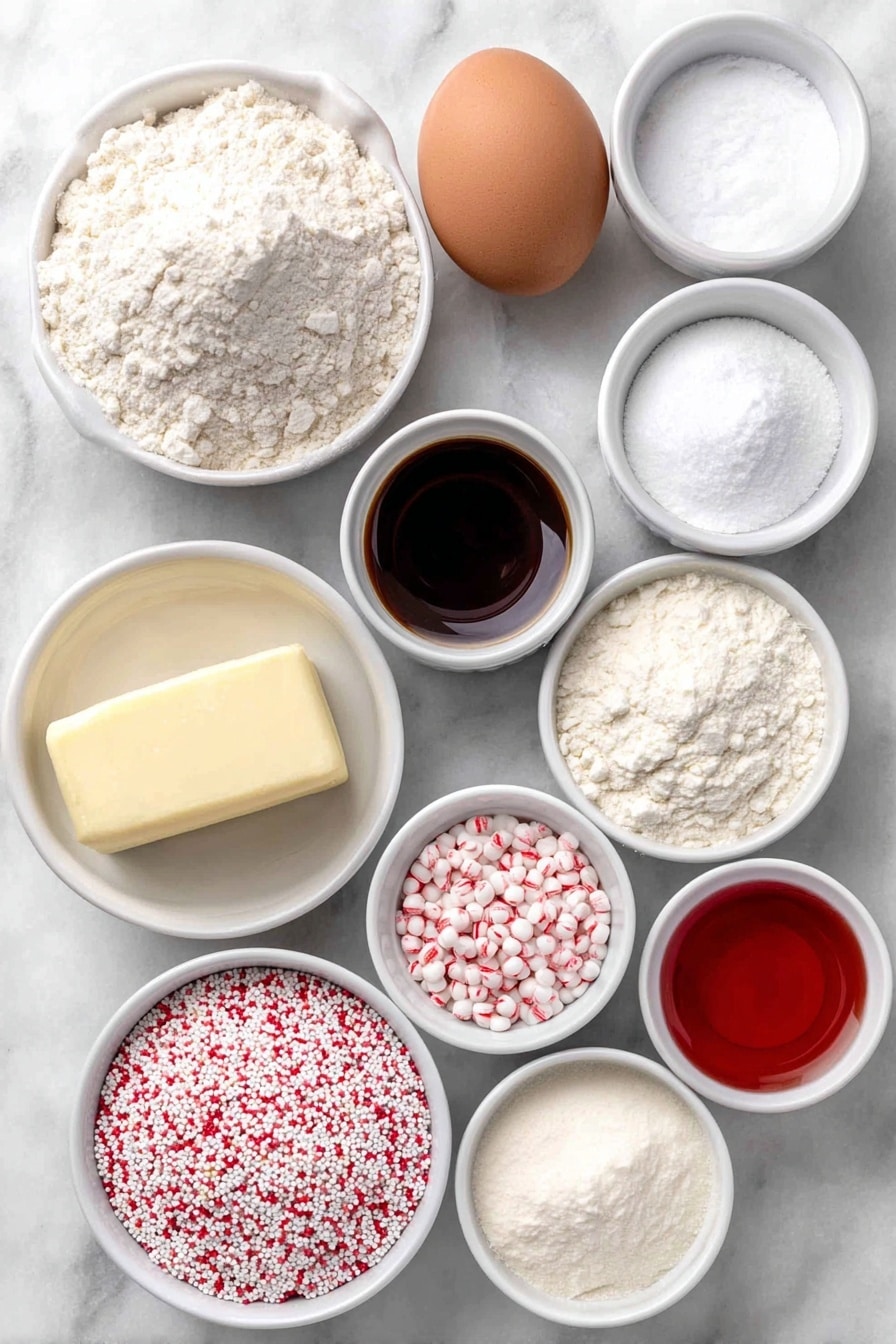
- All-Purpose Flour: The base of your cookie, providing structure and that classic bite.
- Cornstarch: Adds tenderness and a soft crumb to balance the flour.
- Baking Soda and Baking Powder: Work together to give a light rise without puffing the cookies too much.
- Salt: Enhances all the sweet flavors and balances the peppermint.
- Unsalted Butter: Room temp butter creamed with sugar creates that fluffy, melt-in-your-mouth texture.
- Granulated Sugar: Sweetens and lightens the dough when creamed with butter.
- Egg: Binds everything together and adds moisture for tender cookies.
- Vanilla Extract: Adds warmth and depth, balancing the peppermint.
- Peppermint Extract: The star of the show—use good quality for the best flavor.
- Red Gel Icing Color: For that vibrant candy cane red—gel works best to keep the dough consistency just right.
- Sprinkles or Peppermint Crunch (optional): Add festive flair and a little crunch on top if you like.
Variations
The beauty of this Candy Cane Cookie Recipe is how adaptable it is—feel free to tweak it to suit your taste or dietary needs. I love swapping sprinkles for crushed peppermint candies to give an extra hint of crunch, but the cookies are just as charming plain, too.
- Gluten-Free Version: I tried using a gluten-free flour blend and while the texture changes slightly, the flavor is still delightful!
- Chocolate Peppermint: Adding a tablespoon of cocoa powder to half the dough creates a fun chocolate twist that’s a hit at parties.
- Vegan Adaptation: Replacing butter with vegan margarine and using a flax egg works well, though the cookies spread a bit more.
How to Make Candy Cane Cookie Recipe
Step 1: Mix Your Dry Ingredients
First, whisk together your all-purpose flour, cornstarch, baking soda, baking powder, and salt in a medium bowl. Setting this aside keeps things organized and makes the next steps so much smoother. Trust me, I learned this the hard way when I tried mixing everything all at once and ended up with uneven dough.
Step 2: Cream Butter and Sugar Until Fluffy
This is where the magic begins! Using a mixer on medium speed, cream your softened butter and granulated sugar until the mixture turns light in color and fluffy. You’ll actually see this happen if you pause to look—it’s a good visual clue that you’re set. This step is key for soft, tender cookies.
Step 3: Add Egg, Vanilla, and Peppermint Extract
Mix in your egg, vanilla, and peppermint extract until everything is well combined. The peppermint really fills your kitchen with that holiday scent, which always gets me excited to bake!
Step 4: Combine Dry Ingredients With Wet Ingredients
Add your dry mix to the wet ingredients and stir just until the dough comes together. Be gentle here—over-mixing can make the cookies tougher, and you definitely want to hold on to that tender texture that makes this Candy Cane Cookie Recipe so irresistible.
Step 5: Divide and Color the Dough
Divide the dough into two equal parts—leave one plain and color the other with red gel icing color. I love using gel colors because they don’t thin the dough like liquid food coloring can. Just knead in the gel gently until the color is even.
Step 6: Chill and Prep for Twisting
Here’s a trick I discovered: refrigerate the dough for 2-3 hours to firm it up. It makes rolling and shaping so much easier and less sticky. While it’s still soft, I like to pre-portion into teaspoon-sized balls and pop them back into the fridge—then it’s a quick grab-and-go when you’re ready to roll out the ropes.
Step 7: Twist Into Candy Cane Shapes
Roll each ball into a 5-inch rope. Using a ruler can help keep them consistent so your candy canes look uniform—something I started doing after my first batch looked a little wonky! Place a white and a red rope side by side, then gently twist each half separately before twisting the full length together. That method keeps the twist tight and pretty. Curve one end to mimic the classic candy cane hook, and lightly press sprinkles or peppermint crunch on top if using.
Step 8: Bake Until Just Set
Bake in a preheated 350°F (180°C) oven for 5-7 minutes. I recommend keeping a close eye because these cookies can go from soft to golden quickly. You want them set on the edges but still tender in the middle. Fresh out of the oven, let them cool on the pan for about 10 minutes before transferring to a wire rack to prevent breaking.
Pro Tips for Making Candy Cane Cookie Recipe
- Use Room Temperature Butter: This makes creaming easier and helps achieve that fluffy batter you need for tender cookies.
- Chill Twice if Needed: If your dough feels too sticky while twisting, pop it back in the fridge for 15-20 minutes to firm up.
- Don’t Overbake: Cookies will continue to set while cooling, so pull them out as soon as edges look firm but centers are still soft.
- Handle Gently When Cooling: Twisted shapes can be fragile—use a thin spatula and wait for initial cooling before moving.
How to Serve Candy Cane Cookie Recipe

Garnishes
I usually add crushed peppermint candies or festive sprinkles right after twisting but before baking. It clings nicely and adds a perfect pop of texture and sparkle. For holidays, a light dusting of powdered sugar after cooling can also make them look extra magical.
Side Dishes
For holiday gatherings, I love pairing these candy cane cookies with hot cocoa or peppermint mocha—double down on the peppermint vibe! They’re also fantastic alongside a cheese board with mild cheeses and some fresh fruit to balance the sweetness.
Creative Ways to Present
For parties, I sometimes use clear cellophane bags tied with red and white twine to make individual “treat favors.” Another fun idea is arranging a plate of these cookies with mini candy canes and fresh pine sprigs for a snowy holiday centerpiece. Kids especially love helping with these presentation ideas!
Make Ahead and Storage
Storing Leftovers
I keep my leftover Candy Cane Cookies in an airtight container at room temperature, and they usually stay fresh and tasty for 4-5 days. Make sure to layer them with parchment paper if stacking to avoid sticking or breakage. My family goes crazy for these, so leftovers don’t stick around long!
Freezing
If you want to prepare ahead, these cookies freeze beautifully. I wrap them tightly in plastic wrap and then place them in a freezer-safe bag. When I’m ready, I thaw them overnight in the fridge before serving. The flavor and texture hold up remarkably well!
Reheating
To refresh frozen or leftover cookies, I pop a few onto a baking sheet and warm them in a 300°F oven for about 5 minutes. This softens them up just enough without drying them out. It’s like bringing them back to life with no fuss.
FAQs
-
Can I use liquid food coloring instead of gel for this Candy Cane Cookie Recipe?
You can, but I don’t recommend it because liquid coloring can thin out the dough, making it sticky and harder to shape. Gel colors give you vibrant hues without changing the dough’s consistency.
-
How do I prevent my Candy Cane Cookies from spreading too much?
Making sure your dough is well chilled before shaping is key. Also, avoid over-creaming the butter and sugar. If your kitchen is warm, chilling the dough longer can help maintain shape during baking.
-
Can I make these cookies ahead of time?
Absolutely! You can prepare the dough up to 3 days ahead and keep it wrapped in the fridge or freeze the shaped, unbaked cookies. Just thaw before baking to ensure even cooking.
-
What’s the best way to store decorated Candy Cane Cookies?
Store them in an airtight container at room temperature, layering with parchment paper to protect the decorations. Avoid stacking if the decorations are delicate, or freeze them separately if you want extra long storage.
Final Thoughts
Honestly, this Candy Cane Cookie Recipe feels like a little holiday ritual for me now—mixing the dough, twisting the ropes, and baking fills the kitchen with warmth and joy. I love sharing these with friends because they’re not only delicious but also so charming and festive. If you give this recipe a try, I’m confident you’ll find yourself making them year after year like I do. Happy baking and may your holidays be extra sweet!
Print
Candy Cane Cookie Recipe
- Prep Time: 3 hr
- Cook Time: 40 min
- Total Time: 3 hr 40 min
- Yield: About 60 cookies
- Category: Dessert
- Method: Baking
- Cuisine: American
- Diet: Vegetarian
Description
These festive Candy Cane Cookies are a delightful holiday treat, featuring a peppermint-flavored soft cookie dough divided into red and white halves, twisted to resemble classic candy canes. Perfectly tender and lightly sweet, they are great for holiday gatherings or gifting.
Ingredients
Dry Ingredients
- 2 3/4 cups (358g) all-purpose flour
- 2 tbsp cornstarch
- 1 tsp baking soda
- 1/2 tsp baking powder
- 1/2 tsp salt
Wet Ingredients
- 1 cup (224g) unsalted butter, room temperature
- 1 cup (207g) granulated sugar
- 1 egg
- 1 tsp vanilla extract
- 1 tsp peppermint extract
- Red gel icing color
- Sprinkles or peppermint crunch, optional
Instructions
- Mix Dry Ingredients: In a medium bowl, combine the all-purpose flour, cornstarch, baking soda, baking powder, and salt. Set this mixture aside for later use.
- Cream Butter and Sugar: Using a large mixer bowl and medium speed, cream the unsalted butter and granulated sugar until the mixture is light in color and fluffy, indicating that air has been incorporated for a tender cookie texture.
- Add Egg and Extracts: Mix in the egg, vanilla extract, and peppermint extract until everything is well combined and the dough is smooth.
- Incorporate Dry Ingredients: Gradually add the dry ingredient mixture to the wet ingredients. Mix just until the dough forms and there are no streaks of flour—avoid over mixing to maintain a tender crumb.
- Color the Dough: Divide the dough into two equal parts. Add red gel icing color to one half and knead gently to distribute the color evenly.
- Chill the Dough: Refrigerate both dough portions for 2 to 3 hours. This step firms up the dough and makes it easier to shape later. It’s helpful to pre-portion the dough into 1 teaspoon-sized balls now if preferred.
- Preheat the Oven and Prepare Baking Sheets: When ready to bake, preheat your oven to 350°F (180°C) and line baking sheets with parchment paper or silicone mats to prevent sticking.
- Shape the Candy Canes: Roll each teaspoon-sized ball into a 5-inch-long rope using a ruler for accuracy. Place one white rope and one red rope side by side and gently twist them together by twisting each half separately. Form the twisted strand into a candy cane shape by curving one end.
- Add Toppings and Arrange: Place each shaped candy cane cookie onto the prepared baking sheet. Press sprinkles or peppermint crunch onto the fronts if desired for extra festive decoration and texture.
- Bake: Bake the cookies in the preheated oven for 5 to 7 minutes. The cookies should be set but still soft to the touch.
- Cool: Let the cookies cool on the baking sheet for about 10 minutes to firm up before transferring them carefully to a wire rack to cool completely, ensuring they don’t break.
- Store: Store cooled cookies in an airtight container. They taste best within 4 to 5 days but can be frozen for about a month for longer storage.
Notes
- This Candy Cane Cookies recipe is a classic Christmas treat made with simple peppermint-flavored dough colored red and white and twisted to create the iconic candy cane shape.
- Chilling the dough before shaping helps with managing the sticky dough and achieving clean shapes.
- Using red gel icing color instead of liquid food coloring preserves the dough consistency better.
- Pre-measuring dough balls before chilling speeds up the shaping process after refrigeration.
- The cookies bake quickly, so watch closely to avoid overbaking and maintain softness.
Nutrition
- Serving Size: 1 cookie
- Calories: 63
- Sugar: 3.4 g
- Sodium: 42.2 mg
- Fat: 3.2 g
- Saturated Fat: 1.9 g
- Unsaturated Fat: 1.3 g
- Trans Fat: 0 g
- Carbohydrates: 8 g
- Fiber: 0.2 g
- Protein: 0.7 g
- Cholesterol: 11.2 mg

