
If you’re looking for a fun, delicious twist on traditional breadsticks, you’re going to absolutely love this Breadstick Bones Recipe. Not only are these breadsticks perfectly soft and buttery, but their playful bone shape makes them irresistible for parties, Halloween, or just a cozy family snack. I discovered this recipe when I wanted to add a little whimsy to our dinner table, and my family went crazy for them. Keep reading because I’m sharing everything you need to make them turn out perfectly every time!
Why You’ll Love This Recipe
- Fun and Festive: The bone shape is perfect for seasonal celebrations or anytime you want to wow your crew.
- Soft, Buttery Texture: These breadsticks come out tender with a subtle garlic-parmesan finish that’s irresistible.
- Simple Ingredients: You probably have most of what you need right in your pantry already.
- Kid-Approved: My kids loved shaping their own breadstick bones—it’s an easy way to get them involved in the kitchen!

Ingredients You’ll Need
These ingredients work beautifully together to give you soft, flavorful breadsticks that are easy to handle. Just a heads up: using warm water is key to waking up that yeast, so keep a kitchen thermometer handy if you want to be precise.
- Warm water: Make sure it’s comfortably warm—not hot—to activate the yeast without killing it.
- Active dry yeast: The magic that makes your dough rise with a nice fluffy texture.
- Sugar: Just enough to feed the yeast and add a touch of sweetness.
- Salt: Balances the flavors perfectly and strengthens the dough structure.
- Canola oil: Keeps the breadsticks moist and tender without overpowering other flavors.
- Flour: All-purpose flour works great—just add a little at a time to get the right dough consistency.
- Butter (for topping): Melted butter brushed on warm breadsticks gives that wonderful buttery shine.
- Garlic salt: Adds subtle garlicky goodness with a touch of saltiness.
- Grated parmesan cheese: A topping that brings a cheesy, savory finish you’ll want every time.
- Marinara sauce: Perfect for dipping and taking these breadsticks to the next level.
Variations
I love how easy it is to personalize this Breadstick Bones Recipe. You can experiment with flavors, toppings, or even shape them differently if you want something less spooky. Feel free to get creative and make it your own!
- Herb-Infused Variation: I once added chopped rosemary and thyme to the dough and it turned out incredible for a more rustic flavor.
- Cheesy Twist: Mixing shredded mozzarella inside the dough before shaping makes these even more irresistible for cheese lovers.
- Gluten-Free Version: I swapped all-purpose flour for a gluten-free blend, and although the texture shifts slightly, the taste still wins the day.
- Spicy Kick: Sprinkle red pepper flakes on the butter topping for a little heat that balances beautifully with the garlic and parmesan.
How to Make Breadstick Bones Recipe
Step 1: Activate Your Yeast
Start by dissolving the yeast and sugar in warm water. This part is crucial—you want the water warm enough (around 105-110°F) to wake up the yeast, but not so hot it kills it. Wait for it to get foamy and bubbly on top; this is your sign that the yeast is alive and ready to work its magic.
Step 2: Mix and Knead the Dough
Add salt, oil, and about two cups of flour to the yeast mixture and stir until combined. Then, gradually add the remaining flour, about a quarter cup at a time, until the dough pulls away from the sides of the bowl and feels soft but not sticky. I usually knead it for about 8-10 minutes until it’s smooth and elastic. If you’re using a stand mixer, a dough hook does the job beautifully here.
Step 3: Let the Dough Rise
Place your dough in a lightly greased bowl, cover it with a damp towel or plastic wrap, and let it rise in a warm spot for about one hour—or until it’s doubled in size. This rise makes your breadsticks light and airy, so patience really pays off here.
Step 4: Shape Your Breadstick Bones
After the dough has risen, gently punch it down to release air bubbles, then divide it into 16 equal pieces. Roll each piece into a 12-inch rope. Here’s the fun part: cut a 2-3 inch slit on each side of the rope, then twist the dough on either side of the slit in opposite directions to form a bone shape. It sounds tricky, but once you get the hang of it, you’ll find it’s actually quite satisfying.
Step 5: Second Rise and Bake
Place your shaped bones on a greased or parchment-lined baking sheet, cover them again, and let them rise for another 45 minutes to an hour until doubled in size. Meanwhile, preheat your oven to 425°F during the last 10 minutes of rising. Bake for 12-14 minutes or until golden brown and fragrant.
Step 6: Butter and Top
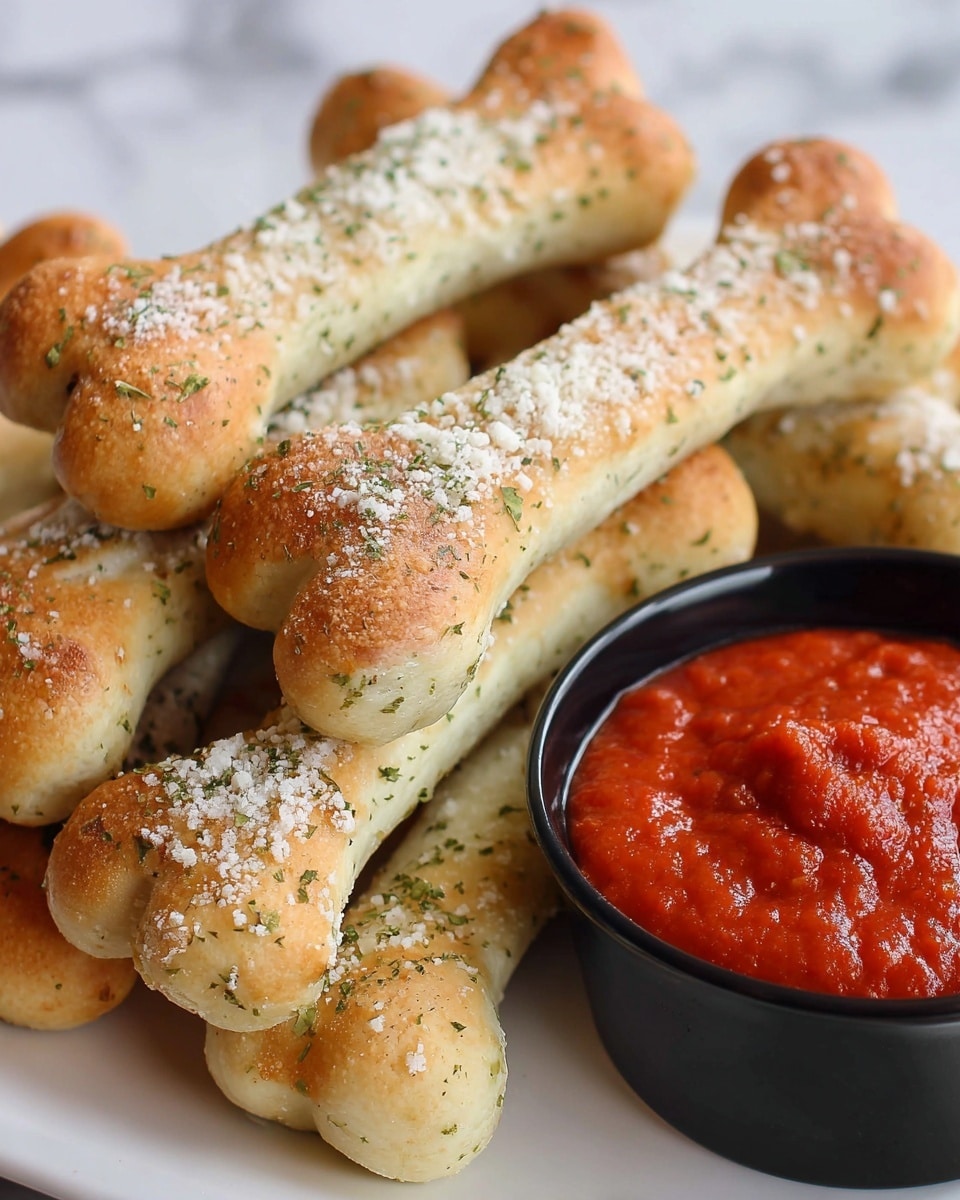
Right after they come out of the oven, brush each breadstick bone with melted butter, then sprinkle garlic salt and parmesan cheese over the top. Serving them warm is best because that butter soaks in and the cheese melts slightly, making these breadsticks simply irresistible.
Pro Tips for Making Breadstick Bones Recipe
- Warm Water Matters: I’ve learned that if the water’s too hot or too cold, your yeast won’t activate properly—keep it just warm to the touch.
- Don’t Rush the Rising: Letting the dough rise fully makes a big texture difference, so resist the urge to hurry.
- Perfect Bone Shape: When twisting the dough pieces into bone shapes, work gently but firmly so they keep their form after rising.
- Butter It While Warm: Brushing butter immediately out of the oven helps the toppings stick better and deepens the flavor.
How to Serve Breadstick Bones Recipe
Garnishes
I love sprinkling extra freshly grated parmesan and a tiny pinch of finely chopped parsley on top to add color and freshness—that little touch makes these breadstick bones look extra special and taste amazing.
Side Dishes
These breadstick bones are fantastic with classic marinara for dipping, but they also pair beautifully with cozy soups like tomato basil or creamy chicken noodle. I often serve them alongside a big salad or even a batch of spaghetti for a fun, crowd-pleasing meal.
Creative Ways to Present
For Halloween or themed parties, I like arranging the breadstick bones on a platter shaped like a skeleton or in little “graveyards” with tombstone-shaped cheese slices. Another fun idea is to tie a little ribbon around the middle “knot” of each bone—kids think it’s like a gift just for them!
Make Ahead and Storage
Storing Leftovers
I usually store leftover breadstick bones in an airtight container at room temperature for up to two days. They’re best eaten within that window because they can dry out, but you can always refresh them in the oven to bring back some softness.
Freezing
If I’m making these ahead for a party, I freeze shaped, unbaked breadstick bones by placing them on a tray, freezing until solid, then transferring to a freezer bag. When ready to bake, thaw and let rise as usual before popping them in the oven. This method saves so much time on busy days.
Reheating
To reheat, I like wrapping the breadsticks in foil and warming them in a 350°F oven for about 10 minutes. This method keeps them soft without drying out or toughening the crust.
FAQs
-
Can I use instant yeast instead of active dry yeast for this Breadstick Bones Recipe?
Absolutely! If you’re using instant yeast, you can skip the activation step in warm water and sugar. Instead, mix it directly with the flour and other dry ingredients, then add the warm water. The rising times may be a bit shorter, so keep an eye on the dough as it rises.
-
How do I make sure my breadstick bones stay soft?
The key is not to overbake them and to brush on melted butter right after baking as the warmth will help retain moisture. Also, storing them properly in airtight containers helps maintain softness.
-
Can I prepare the dough the night before?
Yes! I often make the dough the night before, cover it tightly, and refrigerate it. Just pull it out to come to room temperature before shaping and the first rise. This can actually improve the flavor by giving the yeast more time to develop.
-
Is there a way to make this recipe vegan?
You can easily make it vegan by substituting the butter with a plant-based margarine or olive oil for brushing, and skipping the parmesan or using a vegan cheese alternative.
Final Thoughts
I absolutely love how this Breadstick Bones Recipe turns out every single time. It’s the perfect combo of soft, buttery, and just a little bit cheesy, with that playful bone shape that makes everyone smile. Whether you’re cooking for a special occasion or just craving something comforting and fun, these breadstick bones never disappoint. I highly recommend giving them a try—you might just find yourself making them on repeat like I do!
Print
Breadstick Bones Recipe
- Prep Time: 15 minutes
- Cook Time: 12 minutes
- Total Time: 2 hours 12 minutes
- Yield: 16 breadstick bones
- Category: Baking
- Method: Baking
- Cuisine: American
Description
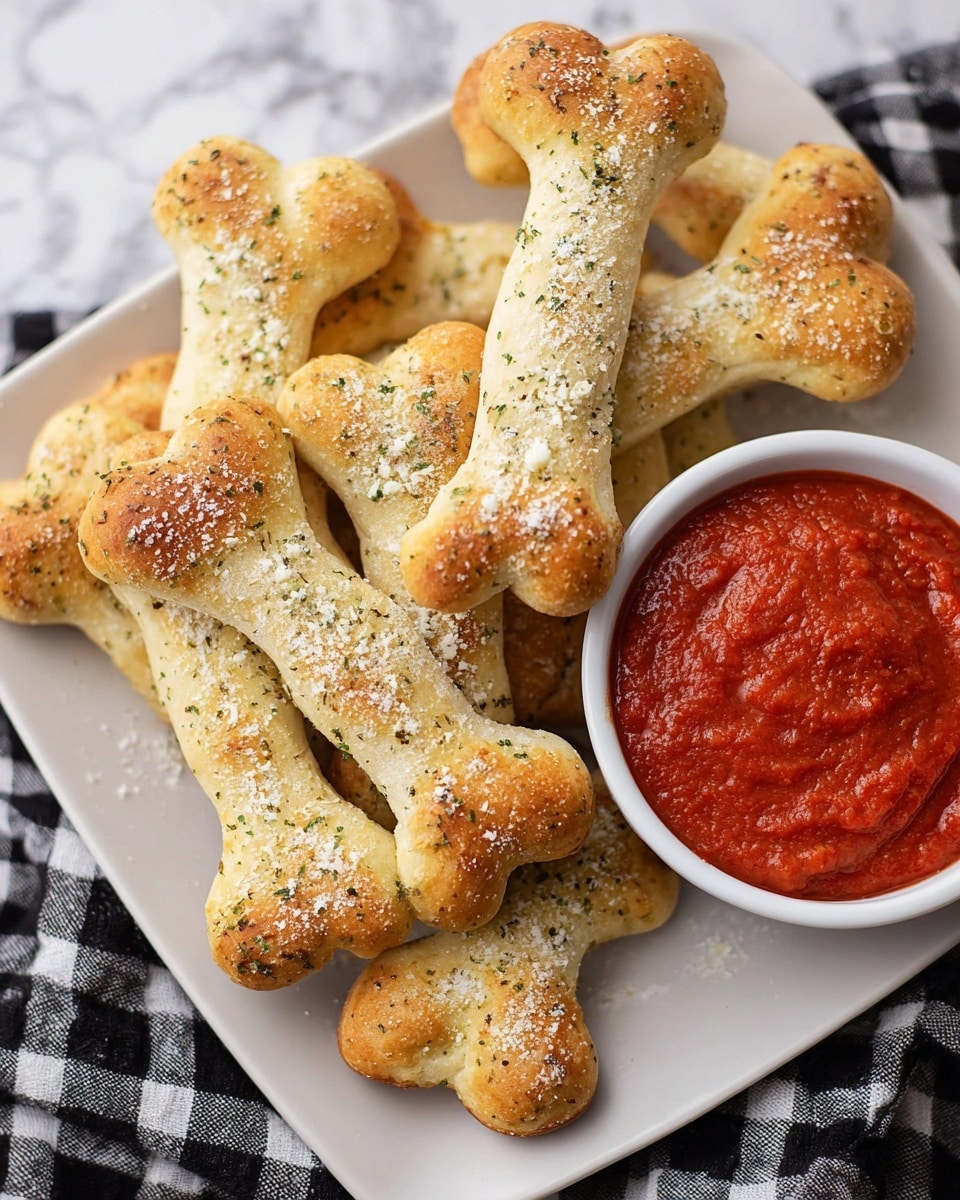
These delightful Breadstick Bones are soft, fluffy breadsticks shaped like bones, perfect for a fun snack or party treat. They are brushed with garlic butter and sprinkled with parmesan cheese, offering a flavorful twist on classic breadsticks. Serve them warm with marinara sauce for dipping to enjoy a comforting appetizer or side dish.
Ingredients
Breadsticks
- 1 cup + 2 tablespoons warm water
- 1 ¼ teaspoons active dry yeast
- 2 tablespoons sugar
- 1 ½ teaspoons salt
- 3 tablespoons canola oil
- 3 – 3¼ cups flour
Topping
- 2 tablespoons butter, melted
- ½ teaspoon garlic salt
- 1 tablespoon grated parmesan cheese
For Serving
- Marinara sauce
Instructions
- Activate Yeast: In a large bowl or the bowl of a stand mixer, dissolve the yeast and sugar in the warm water. Let it sit until it becomes foamy and bubbly, indicating that the yeast is active and ready for use.
- Mix Dough: Add the salt, canola oil, and two cups of flour to the yeast mixture. Mix until combined. Gradually add the remaining flour, ¼ cup at a time, working until a soft dough forms that pulls away from the sides of the bowl.
- Knead Dough: Knead the dough thoroughly until it becomes smooth and elastic. Then, place it in a greased bowl, cover it with a cloth or plastic wrap, and allow it to rise for one hour in a warm place until it doubles in size.
- Shape Breadsticks: Once the dough has risen, gently punch it down to release the gas. Divide the dough into 16 equal pieces. Roll each piece into a 12-inch rope. On each side of the rope, cut a 2-3 inch slit. Roll the dough on either side of the slit into spirals in opposite directions to form bone shapes.
- Second Rise: Place the shaped breadsticks on a greased or parchment-lined baking sheet. Cover them and let them rise for 45 minutes to one hour until they have doubled in size again.
- Preheat Oven: During the last 10 minutes of the second rise, preheat your oven to 425℉ (220℃) to ensure it’s ready for baking.
- Bake Breadsticks: Bake the breadstick bones for 12-14 minutes or until they turn golden brown on top and cooked through.
- Add Topping and Serve: Remove the breadsticks from the oven and immediately brush them with melted butter. Sprinkle with garlic salt and grated parmesan cheese. Serve warm with marinara sauce for dipping.
Notes
- Ensure the water is warm but not hot to avoid killing the yeast.
- You can substitute canola oil with olive oil for a richer flavor.
- To make the shapes easier, use a ruler to measure the dough ropes precisely.
- Letting the dough rise twice is key to achieving soft, fluffy breadsticks.
- These breadsticks are best served fresh and warm but can be stored in an airtight container for up to 2 days.
- Reheat gently in the oven before serving to refresh the texture.
Nutrition
- Serving Size: 1 breadstick bone
- Calories: 110 kcal
- Sugar: 2 g
- Sodium: 210 mg
- Fat: 3 g
- Saturated Fat: 1 g
- Unsaturated Fat: 2 g
- Trans Fat: 0 g
- Carbohydrates: 18 g
- Fiber: 1 g
- Protein: 3 g
- Cholesterol: 5 mg

