
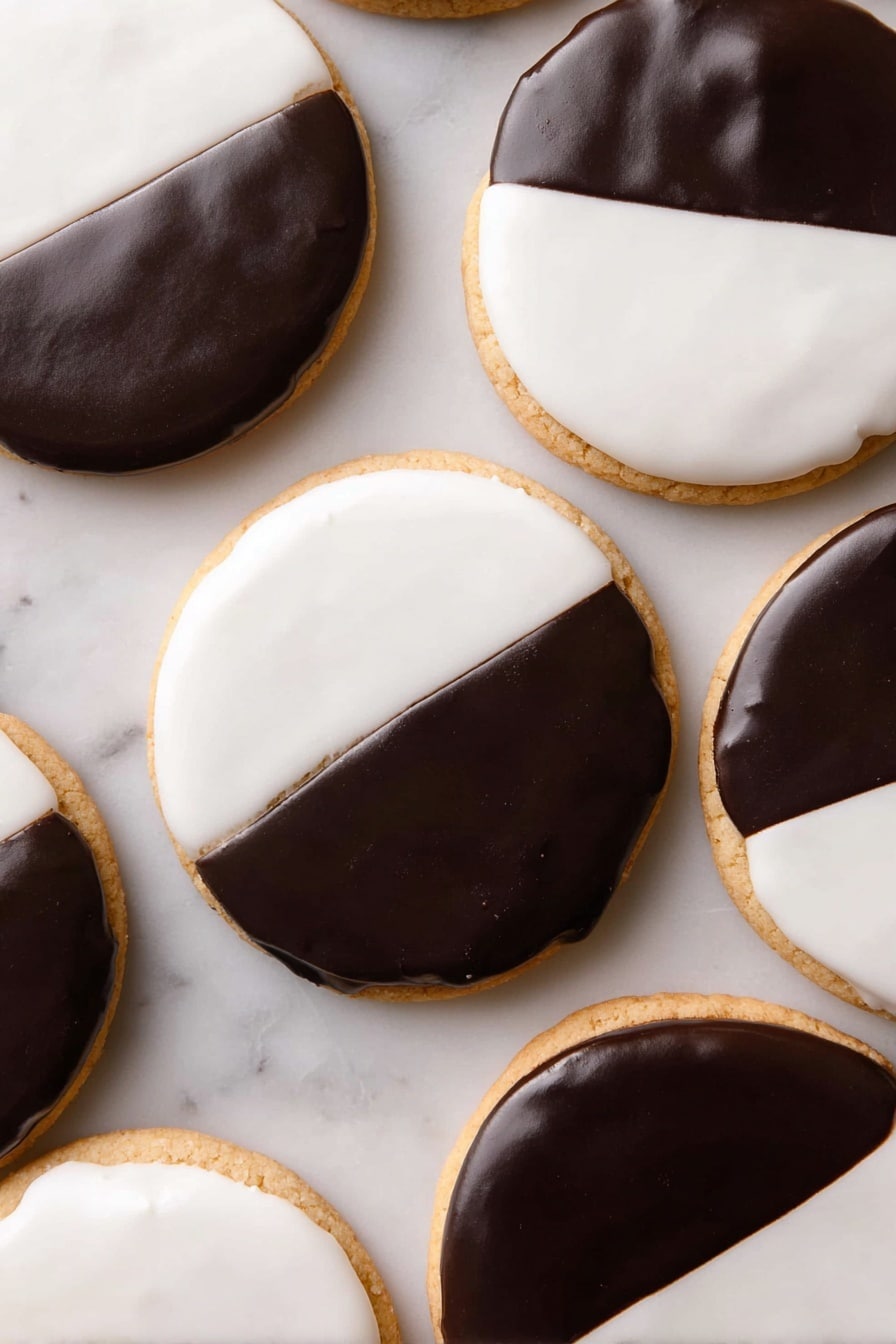
If you’re anything like me and have a soft spot for classic bakery treats, you’re going to adore this Black and White Cookies with Vanilla and Chocolate Icing Recipe. These cookies come straight from that nostalgic New York vibe—soft, cakey, and coated with half vanilla and half chocolate icing so you can literally have the best of both worlds in every bite. I love this recipe because it’s reliable, the texture is spot-on, and the icing turns out shiny and smooth—perfect for sharing (or keeping all to yourself, I won’t tell!). Stick around, and I’ll walk you through everything you need to know.
Why You’ll Love This Recipe
- Perfect Balance: You get the classic combo of vanilla and chocolate icing, giving you contrasting flavors in one cookie.
- Soft, Cakey Texture: Unlike tougher cookies, these stay tender and moist, just like the ones from your favorite bakery.
- Easy to Make: No fancy ingredients or complicated techniques—just straightforward steps that deliver delicious results.
- Customizable Icing: You can adjust the thickness of the icing to your liking, making decorating fun and simple.

Ingredients You’ll Need
For these cookies, it’s all about good quality basics that mesh beautifully for that iconic flavor and texture. I always recommend using room temperature ingredients to get the batter just right. A quick tip: be sure to grab Dutch-process cocoa to get that rich chocolate icing depth.

- All-purpose flour: Provides the structure with the perfect balance of softness and stability.
- Baking soda: Helps the cookies rise and keeps them light.
- Salt: Just a touch to enhance all the other flavors.
- Unsalted butter: Using room temp butter is key for that creamy batter texture.
- Granulated sugar: Adds sweetness and helps with tenderness.
- Large egg: Binds everything and adds richness.
- Vanilla extract: A must for that sweet, comforting aroma.
- Buttermilk: Gives a subtle tang and tender crumb.
- Confectioners’ sugar: The base of the icing, making it smooth and sweet.
- Lemon juice (optional): Brightens the vanilla icing for balance.
- Water: Adjust as needed to get the perfect icing consistency.
- Light corn syrup: Adds shine and keeps the icing from cracking.
- Cocoa powder (Dutch-process preferred): Essential for that rich chocolate icing.
Variations
I like to keep the classic feel with this Black and White Cookies with Vanilla and Chocolate Icing Recipe, but there’s plenty of room to make it your own. Don’t hesitate to get creative with the flavors or the icing thickness—believe me, every way tastes terrific!
- Gluten-free option: I swapped in a gluten-free all-purpose mix once and the cookies had a delightful crumb, though they needed a tiny longer bake time.
- Flavored icing: Adding a splash of almond or orange extract to the vanilla icing gave it a fun, fresh twist that my family loved.
- Less sweet: Dial down the sugar slightly in the icing to suit your taste buds—just watch the consistency.
- Mini cookies: I made smaller versions for a party once, baking just 7-8 minutes; they disappeared in no time!
How to Make Black and White Cookies with Vanilla and Chocolate Icing Recipe
Step 1: Get Your Dry Ingredients Ready
Start by preheating your oven to 350°F and lining two baking sheets with silicone mats or parchment paper—trust me, this saves on cleaning and stops sticking. Combine the flour, baking soda, and salt in a bowl and whisk them together so everything is evenly distributed. Setting this mix aside early speeds things up later.
Step 2: Cream the Butter and Sugar
Using a stand mixer fitted with a paddle attachment, beat the softened butter on medium-high until it’s smooth and creamy. Then add the granulated sugar and whip it until the mix looks fluffy and lighter in color—this usually takes about 3-4 minutes. This step is crucial because it locks air into the batter, giving you those soft, tender cookies everyone raves about.
Step 3: Add the Egg and Vanilla
Next, crack in the egg and pour in the vanilla extract. Scrape down the bowl to be sure every bit is incorporated, then mix on medium until everything is combined and smooth. This is the moment when the batter becomes beautifully cohesive, ready to welcome the dry ingredients.
Step 4: Alternate Adding Flour and Buttermilk
Now, add the flour mixture and buttermilk in alternating batches: start with a third of your flour, then half the buttermilk, then repeat, finishing with flour. Mix everything on low speed just until you no longer see dry flour. Resist the urge to overmix—it’s tempting, I know, but overworking the batter will make your cookies tougher.
Step 5: Portion and Bake
Use a ¼ cup cookie scoop or a greased measuring cup to drop scoops of dough onto your prepared baking sheets, spacing them about 4 inches apart—these babies spread out while baking. I recommend no more than five per sheet for even baking. Bake on the center rack for 13-14 minutes. When you gently press the center, it should spring back—not too soft or too firm.
Step 6: Cool the Cookies Upside Down
This may be surprising, but cooling your cookies upside down makes the cookie bottoms—the sides that rest on the baking sheet—flat and perfect for icing. After they’ve cooled a few minutes on the sheets, gently flip them over onto a wire rack. This trick prevents cracked or uneven tops once you begin icing.
Step 7: Make the Vanilla and Chocolate Icings
While the cookies cool, whisk together the confectioners’ sugar, lemon juice (if using), vanilla, corn syrup, and water until smooth for the vanilla icing. Adjust with a teaspoon of water at a time if the icing is too thick—it should be spreadable without dripping off. Then, scoop almost half of this icing into a separate bowl. Stir in the cocoa powder, a splash of water, and a bit of corn syrup. Mix at high speed until it transforms into a glossy, luscious chocolate icing that matches the vanilla’s consistency.
Step 8: Ice Your Cookies Like a Pro
Using a small offset spatula or knife, spread a thin, even layer of vanilla icing on half of each cookie. To get that neat dividing line, gently draw the icing from the middle to the edges with the clean edge of your spatula or knife. Clean your utensil often for crisp lines. Once the vanilla sets, cover the other half with the chocolate icing, pressing it gently towards the center and smoothing it out. Let them dry completely before digging in—patience totally pays off here!
Pro Tips for Making Black and White Cookies with Vanilla and Chocolate Icing Recipe
- Use Room Temperature Ingredients: I used to rush this part, but letting eggs and butter warm up really smooths your batter and helps everything combine beautifully.
- Don’t Overmix the Batter: I learned the hard way that overmixing makes the cookies dense, so stop as soon as the flour disappears.
- Spacing is Key: Give your cookie dough plenty of room because these cookies spread out quite a bit in the oven.
- Perfect Your Icing Consistency: I adjust with just tiny amounts of water to ensure I don’t end up with runny icing that melts off the cookie.
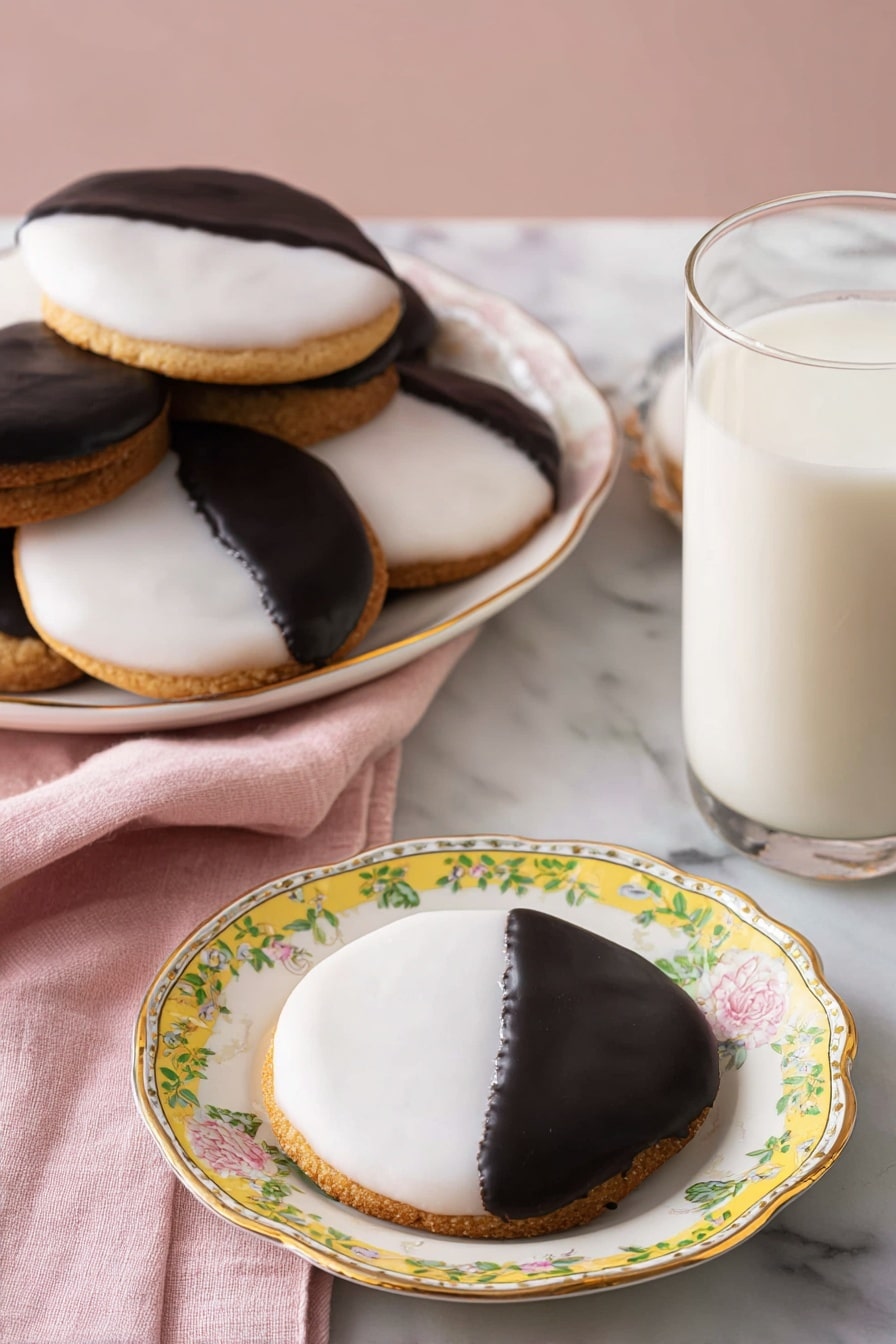
How to Serve Black and White Cookies with Vanilla and Chocolate Icing Recipe
Garnishes
I usually keep these simple, but a light dusting of finely grated lemon zest on the vanilla side or a sprinkle of cocoa powder on the chocolate side can take these from classic to wow in a snap. For a festive touch, adding edible gold leaf or sprinkles along the dividing line is a fun idea I tried on special occasions.
Side Dishes
These cookies shine on their own, but they’re equally delightful paired with a strong cup of coffee or a creamy hot chocolate. Sometimes I serve them at brunch alongside fresh fruit and a spread of other pastries for a delightful variety.
Creative Ways to Present
For holidays or gatherings, I like to stack them in glass cookie jars layered with parchment for a charming display. Another favorite is presenting them arranged in a circle on a large plate with small bowls of extra icing for dipping—everyone loves a little interactive treat moment!
Make Ahead and Storage
Storing Leftovers
Store your iced Black and White Cookies in an airtight container at room temperature for up to 3 days. I find placing parchment paper between layers helps keep the icing intact and prevents sticking. If your kitchen’s warm, the icing might soften a bit, but the flavor stays amazing.
Freezing
You can freeze these cookies before icing if you want to prep ahead—just bake and cool them completely, then freeze in a single layer on a baking sheet. Once frozen, transfer to a freezer-safe container. Thaw before icing and decorating for best results. I’ve found freezing after icing dulls the shine and texture slightly, so this method works best.
Reheating
Since these are soft cake-like cookies, I usually don’t reheat them. But if you want that fresh-baked warmth, popping a cookie in the microwave for 10-12 seconds softens them nicely without melting the icing.
FAQs
-
Can I make these Black and White Cookies gluten-free?
Absolutely! Substituting an equal amount of gluten-free all-purpose flour blend usually works well. Just keep an eye on the texture and bake a bit longer if needed since gluten-free flours sometimes require extra baking time.
-
Why do I need to cool cookies upside down before icing?
Cooling your cookies upside down flattens the baking sheet side, giving you a smooth surface to spread icing on and preventing cracks or rough edges. It’s a little trick that makes your decorating look professional.
-
How do I get my icing shiny and smooth?
The key is using light corn syrup in your icing—it adds gloss and keeps the surface smooth. Also, mix the icing thoroughly and adjust with small amounts of water to get a spreadable but not runny consistency.
-
Can I use regular cocoa powder instead of Dutch-process?
Yes, you can, but Dutch-process cocoa is less acidic and gives a deeper, smoother chocolate flavor that pairs beautifully with vanilla icing. If you only have regular cocoa, it might taste slightly more bitter.
-
How long do these cookies stay fresh?
When stored in an airtight container at room temperature, these cookies are best enjoyed within 3 days. The icing may soften over time, so they’re freshest when eaten sooner rather than later.
Final Thoughts
This Black and White Cookies with Vanilla and Chocolate Icing Recipe holds a special place in my kitchen because it brings that perfect nostalgic bakery feeling right to my home. The fluffy texture, the glossy dual icing, and the little sweet moment in every bite never fail to brighten my day—and I hope it does the same for you. Try baking these soon, share them with your loved ones, and get ready to fall in love with an old classic all over again.
Print
Black and White Cookies with Vanilla and Chocolate Icing Recipe
- Prep Time: 20 minutes
- Cook Time: 13-14 minutes
- Total Time: 93 minutes (includes cooling and icing time)
- Yield: 8 cookies
- Category: Dessert
- Method: Baking
- Cuisine: American
Description
Classic New York-style Black and White Cookies featuring a tender, buttery cake-like base topped with a smooth, glossy half-vanilla, half-chocolate icing for the perfect balance of flavors and textures.
Ingredients
Dry Ingredients
- 1 ⅓ cups all-purpose flour (160g)
- ½ tsp baking soda
- ½ tsp salt
Wet Ingredients and Base
- 6 Tbsp unsalted butter, room temperature (85g)
- ½ cup granulated sugar (100g)
- 1 large egg, room temperature
- 2 tsp vanilla extract (10mL)
- ⅓ cup buttermilk (80mL)
Vanilla Icing
- 2 cups confectioners’ sugar (240g)
- 2 tsp lemon juice, fresh (optional)
- 2 Tbsp water, plus more as needed
- 1 Tbsp light corn syrup
- ½ tsp vanilla extract
Chocolate Icing
- 3 Tbsp cocoa powder, Dutch-process preferred (18g)
- Water as needed
- 1 tsp corn syrup
Instructions
- Prepare Dry Ingredients: Preheat your oven to 350°F (175°C) and line two baking sheets with silicone mats or parchment paper. In a medium bowl, whisk together the all-purpose flour, baking soda, and salt and set aside.
- Cream Butter and Sugar: In the bowl of a stand mixer fitted with a paddle attachment, cream the room temperature unsalted butter. Add the granulated sugar and beat on high speed until the mixture is light and fluffy. Then mix in the egg and vanilla extract. Scrape down the sides to ensure even mixing.
- Combine Batter: Add the dry flour mixture and buttermilk alternately in three batches to the creamed mixture, starting and ending with the flour. Mix on low speed just until combined. Use a spatula to scrape the bowl and mix in any remaining flour or butter bits.
- Form Cookies: Using a ¼ cup cookie scoop or a greased measuring cup, drop dollops of batter onto the prepared baking sheets, spacing about 4 inches apart to allow for spreading. Place no more than 5 cookies per baking sheet to avoid overcrowding.
- Bake Cookies: Bake on the center rack at 350°F for 13-14 minutes or until cookie centers are springy to the touch. Remove and let cookies cool for a few minutes on the baking sheets before transferring them upside down to a wire rack to cool completely. This technique ensures the flat bottom becomes the top for icing.
- Prepare Vanilla Icing: In a large bowl, whisk together confectioners’ sugar, vanilla extract, lemon juice (optional), light corn syrup, and 2 tablespoons of water. Add more water if necessary to achieve a smooth, spreadable consistency.
- Prepare Chocolate Icing: Transfer nearly half of the vanilla icing to a separate bowl. Mix in cocoa powder, a few teaspoons of water, and a teaspoon of corn syrup. Beat on high speed until the chocolate icing is glossy and smooth. Adjust water amount as needed to match vanilla icing consistency.
- Ice Cookies – Vanilla Side: Using a small or offset spatula, spread a thin layer of vanilla icing over half of each cooled cookie. Use the edge of a knife or spatula to create a neat dividing line down the center by gently drawing the icing from the middle towards the edge. Clean the tool before repeating on the other side. Allow the icing to set.
- Ice Cookies – Chocolate Side: Spread the chocolate icing on the other half of the cookie, pushing the icing right to the center. Smooth quickly with the spatula and allow the icing to set completely before serving.
Notes
- Get the best of both worlds with these Black and White cookies, glazed with both chocolate and vanilla icing so you don’t have to choose your favorite flavor.
- Using Dutch-process cocoa powder gives a richer, smoother chocolate icing.
- Cooling the cookies upside down creates a flat surface perfect for even icing application.
- Ensure you don’t overcrowd the baking sheets so cookies bake evenly and maintain their shape.
Nutrition
- Serving Size: 1 cookie
- Calories: 347 kcal
- Sugar: 45 g
- Sodium: 238 mg
- Fat: 10 g
- Saturated Fat: 6 g
- Unsaturated Fat: 3 g
- Trans Fat: 1 g
- Carbohydrates: 62 g
- Fiber: 1 g
- Protein: 4 g
- Cholesterol: 47 mg


