

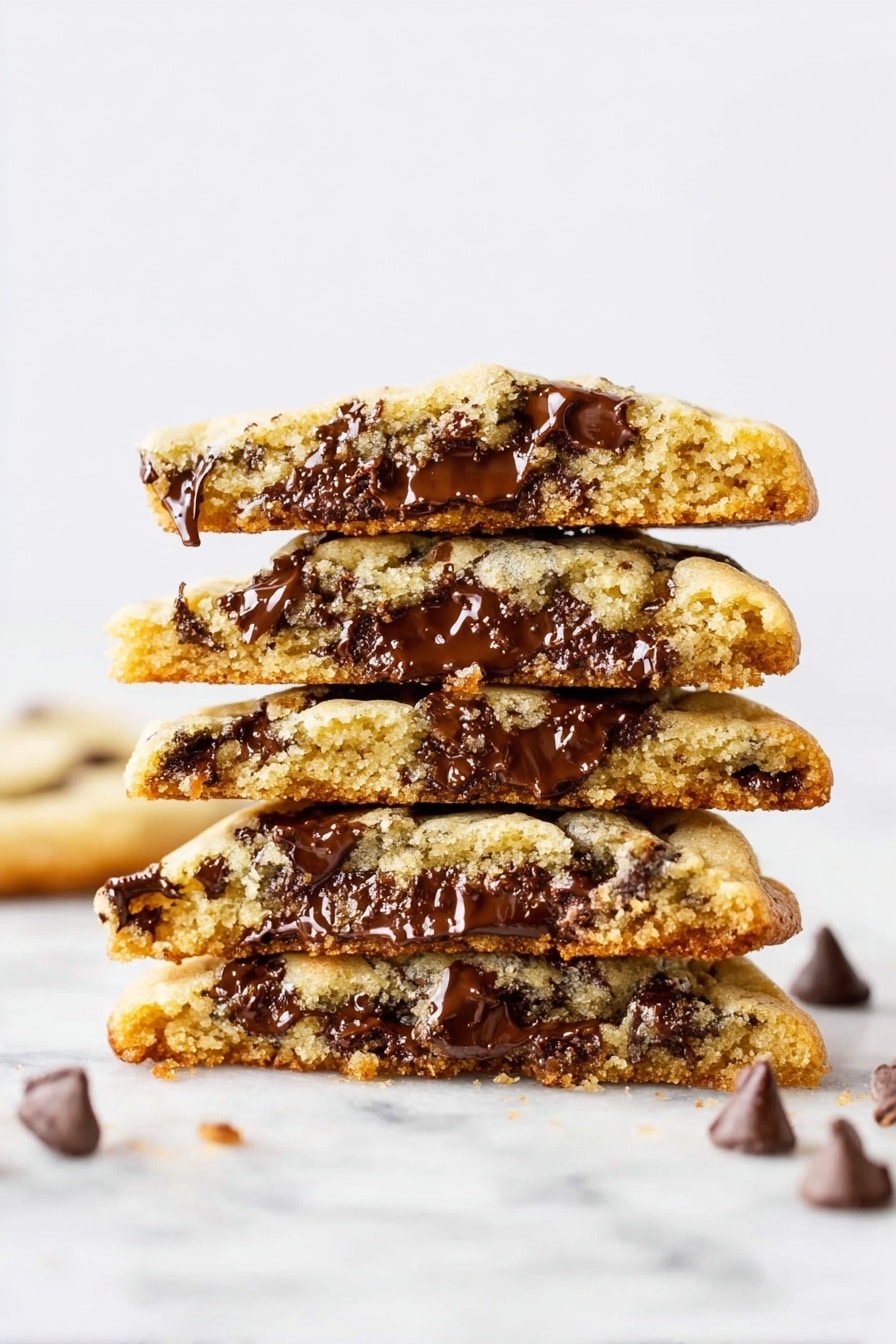
If you’ve ever wished you could bake the kind of chocolate chip cookies that look straight from a bakery display, you’re in the right place. This Bakery Style Chocolate Chip Cookies Recipe is absolutely fan-freaking-tastic and foolproof, delivering those perfectly thick, chewy, and golden treats that everyone raves about. Trust me, after trying countless recipes, I discovered this one really nails that bakery vibe with a soft center and just enough crispness on the edges — and I can’t wait to share all my tips with you.
Why You’ll Love This Recipe
- Thick and Chewy Texture: Each cookie comes out with perfect thickness and a chewy center that reminds me of my favorite bakery finds.
- Simple Ingredients: No fancy additives here—just quality staples you likely already have in your kitchen.
- Make-Ahead Dough: I love that letting the dough rest in the fridge enhances the flavor and texture dramatically.
- Consistently Great Results: You’ll find this recipe is surprisingly reliable every time—you don’t need to be a pro baker to nail it.

Ingredients You’ll Need
The magic of this Bakery Style Chocolate Chip Cookies Recipe starts with simple, thoughtful ingredients that balance richness, sweetness, and a touch of saltiness. Each ingredient has a role, and using them right will make all the difference when your cookies come out of the oven.
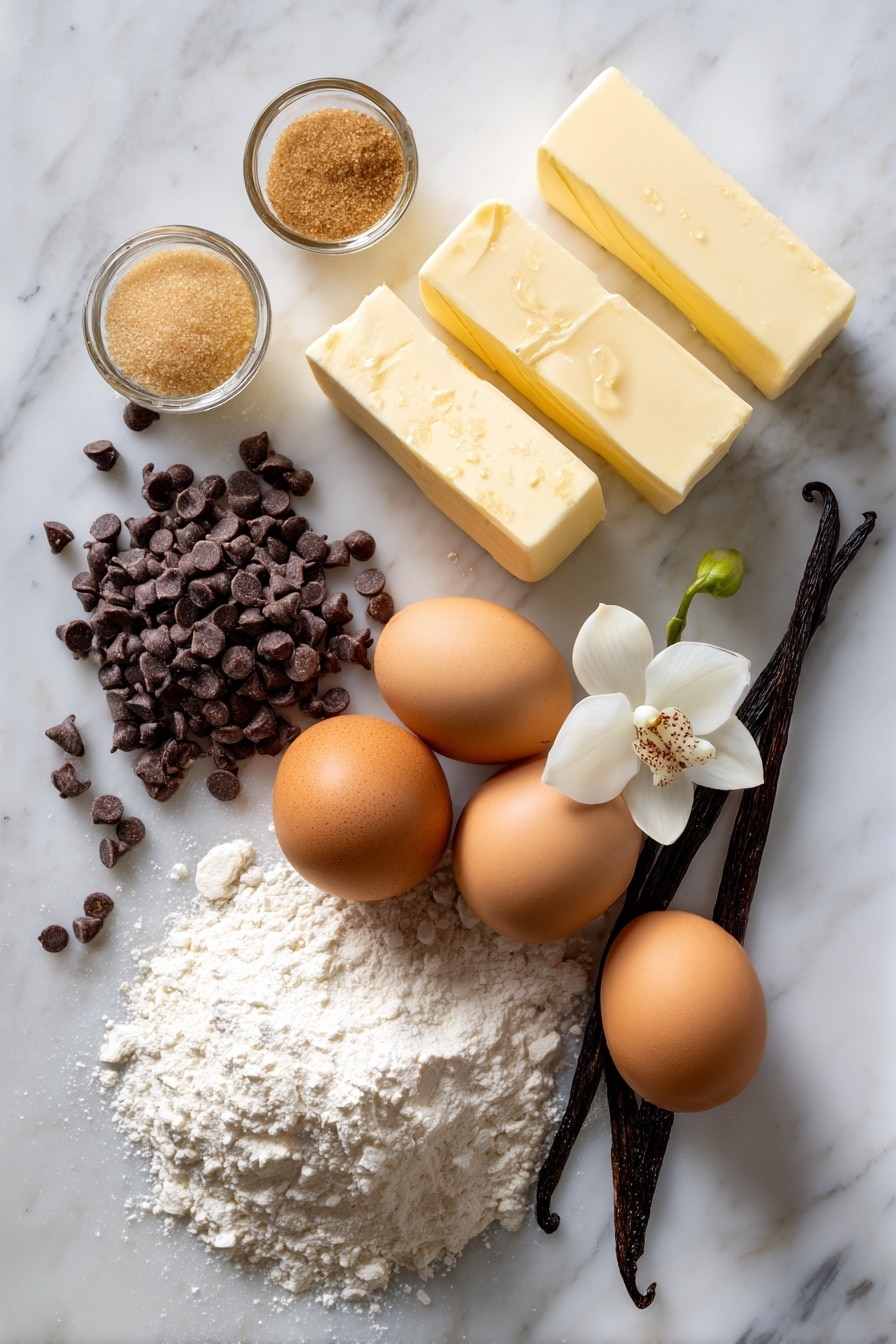
- All-purpose flour: Provides the structure and the right chewiness without being too cakey.
- Baking soda: Helps the cookies rise and spread perfectly for that bakery shape.
- Fine sea salt: Not just for taste — it brings out the sweetness of the chocolate and balances flavors.
- Unsalted butter: I always recommend using it at cool room temperature—it creams better and creates the best texture.
- Granulated sugar: Adds crispness to the edges.
- Light brown sugar: Packed with molasses, it’s key for moisture and that chewy softness I adore.
- Vanilla extract: A little vanilla goes a long way to deepen the cookies’ flavor.
- Large eggs: At room temperature, they help bind and create a tender crumb.
- Semisweet chocolate chips: The star of the show—mix it up with your favorite chips or chunks for variety.
Variations
One of the things I love most about this Bakery Style Chocolate Chip Cookies Recipe is how easy it is to tweak. I’m all for making a recipe your own, so here are a few ways I like to customize mine depending on mood, season, or what I have on hand.
- Nutty Twist: I sometimes add a cup of chopped walnuts or pecans for crunch and that toasty flavor that pairs so well with chocolate.
- Double Chocolate: Swap half the flour for cocoa powder, and add white chocolate chips instead for a rich, decadent upgrade.
- Chewy vs. Crispy: If you prefer crispier edges, reduce the brown sugar slightly and add a teaspoon of cornstarch to keep the cookies tender but firm.
- Seasonal Spice: Around the holidays, I love adding a pinch of cinnamon or a dash of espresso powder — it adds subtle depth that surprises everyone.
How to Make Bakery Style Chocolate Chip Cookies Recipe
Step 1: Gather and Prep Your Ingredients
Start by preheating your oven to 350ºF and lining your baking sheets with parchment paper—trust me, this saves a lot of cleanup later. Then, in a medium bowl, whisk together your flour, baking soda, and sea salt. It’s a small step, but sifting or mixing ahead means your dry ingredients are perfectly combined for even texture.
Step 2: Cream the Butter and Sugars
Using an electric mixer, beat your cool room-temperature butter with the granulated and brown sugars until the mixture is creamy and fluffy—about two minutes. This step is crucial because it incorporates air and sets the foundation for those tender, bakery-quality cookies. Don’t forget to scrape down the sides so everything is perfectly mixed!
Step 3: Add Eggs and Vanilla
Next, add your vanilla extract and eggs—two large eggs, room temperature too—and beat until fully combined. Eggs are what help the dough hold together, plus they add moisture. If your eggs are cold, you might notice the butter mixture getting stiff, so warming them up helps keep things smooth.
Step 4: Incorporate Dry Ingredients and Chocolate Chips
Slowly add your flour mixture to the wet ingredients in batches. Mixing gradually stops flour dust clouds and helps you avoid over-mixing, which can toughen cookies. When the dough is just combined, fold in those luscious chocolate chips. I love a nice generous mix—chunks and chips both make each bite interesting.
Step 5: Chill the Dough for Ultimate Texture
This is the trick I learned that makes all the difference: wrap your cookie dough in plastic wrap and refrigerate it for at least 24 hours but no more than 72. This “marinating” process helps develop flavor and makes the dough easier to handle. Plus, it prevents cookies from spreading too thin, so you get that bakery-style thickness. When you’re ready to bake, let the dough soften just enough to scoop.
Step 6: Bake to Golden Perfection
Using a large cookie scoop, drop 3-tablespoon-sized balls onto your prepared baking sheets. Space them well apart—you don’t want them merging during baking. Bake for 11 to 13 minutes or until you see that beautiful golden brown edge forming. The center might still look slightly soft, but it will set as the cookies cool, so don’t overbake.
Cool the cookies on the baking sheet for about five minutes before transferring them to a wire rack. This resting time lets them firm up just the right amount without losing that soft, gooey center we crave.
Pro Tips for Making Bakery Style Chocolate Chip Cookies Recipe
- Use Room Temperature Ingredients: I learned this trick early—cold butter or eggs can mess with dough consistency and baking results.
- Don’t Skip the Chill: Patience is key here; refrigerated dough bakes into thicker, more flavorful cookies.
- Choose Quality Chocolate: I always go for semisweet chocolate chips with a touch of bitterness to balance the sweetness.
- Watch Baking Time Closely: Cookies continue to cook on the sheet after coming out of the oven; pulling them out slightly early prevents dryness.
How to Serve Bakery Style Chocolate Chip Cookies Recipe
Garnishes
I like to keep it simple with these cookies—sometimes just a light sprinkle of flaky sea salt on top right before baking adds an amazing contrast that really brings out the chocolate flavor. For a fun twist, you can dust them with a little powdered sugar once cooled, especially if you’re gifting them.
Side Dishes
Nothing beats pairing these warm cookies with a cold glass of whole milk or your favorite coffee. For a special treat, I’ve also served them alongside vanilla ice cream or drizzled with caramel sauce for an indulgent dessert experience.
Creative Ways to Present
Hosting a party? I’ve arranged these cookies on a tiered platter with fresh berries and edible flowers for a charming look. Wrapping several in parchment tied with twine also makes for a sweet homemade gift box that friends and family love!
Make Ahead and Storage
Storing Leftovers
I keep leftovers in an airtight container at room temperature, and they stay delicious for up to three days. To keep that soft-and-chewy texture, I recommend adding a slice of bread inside the container—the cookies absorb moisture from the bread and stay fresh longer.
Freezing
If I want to save some dough for later, I portion it into balls and freeze them on a baking sheet before transferring to a freezer bag. When I’m ready to bake, I just pop frozen dough balls on a baking sheet and add a couple extra minutes to the bake time. The cookies turn out just as amazing as fresh!
Reheating
To warm up leftover cookies, I pop them in the microwave for 10–15 seconds or in a preheated oven at 300ºF for about 5 minutes. This revives their soft, melty center without drying them out—definitely my go-to comfort move.
FAQs
-
Can I use salted butter instead of unsalted in this Bakery Style Chocolate Chip Cookies Recipe?
You can, but I prefer unsalted so I control the salt levels. If using salted butter, reduce or omit the added sea salt to keep the flavor balanced.
-
Why should I refrigerate the cookie dough before baking?
Chilling the dough allows the flour to fully hydrate and the flavors to develop. It also solidifies the fat in the dough, so cookies spread less and come out thicker with a better texture—you’ll notice a much more “bakery-style” result.
-
How do I know when the cookies are done baking?
Look for golden brown edges while centers still look slightly soft—this means the cookies will finish setting as they cool, leaving you with a perfect gooey middle and crisp edges.
-
Can I substitute different types of chocolate chips in this recipe?
Absolutely! Semi-sweet chocolate is classic, but white chocolate, milk chocolate, or even chunks of dark chocolate can all work beautifully. Adjust sweetness and balance depending on what you choose.
-
How do I store these cookies to keep them soft?
Store them in an airtight container with a slice of fresh bread to retain moisture. Also, keep them at room temperature—not in the fridge, which can dry them out.
Final Thoughts
Honestly, I absolutely love how this Bakery Style Chocolate Chip Cookies Recipe turns out every single time. It’s the recipe I reach for when I want that nostalgic, bakery-fresh flavor but in my own kitchen. The dough chilling trick was a game changer for me, and I’m confident you’ll find these cookies thick, soft, and irresistible—just like from your favorite local bakery. Give it a try, and I bet this will become your go-to chocolate chip cookie recipe too!
Print
Bakery Style Chocolate Chip Cookies Recipe
- Prep Time: 15 minutes
- Cook Time: 13 minutes
- Total Time: 28 minutes
- Yield: 26 cookies
- Category: Dessert
- Method: Baking
- Cuisine: American
Description
These Bakery Style Chocolate Chip Cookies offer the perfect combination of ultra-thick, golden brown edges with ooey, gooey centers. Made with simple ingredients and an easy-to-follow method, this recipe yields soft, chewy, and flavorful cookies reminiscent of your favorite bakery treats. For best results, allowing the dough to refrigerate for 24 to 72 hours enhances thickness, chewiness, and depth of flavor.
Ingredients
Dry Ingredients
- 3 cups (380 grams) all-purpose flour
- 1 teaspoon baking soda
- 1 teaspoon fine sea salt
Wet Ingredients
- 2 sticks (227 grams) unsalted butter, at cool room temperature (67°F)
- 1/2 cup (100 grams) granulated sugar
- 1 1/4 cups (247 grams) lightly packed light brown sugar
- 2 teaspoons vanilla extract
- 2 large eggs, at room temperature
Add-ins
- 2 cups (340 grams) semisweet chocolate chips
Instructions
- Preheat and prepare baking sheets. Preheat your oven to 350ºF (175ºC). Line baking sheets with parchment paper to prevent sticking and ensure even baking.
- Mix dry ingredients. In a medium bowl, whisk together the all-purpose flour, baking soda, and fine sea salt until well combined.
- Cream butter and sugars. In the bowl of an electric mixer, beat the room-temperature unsalted butter, granulated sugar, and light brown sugar on medium speed until creamy and fully combined, about 2 minutes. Scrape down sides and bottom of the bowl as needed.
- Add eggs and vanilla. Add the vanilla extract and eggs to the creamed butter and sugar mixture, beating until fully incorporated. Scrape down the bowl as needed to ensure even mixing.
- Incorporate dry ingredients. Gradually add the flour mixture to the wet ingredients, beating on low speed or stirring gently to combine. Avoid overmixing to maintain tender cookies.
- Stir in chocolate chips. Fold the semisweet chocolate chips evenly into the cookie dough using a spatula or wooden spoon.
- Optional chilling of dough. For the best texture, wrap the dough tightly in plastic wrap and refrigerate for at least 24 hours and up to 72 hours. This resting period allows the dough to marinate, resulting in thicker, chewier, and more flavorful cookies. Before baking, let refrigerated dough sit at room temperature until soft enough to scoop.
- Scoop dough onto baking sheets. Using a large cookie scoop or spoon, divide the dough into 3-tablespoon-sized balls and drop them onto the prepared baking sheets, spacing them adequately to allow spreading.
- Bake the cookies. Bake in the preheated oven for 11 to 13 minutes, or until the edges are golden brown and the centers look set but still soft.
- Cool before serving. Remove the cookies from the oven and allow them to cool on the baking sheets for 5 minutes. Then transfer them to wire racks to cool completely for the best texture.
- Storage. Store cooled cookies in an airtight container at room temperature for up to 3 days to maintain freshness. Refer to detailed storage tips for longer preservation.
Notes
- These ultra-thick chocolate chip cookies feature golden brown edges and soft, gooey centers for an irresistible texture.
- Refrigerating the dough for 24 to 72 hours greatly improves thickness, chewiness, and flavor development, but you can bake immediately if pressed for time.
- Allowing dough to come to room temperature before scooping helps form perfect cookie shapes.
- Use parchment paper to prevent sticking and promote even bake.
- Store cookies in an airtight container at room temperature for up to 3 days or freeze for longer storage.
- This recipe makes approximately 26 large cookies.
Nutrition
- Serving Size: 1 cookie
- Calories: 230
- Sugar: 16g
- Sodium: 140mg
- Fat: 12g
- Saturated Fat: 7g
- Unsaturated Fat: 4g
- Trans Fat: 0g
- Carbohydrates: 29g
- Fiber: 1g
- Protein: 3g
- Cholesterol: 40mg


