

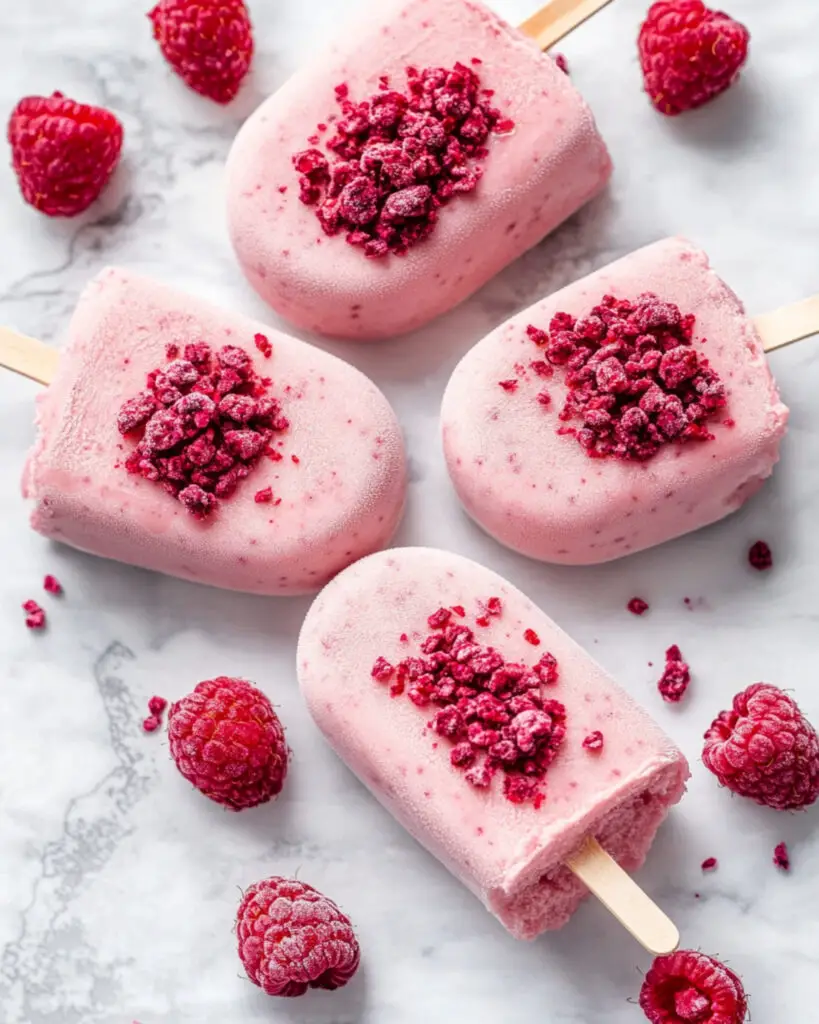
Bite into a Raspberry White Chocolate Ice Cream Pop and you’ll see why this treat becomes an instant favorite. Imagine creamy, tangy ice cream infused with real raspberries—swirled with just enough tartness from buttermilk—dressed up in a crisp shell of velvety white chocolate and showered with bits of freeze-dried raspberries for a finishing touch. The best part? The hands-on time is minimal, so you can whip up a batch between work and dinner, making these popsicles the ultimate make-ahead dessert for busy weeknights or summer lounging. If you love the pairing of sweet and tart, these pops deliver in every frosty bite.
Why You’ll Love This Recipe
- Delightful Flavors and Textures: Each pop balances fresh berry brightness, a whisper of vanilla, and a creamy, rich center under a snappy white chocolate shell. It’s summer on a stick.
- No-Fuss Process: With only about 30 minutes of actual work, the rest is chill time—literally. It’s the perfect “get ahead” dessert that lets the freezer do the hard part.
- Impressive but Easy: These pops feel (and look) like a special occasion treat, but truly anyone can make them. No fussy pastry skills required.
- Customizable: No ice cream maker? No problem! These pops can be made churned or unchurned (details below), and substitutions are a breeze.
- Kid-Friendly & Crowd-Pleasing: Whether it’s a family treat or a backyard BBQ, these pops will be gone faster than you can say “seconds, please.”

Ingredients You’ll Need
- Raspberries (fresh or frozen): Bursting with tart, juicy flavor; the absolute star of the show.
- Lemon Juice: Adds brightness and lifts those raspberry notes.
- Granulated Sugar: Sweetens the berry mixture and helps achieve that luscious mouthfeel.
- Vanilla Bean or Extract: The hint of real vanilla takes everything up a notch—go for the seeds if you can.
- Heavy Whipping Cream: Adds creaminess and rich texture; can’t skip for that true ice cream feel.
- Buttermilk: Offers tang and keeps the ice cream from feeling too heavy; also helps it freeze beautifully.
- White Chocolate: Forms the decadent, candy-like shell; use good quality for best results.
- Cocoa Butter or Vegetable Shortening: Helps the white chocolate coat the pops smoothly and creates the perfect snap.
- Freeze-Dried Raspberries: Used two ways! Blend for a colorful, zesty coating and crush for a gorgeous, fruity garnish.
Tip: If you want those gorgeous flecks of vanilla, use a vanilla bean or vanilla bean paste.
Note: You’ll find the complete list of ingredients, along with their exact measurements, in the printable recipe card at the bottom of this post.
Variations
- Dairy-Free Version: Swap heavy cream and buttermilk for full-fat coconut yogurt and coconut cream for a tropical twist.
- Berry-Packed: Substitute blackberries or mixed berries for a deeper flavor or a darker swirl.
- Chocolate Fans: Use milk or dark chocolate in place of white chocolate for the coating.
- Nutty Crunch: Press chopped pistachios or toasted nuts onto the chocolate coating before it sets.
- Fresh Flavors: Add a teaspoon of finely grated lemon or orange zest to the berry mix for extra zing.
How to Make Raspberry White Chocolate Ice Cream Pops
Step 1: Cook the Raspberries
Combine raspberries, lemon juice, sugar, and vanilla in a saucepan. Simmer gently, mashing the berries until juicy and fragrant. This only takes a few minutes, and your kitchen will smell like a summer berry patch.
Step 2: Strain and Cool
Strain the mixture through a fine mesh sieve to remove seeds and skins—press well to get every drop of that ruby-red juice. Let the mixture cool to room temp.
Step 3: Blend in the Creams
Stir in the heavy cream and buttermilk. Cover the surface with plastic wrap to prevent a skin from forming, and chill until completely cold (at least 3-4 hours or even overnight for top results).
Step 4: Freeze or Churn
If you have an ice cream maker, churn the mixture until thick and velvety, then spoon into silicone popsicle molds (standard molds won’t work for churned ice cream). No ice cream maker? Pour the well-chilled berry mixture straight into popsicle molds for a firmer, icier pop.
Insert sticks and freeze overnight until fully set.
Step 5: Coat in White Chocolate Magic
Once pops are frozen solid, carefully unmold and arrange them on a chilled, parchment-lined baking sheet. Melt the white chocolate and cocoa butter/shortening until glossy and smooth. Blitz half the freeze-dried raspberries to a powder and mix into the melted chocolate.
Step 6: Dip, Sprinkle, Freeze Again
Dip each pop quickly into the chocolate coating, then sprinkle with the remaining crushed freeze-dried raspberries before the shell sets (it’s fast!). Return pops to the freezer for a final chill, and they’re ready to enjoy.
Tip: Work in small batches, keeping pops in the freezer until you’re ready to dip. The quick set is key to the crunchy shell!
Pro Tips for Making the Recipe
- Silicone Molds are Key: Churned ice cream pops don’t come out well from rigid molds; silicone makes demolding easy and preserves that perfect shape.
- Work Fast with the Coating: The white chocolate plus cocoa butter sets quickly on cold pops—have your sprinkling toppings ready.
- Get Every Drop: Squeeze the cooked raspberry mixture through the sieve thoroughly for the most intense, seedless flavor.
- Customize the Coating: Don’t be shy with your dip-ins—nuts, sprinkles, coconut flakes, or extra raspberry powder all add flair.
- Use High-Quality White Chocolate: The flavor really shines here, so this is the time for the good stuff.
How to Serve
These pops are made for celebration—set them out on a frosty platter at parties or offer as a summertime dessert after dinner. They pair beautifully with a sparkling rosé, fruity iced tea, or even a strong espresso if you want to make them the star of a dessert course.
For a special touch, wrap each pop in parchment and tie with a ribbon for picnics or lunchbox surprises.
Make Ahead and Storage
Storing Leftovers
Once dipped and set, layer pops in an airtight container with parchment between layers. They’ll hold perfectly in the freezer for up to 2 weeks. Individually wrapping each pop in plastic wrap helps protect against freezer burn and keeps them looking pristine.
Freezing
Plan to freeze pops overnight to get them completely firm, both before and after dipping. The chocolate coating helps lock in freshness.
Reheating
No reheating needed—just let the pop sit at room temperature for 3-5 minutes before biting in for the ideal creamy texture.
FAQs
-
Can I use frozen raspberries instead of fresh?
Absolutely! Frozen raspberries work just as well and are often picked at peak ripeness. Thaw before cooking for best results, and drain off excess liquid if needed.
-
Do I have to use an ice cream maker?
Not at all. While churning gives you a creamier pop, you can simply pour the chilled mixture into popsicle molds for a slightly icier but still delicious treat. Expect one less pop from the batch if you go this route.
-
What’s the best way to melt white chocolate for coating?
The safest method is using a double boiler, but the microwave works if you use short bursts and stir in between. Always mix in the cocoa butter or shortening to ensure a smooth, snappy shell.
-
How do I prevent pops from sticking to the mold?
For churned pops, always use flexible silicone molds and let the pops sit at room temperature for a minute or two before gently removing. Running the outside of the mold under warm water (just briefly) also helps.
Final Thoughts
Raspberry White Chocolate Ice Cream Pops are the perfect blend of fun, flavor, and just a little bit of kitchen magic. Don’t let the steps intimidate you—the process is simple, the ingredients are straightforward, and the reward is absolutely worth it. With these pops in your freezer, you’re always just minutes away from a gourmet treat that’s bound to impress. Give them a try, and don’t be surprised when they disappear faster than you can make them!
Print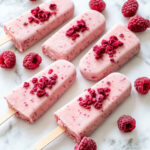
Raspberry White Chocolate Ice Cream Pops Recipe
- Prep Time: 30 minutes
- Cook Time: 10 minutes
- Total Time: 24 hours
- Yield: 5 to 6 popsicles
- Category: Desserts
- Method: Freezing
- Cuisine: American
- Diet: Vegetarian
Description
Raspberry White Chocolate Ice Cream Pops combine the sweet-tart flavor of raspberries with creamy ice cream and a luscious white chocolate coating. These vibrant frozen treats feature a rich, smooth interior made with fresh raspberry puree, real cream, and buttermilk, then get a glossy dip in white chocolate enhanced with freeze-dried raspberry powder. Perfect for summer or special celebrations, they are delightfully fruity with a gourmet touch.
Ingredients
For the Raspberry Ice Cream Base
- 1 1/2 cups (7 ounces) fresh or frozen raspberries
- 1/2 teaspoon lemon juice
- 3/4 cup (5 1/4 ounces) granulated sugar
- Seeds of 1 vanilla bean, or 1 teaspoon vanilla bean extract or paste
- 1/2 cup heavy whipping cream
- 1/2 cup buttermilk
For the White Chocolate Coating
- 12 ounces white chocolate, finely chopped
- 1 tablespoon cocoa butter or vegetable shortening
- 1/2 cup (about 1/2 ounce) freeze dried raspberries
Instructions
- Prepare the Raspberry Puree: In a medium saucepan, combine the raspberries, lemon juice, sugar, and vanilla bean seeds or extract. Simmer over medium heat, mashing the berries as they cook, until the mixture is juicy and fragrant.
- Strain and Cool: Pass the raspberry mixture through a fine mesh sieve, pressing to extract as much liquid as possible. Discard the seeds, then let the puree cool to room temperature.
- Add Dairy and Chill: Stir in the heavy cream and buttermilk to the cooled puree. Cover the mixture with plastic wrap, pressing it down onto the surface. Refrigerate for 3-4 hours or overnight until well chilled.
- Form the Pops: If churned, process the mixture in an ice cream maker according to manufacturer’s instructions, then spread into silicone molds; or, for a non-churned version, pour the chilled mixture directly into popsicle molds (yielding 5 instead of 6 pops). Insert sticks. Freeze overnight until firm.
- Prepare the White Chocolate Coating: Melt the white chocolate with cocoa butter or shortening in a double boiler or microwave in short intervals at half power. When almost melted, remove from heat and let residual heat finish the job.
- Add Raspberry Powder: Finely grind half of the freeze dried raspberries into a powder and stir into the melted white chocolate. Coarsely crush the remaining raspberries to use as a garnish.
- Dip and Garnish the Popsicles: Transfer the white chocolate mixture to a tall glass. Quickly dip each frozen pop into the coating, then place back onto a parchment-lined frozen baking sheet. Immediately sprinkle with the crushed freeze dried raspberries before the coating sets. Repeat with all popsicles.
- Final Freeze: Return the finished pops to the freezer for at least 1-2 hours to ensure the coating is completely set. Wrap individually for storage if desired.
Notes
- If using churned ice cream, silicone molds work best for easy removal.
- Work quickly when coating and garnishing the popsicles, as the white chocolate sets fast on frozen surfaces.
- Popsicles can be wrapped individually in plastic wrap for longer storage and to prevent freezer burn.
- Recipe can be doubled or halved as needed.
Nutrition
- Serving Size: 1 popsicle
- Calories: 320
- Sugar: 28g
- Sodium: 36mg
- Fat: 19g
- Saturated Fat: 10g
- Unsaturated Fat: 7g
- Trans Fat: 0g
- Carbohydrates: 36g
- Fiber: 2g
- Protein: 3g
- Cholesterol: 23mg

