

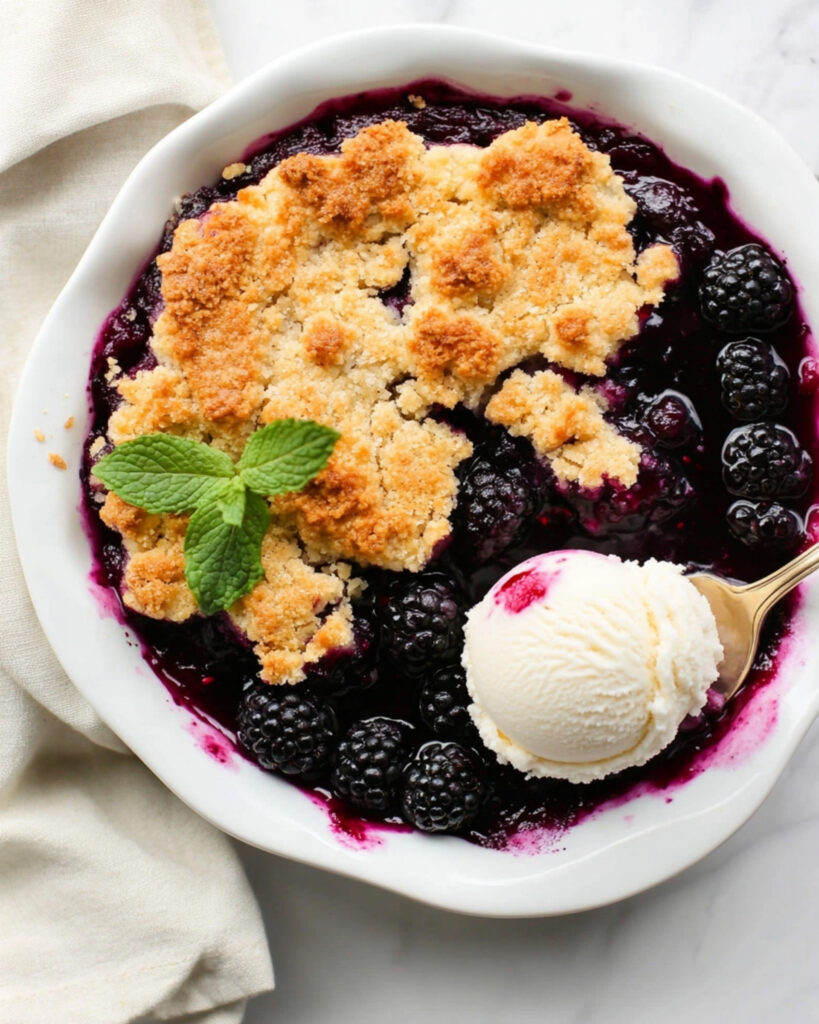
This Berry Cobbler is a rustic dream come true – juicy, sweet berries nestled under a golden, buttery biscuit topping that bakes up crisp on the outside and tender on the inside. It’s the perfect balance of fruit and pastry that works beautifully for casual family dinners or dressed up for special occasions. Ready in just over an hour with minimal hands-on time, this dessert celebrates the natural sweetness of mixed berries while providing that comforting homemade touch we all crave.
Why You’ll Love This Recipe
- Versatile fruit options: Works with any combination of berries, whether fresh or frozen, making it perfect year-round.
- Simple ingredients: Uses pantry staples you likely already have on hand – no special shopping trip required!
- Make-ahead components: The filling can be prepared ahead of time and frozen, making assembly quick when you’re ready to bake.
- Crowd-pleaser: That magical combination of warm fruit and buttery topping never fails to impress, even picky eaters can’t resist.
- Rustic charm: The free-form nature of the topping means there’s no need for perfection – it looks better with a homemade touch!

Ingredients You’ll Need
- Mixed berries: The star of the show! Provides natural sweetness, vibrant color, and tangy flavor. Use any combination you love – strawberries, blueberries, raspberries, blackberries all work beautifully.
- Granulated sugar: Sweetens the filling and topping while helping create that perfect syrupy berry texture.
- Cornstarch: The thickening agent that transforms berry juice into a luscious sauce rather than a watery mess.
- Lemon juice: Brightens all those berry flavors and balances the sweetness with a touch of acidity.
- Vanilla extract: Adds depth and warmth to the berry filling.
- All-purpose flour: Forms the base of our biscuit topping, providing structure.
- Baking powder: Gives the biscuit topping its rise and light texture.
- Salt: Enhances all the flavors and balances the sweetness.
- Butter: Creates those delicious flaky pockets in the biscuit topping – keep it cold for best results!
- Buttermilk: Adds tanginess to the biscuit topping while keeping it tender and moist.
- Coarse sugar: Optional topping that adds a delightful crunch and sparkle to the finished cobbler.
Note: You’ll find the complete list of ingredients, along with their exact measurements, in the printable recipe card at the bottom of this post.
Variations
Want to customize your cobbler? Try these delicious options:
- Single-fruit focus: Use all blueberries or all blackberries for a more uniform flavor.
- Add warm spices: Mix in 1/2 teaspoon cinnamon or a pinch of nutmeg to the berry filling for a warm, spiced twist.
- Citrus zest: Add lemon or orange zest to either the filling or the biscuit topping for a fragrant boost.
- Nutty topping: Sprinkle chopped nuts like almonds or pecans over the biscuit layer before baking.
- Herbal notes: Add fresh chopped herbs like basil or mint to the filling for a sophisticated flavor profile.
- Boozy berry filling: Add a splash of bourbon, rum, or fruit liqueur to the filling for an adult version.
How to Make Berry Cobbler
Step 1: Prepare the Berry Filling
Preheat your oven to 350°F and grease a 9×13-inch baking dish. In a large bowl, gently fold together your mixed berries, sugar, cornstarch, lemon juice, and vanilla extract until everything is evenly coated. The sugar will start drawing out the berry juices, and the cornstarch will mix in to later thicken those juices. Spread this vibrant mixture evenly in your prepared baking dish.
Step 2: Make the Biscuit Topping
In a large bowl, whisk together the flour, sugar, baking powder, and salt. Take your cold, cubed butter and cut it into the dry ingredients using a pastry cutter or two forks. Work quickly to maintain the cold temperature – you’re aiming for a coarse, pebbly texture with pea-sized bits of butter throughout. This creates those wonderful flaky pockets in the final biscuit topping. Slowly drizzle in the cold buttermilk while gently stirring until the dough comes together.
Step 3: Assemble the Cobbler
Take handfuls of the biscuit dough and flatten them slightly between your palms. Arrange these flattened pieces over the berry filling, leaving some small gaps for the berry juices to bubble through. Don’t worry about covering every inch – the rustic look is part of a cobbler’s charm! Brush the top with a tablespoon of buttermilk and sprinkle with coarse sugar for that bakery-quality finish.
Step 4: Bake to Perfection
Bake for 45-55 minutes until the topping turns golden brown and a toothpick inserted into the biscuit comes out clean. You’ll know it’s ready when you see those berry juices bubbling up around the edges and through the gaps in the topping. Let the cobbler cool on a wire rack for at least 5 minutes before serving – this allows the filling to set slightly and makes serving easier.
Pro Tips for Making the Recipe
- Keep everything cold: Cold butter and buttermilk create the flakiest biscuit topping – if your kitchen is warm, chill the bowl of dry ingredients before adding butter.
- Don’t overwork the dough: Mix the biscuit topping just until combined – overworking develops gluten and makes for tough biscuits.
- Berry management: If using strawberries, quarter larger ones to ensure even cooking. For frozen berries, use them straight from the freezer – no thawing needed.
- Thickening control: If you prefer a more solid filling, increase cornstarch to 3 tablespoons. For a juicier cobbler, stick with 2 tablespoons.
- Check for doneness: Look for bubbling around the edges and a golden-brown topping. If topping browns too quickly, loosely cover with foil.
- Even cooking: Rotate the baking dish halfway through baking for even browning, especially if your oven has hot spots.
How to Serve
Berry cobbler shines when served warm, about 15-20 minutes after coming out of the oven. Here are my favorite serving suggestions:
Classic Pairings:
Top with a scoop of vanilla ice cream that slowly melts into the warm berries, creating a creamy sauce that’s absolutely divine. Alternatively, a dollop of lightly sweetened whipped cream provides a lovely contrast to the warm fruit.
Temperature Tips:
While warm is traditional, room temperature cobbler allows the berry flavors to fully develop. Chilled leftovers make a surprisingly delicious breakfast option paired with yogurt!
Special Occasions:
For a dinner party presentation, serve individual portions in ramekins with a mint leaf garnish and a light dusting of powdered sugar.
Make Ahead and Storage
Storing Leftovers
Cover leftover cobbler with plastic wrap or transfer to an airtight container and refrigerate for up to 5 days. The topping will soften over time but will still taste delicious.
Freezing
You can freeze fully baked cobbler for up to 3 months. Cool completely, then wrap tightly in plastic wrap and aluminum foil. Alternatively, freeze just the prepared berry filling in a zip-top freezer bag for future use.
Reheating
For the best texture and flavor, reheat refrigerated cobbler in a 350°F oven for 15-20 minutes until warmed through. For frozen baked cobbler, thaw overnight in the refrigerator, then reheat covered with foil at 350°F for about 20 minutes or until hot.
FAQs
-
Can I use all frozen berries for this cobbler?
Absolutely! Frozen berries work perfectly in cobblers and don’t need to be thawed first. Keep in mind that frozen berries release more liquid when baking, so you might want to add an extra tablespoon of cornstarch if you prefer a thicker filling. The baking time may also increase by 5-10 minutes.
-
Why did my cobbler turn out runny?
Several factors can lead to a runny cobbler. Very juicy or frozen berries release more liquid, cornstarch needs to reach a boiling point to fully activate, and the cobbler needs adequate cooling time to set. For a thicker filling, increase cornstarch to 3 tablespoons, ensure your cobbler bubbles during baking, and allow ample cooling time.
-
Can I make this cobbler with other fruits?
This recipe adapts beautifully to other fruits! Stone fruits like peaches, plums, or cherries work wonderfully. For apples or pears, I recommend partially cooking them first as they take longer to soften. Adjust sugar levels depending on the sweetness of your fruit, and consider adding complementary spices like cinnamon for apples or ginger for pears.
-
Is there a substitute for buttermilk in the topping?
If you don’t have buttermilk, you can easily make a substitute by adding 1 teaspoon of lemon juice or white vinegar to 1/2 cup of regular milk (whole milk works best). Let it sit for 5 minutes before using. In a pinch, plain yogurt thinned with a little milk also makes a good substitute with similar tangy notes.
Final Thoughts
This Berry Cobbler is more than just a dessert—it’s a celebration of the simple joy of transforming humble ingredients into something magical. The contrast between the juicy, sweet-tart berries and the buttery, golden topping creates a dessert that feels both indulgent and comforting. Whether shared at a summer gathering or enjoyed as a cozy winter treat with frozen berries, this cobbler brings a bit of homemade happiness to any occasion. Give it a try—your kitchen will smell amazing, and I promise those first warm, berry-filled bites will put a smile on everyone’s face!
Print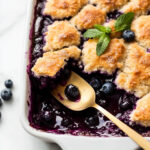
Berry Cobbler Recipe
- Prep Time: 10 minutes
- Cook Time: 50 minutes
- Total Time: 1 hour 5 minutes
- Yield: Serves 10-12
- Category: Desserts
- Method: Baking
- Cuisine: American
- Diet: Vegetarian
Description
Berry Cobbler is a delightful dessert packed with the freshest mixed berries, baked under a buttery, golden biscuit topping. This warm and comforting dessert is perfect for any occasion, served with a scoop of vanilla ice cream or freshly whipped cream. The combination of sweet, tangy berries with tender biscuit makes it an irresistible treat for family dinners or special gatherings.
Ingredients
For the Filling
- 8 cups (approx. 1kg) mixed berries (fresh or frozen, do not thaw)
- 1/2 cup (100g) granulated sugar
- 2 tablespoons (15g) cornstarch
- 1 teaspoon lemon juice
- 1/2 teaspoon pure vanilla extract
For the Biscuit Topping
- 1 and 1/2 cups (188g) all-purpose flour (spooned & leveled)
- 1/3 cup (65g) granulated sugar
- 1 and 1/2 teaspoons baking powder
- 1/4 teaspoon salt
- 6 tablespoons (85g) unsalted butter, cold and cubed
- 1/2 cup (120ml) buttermilk, cold
- Topping before baking: 1 tablespoon buttermilk and coarse sugar
Instructions
- Prepare the oven and pan:
Preheat your oven to 350°F (177°C) and grease a 9×13-inch pan to ensure the cobbler doesn’t stick. - Make the berry filling:
In a large mixing bowl, gently combine the mixed berries, granulated sugar, cornstarch, lemon juice, and vanilla extract. Mix well until the ingredients are evenly coated. Spread the berry mixture evenly into the prepared pan. - Prepare the biscuit topping:
In another large bowl, whisk together the flour, sugar, baking powder, and salt. Next, using a pastry cutter or two forks, cut the cold cubed butter into the dry mixture until it resembles pea-sized crumbs. Slowly drizzle in the buttermilk while stirring, mixing just until the dough comes together. Take small handfuls of the dough, flatten them, and place them over the berry filling. Cover most of the berries, but it doesn’t need to be perfect. - Add finishing touches:
Brush the top of the biscuit dough with 1 tablespoon of buttermilk and sprinkle with coarse sugar for a crunchy and golden finish. Both of these steps are optional but elevate the overall texture and presentation of the cobbler. - Bake:
Place the cobbler in the preheated oven and bake for 45-55 minutes, or until the biscuit topping is golden brown and cooked through. To check, insert a toothpick into the topping; if it comes out clean, the cobbler is done. Let the cobbler cool on a wire rack for 5 minutes before serving. - Serve and enjoy:
Serve warm with a dollop of vanilla ice cream or freshly whipped cream for an extra touch of indulgence. Cover and store leftovers in the refrigerator for up to 5 days.
Notes
- Freezing Instructions: The berry filling can be prepared and frozen for up to 3 months. Thaw before baking. The fully baked cobbler can also be frozen for up to 3 months; reheat in a 350°F oven for 20 minutes or until warmed through.
- Berry Selection: Use a combination of blueberries, blackberries, raspberries, or strawberries. Adjust based on your preference, keeping in mind that juicy berries like strawberries will produce a thinner filling.
- DIY Buttermilk: If you don’t have buttermilk on hand, mix 1 teaspoon of white vinegar or lemon juice with enough milk to make 1/2 cup. Stir and let it sit for 5 minutes before using.
- Individual Cobblers: You can divide the ingredients into oven-safe ramekins for personal-sized servings. Bake times will vary depending on their size.
Nutrition
- Serving Size: 1 serving
- Calories: 320
- Sugar: 28g
- Sodium: 160mg
- Fat: 10g
- Saturated Fat: 6g
- Unsaturated Fat: 4g
- Trans Fat: 0g
- Carbohydrates: 53g
- Fiber: 4g
- Protein: 3g
- Cholesterol: 25mg

