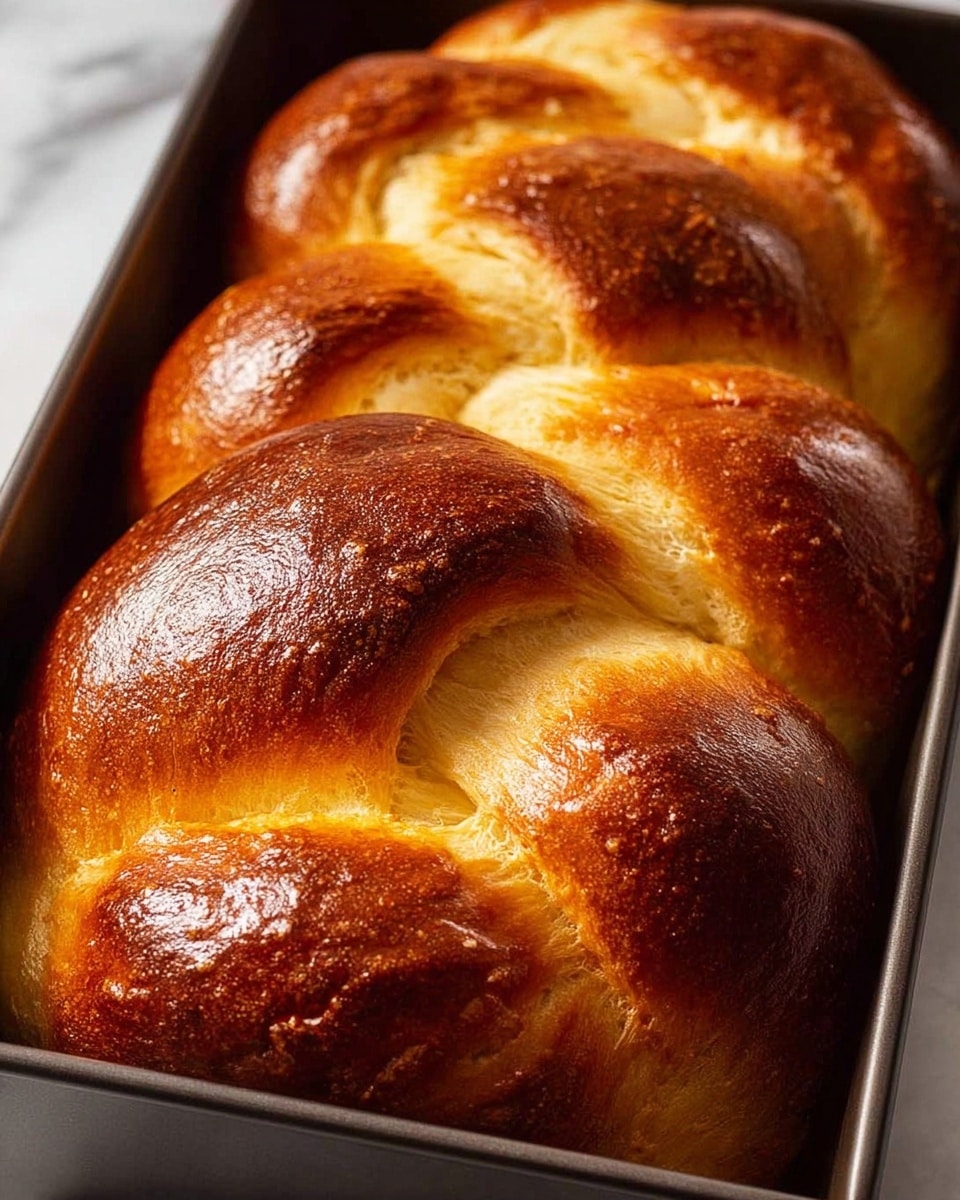
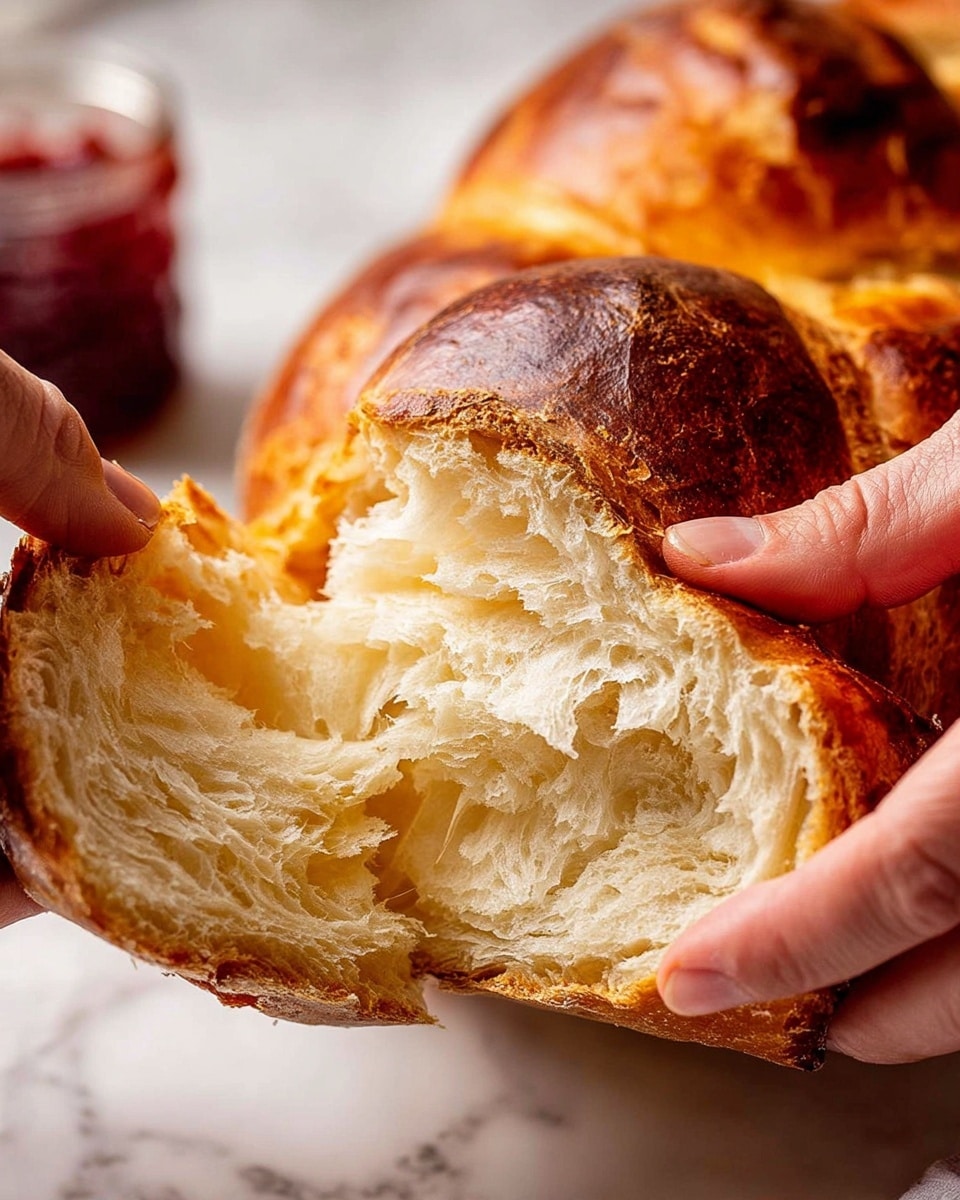
If you’ve ever dreamed of biting into a buttery, tender, and fluffy bread straight from a French bakery, this Homemade Classic French Brioche Recipe will absolutely blow you away. It’s not just any brioche — this one rises beautifully, has that delicate crumb that almost melts in your mouth, and delivers buttery goodness with every bite. I remember the first time I made it: the smell alone was intoxicating, and my family went crazy for it! Stick with me, and I’ll walk you through every step so you can enjoy fresh, homemade brioche in your kitchen, no fancy bakery needed.
Why You’ll Love This Recipe
- Authentic French Technique: This recipe was crafted with the help of a classically trained French chef, ensuring you’re getting the real deal.
- Soft, Butter-Rich Texture: The long kneading and gradual butter incorporation create that signature irresistibly fluffy crumb.
- Step-by-Step Guidance: From yeast blooming to baking tips, you’ll find practical advice to avoid any baking mishaps.
- Impressively Versatile: Perfect for breakfast, snacks, or even dessert — sweet or savory, you’re covered!
Ingredients You’ll Need
The magic of this Homemade Classic French Brioche Recipe lies in simple, quality ingredients coming together just right. A few key points: use all-purpose flour instead of bread flour for a tender crumb, soften your butter but don’t melt it, and don’t skip the yeast blooming step — it wakes up the yeast for a better rise.
- Instant/rapid rise dried yeast: Bloom it with a bit of sugar and warm milk to ensure it’s alive and kicking for a lofty rise.
- Milk (full fat, warm): Provides moisture and helps activate the yeast; full fat adds richness.
- Plain/all-purpose flour: Less protein than bread flour, making your brioche soft and fluffy.
- Caster/superfine sugar: Dissolves quickly, sweetening without grittiness.
- Eggs (room temperature): Adds color, richness, and tenderness; whisk them lightly for smooth integration.
- Salt (kosher or cooking salt preferred): Enhances flavor without overpowering; adjust if using finer table salt.
- Unsalted butter (softened, but firm): The star of the show for that signature buttery flavor and tender texture.
- Neutral oil spray: For prepping pans and preventing sticking without adding unwanted flavors.
- Leftover egg (for egg wash): Creates a beautiful golden crust.
Variations
One of the things I love about this Homemade Classic French Brioche Recipe is how easy it is to adjust and make your own. Whether you want to add a twist for dietary needs or just experiment with flavors, you’ve got a great base to work with.
- Chocolate Brioche: I’ve folded in some mini chocolate chips after the first rise — my kids went nuts for this indulgence!
- Vegan-Friendly Version: I’ve swapped butter for coconut oil and used plant-based milk with a flaxseed “egg” substitute, yielding a lovely brioche that’s dairy-free.
- Herb-Infused: Sometimes I add fresh thyme or rosemary to the dough for a savory brunch option that pairs beautifully with cheese and eggs.
- Overnight Rise: You can refrigerate the dough overnight after shaping – it slows fermentation and develops flavor; just let it warm and rise a bit longer before baking.
How to Make Homemade Classic French Brioche Recipe
Step 1: Bloom Your Yeast for the Best Rise
Start by mixing your instant yeast with a teaspoon of sugar and warm milk — not hot, just warm enough to feel cozy. Cover it and set it aside for about 10 minutes until it’s foamy. This is the “wake-up call” for your yeast. I used to think instant yeast could just go straight into the dough, but activating it this way makes my brioche rise higher and have a softer crumb. If your mixture isn’t foamy, your yeast might be old — better to swap it out than risk flattening your bread!
Step 2: Mix Your Dough with Patience and Love
Into your stand mixer bowl, add flour, eggs, salt, the rest of your sugar, and that foamy yeast mixture. Start mixing slowly until everything just comes together. Then keep at it, first on a slow speed for 5 minutes, then faster for 10 minutes. Yes, you’re kneading for 15 minutes right here! I know it sounds a little intense, but this is crucial for developing gluten in an enriched dough like brioche — trust me on this one.
Next comes the butter, your secret weapon for that legendary softness. Add your softened butter cubes gradually while the mixer runs on speed 2, over about 1 to 2 minutes. You’ll see the dough go from sticky and rough to silky and cohesive — it’s magical! Keep mixing for about 20 more minutes, scraping down the bowl every now and then. Your dough will start soft and sticky, but by the end, it should be smooth, elastic, and pass the “window pane” test. (If you’re new to that — pinch off a small piece of dough and gently stretch it thin until you can see light through it without tearing.)
Step 3: First Rise – Let the Dough Double in Size
Shape your dough into a ball and pop it back into the bowl. Cover it tightly with cling wrap and leave it in a warm spot for about 2 hours until it doubles in size. This is the quiet moment that builds flavor and volume. I usually set mine near a sunny window or inside my oven (turned off) with the light on. It’s always exciting to peek in and see it puffed up!
Step 4: Shape and Chill for Easier Handling
Punch the risen dough down gently to release the air, then fold the dough’s edges in 6 times on a lightly floured surface to build some structure. Shape it into a log and cut into 3 equal parts. Roll each piece into a ball and place them on a parchment-lined container sprayed with neutral oil. Cover and refrigerate for about 1.5 hours. This step is a game changer — it firms up the dough so it’s way easier to handle and braid later. I discovered this trick after struggling with sticky dough that lost its shape.
Step 5: Braid Your Brioche and Let it Rise Again
Take the chilled dough balls out and roll each into roughly 14-inch logs. Arrange them side by side and braid like your classic braid — three strands make a beautiful loaf. Tuck the ends neatly under and place the braid into a well-oiled loaf pan. Cover it with oiled cling wrap and leave it somewhere warm to rise for about 3 hours, or until it just doubles again. This slow second rise is where the dough puffs perfectly without over-proofing.
Step 6: Bake Until Golden and Heavenly
Preheat your oven to 390°F (200°C). Brush the surface of the brioche gently with whisked egg for that gorgeous, shiny, golden crust. Put the loaf in the lower third of your oven and bake uncovered for 15 minutes. Then loosely tent with foil and bake for another 20 minutes, or until the internal temperature hits around 190°F (88°C). The foil prevents the crust from getting too dark while allowing the inside to bake perfectly. Once out, flip the brioche out onto a cooling rack and let it rest for at least 45 minutes — slice it warm or wait until fully cool, either way, it’ll taste amazing!
Pro Tips for Making Homemade Classic French Brioche Recipe
- Yeast Blooming Matters: Don’t skip this step; it wakes up your yeast and prevents flat, dense bread.
- Long Kneading is Key: The dough needs extra mixing to develop gluten despite the high-fat content – patience really pays off.
- Butter Consistency is Crucial: Keep butter softened but firm; melting butter will make your dough greasy and tough to handle.
- Window Pane Test Saves the Day: If your dough breaks when you stretch it, keep kneading — this is your gluten development checkpoint.
How to Serve Homemade Classic French Brioche Recipe
Garnishes
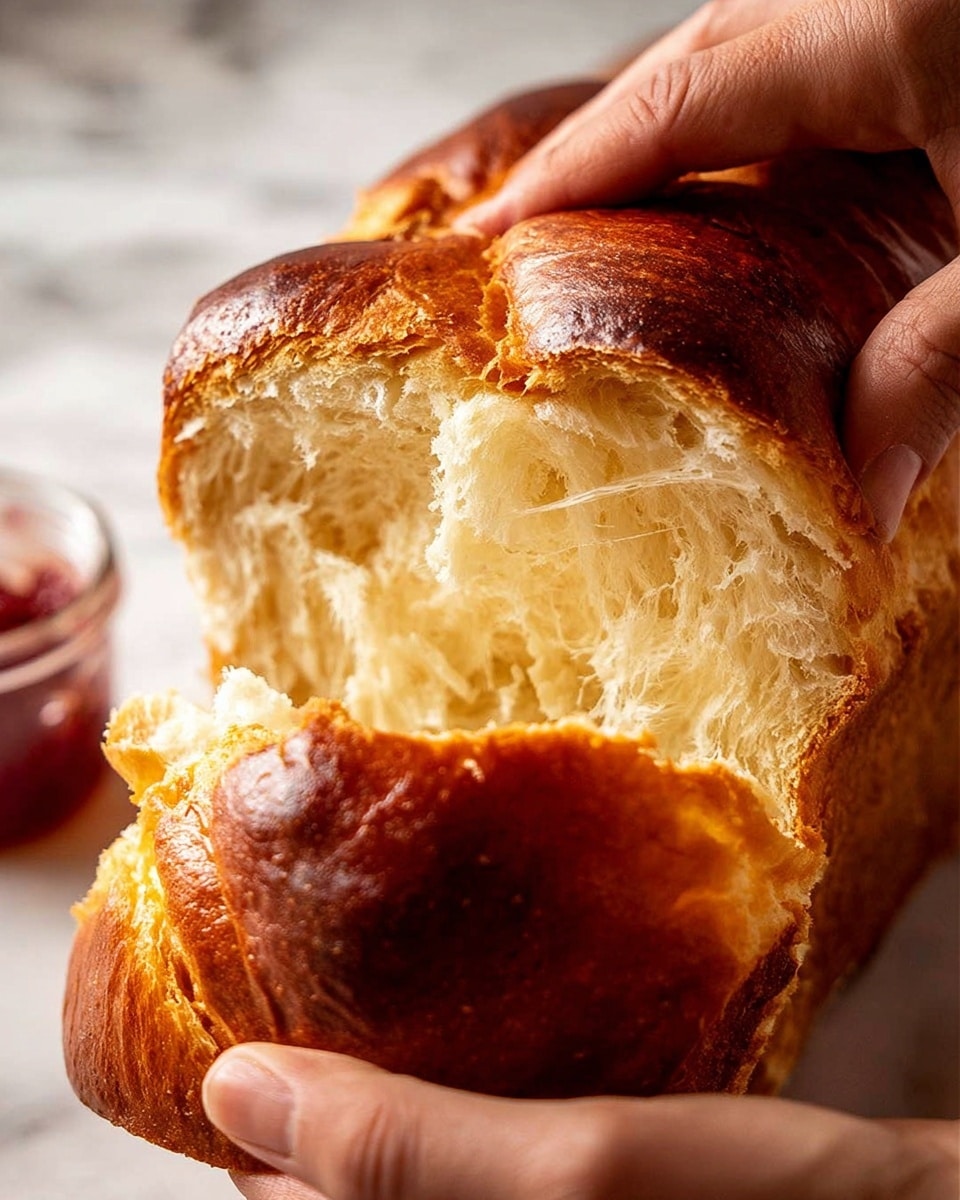
I love brushing the loaf with melted butter or adding a dusting of powdered sugar right before serving for a subtle finish. Sometimes I top slices with homemade fruit jam or a smear of rich Nutella — pure comfort on a plate. When serving savory, a sprinkle of flaky sea salt on warm slices adds an unexpected but delightful contrast.
Side Dishes
This brioche pairs wonderfully with breakfast favorites like scrambled eggs, smoked salmon, or a creamy cheese plate. For lunch or dinner, it’s a perfect side to soups like French onion or ratatouille. And for dessert, serve it with fresh berries and whipped cream or custard for a true French treat.
Creative Ways to Present
I’ve braided the brioche into a wreath shape for holiday brunches, decorating the center with fresh flowers or edible herbs. Another time, I made individual buns by dividing dough into smaller pieces before braiding, creating adorable hand-held treats. Get creative — you can even make French toast with the leftover slices for a crowd-pleasing breakfast.
Make Ahead and Storage
Storing Leftovers
I find the best way to keep brioche fresh for a couple of days is to wrap it tightly in plastic wrap and store it at room temperature. It stays soft and delicious, but I always recommend finishing it within 2 days for best texture. If your kitchen is warm or humid, storing it in an airtight container will help.
Freezing
Freezing brioche works wonderfully! I slice the loaf first and wrap individual slices in parchment and then foil before chucking them in the freezer. This way, you can pull out just what you need for toast or snacks. It will keep well for up to 3 months without losing that fresh taste.
Reheating
To bring brioche back to life, I wrap slices or whole loaf in foil and pop it in a 350°F (180°C) oven for about 10-15 minutes. You get that freshly baked warmth and soft texture every time — way better than microwaving!
FAQs
-
Can I make this Homemade Classic French Brioche Recipe without a stand mixer?
Absolutely! While a stand mixer makes kneading easier, you can hand-knead the dough—it will just take longer and require some elbow grease. Make sure to knead thoroughly to develop gluten, aiming for that smooth, elastic texture. You could also use a food processor as an alternative, adding butter slowly as directed.
-
Why is the butter added gradually in this recipe?
Adding butter little by little helps the dough absorb it evenly without becoming greasy. It also ensures the dough stays soft but catches enough gluten development during the long kneading process. Dumping all the butter at once can cause the dough to separate and get oily, affecting texture and rise.
-
How can I tell when my brioche dough is properly kneaded?
Look for a dough that’s soft and slightly sticky but comes away cleanly from the sides of the bowl. Perform the “window pane” test—a small piece of dough should stretch thin without tearing. If it easily breaks, keep kneading. Proper kneading means your brioche will have that delicate, airy crumb you’re after.
-
Can I bake this brioche in shapes other than a loaf?
Definitely! You can braid it, shape individual rolls, or create festive wreaths. Just remember that different shapes might require slightly different baking times, so keep an eye on your brioche and use a thermometer to check for doneness if unsure.
Final Thoughts
This Homemade Classic French Brioche Recipe holds a special place in my kitchen and heart. It’s the bread I reach for when I want to impress without stress, making special moments feel truly homemade. The buttery aroma, the pillowy soft crumb, and that delicate crust make every slice feel like a celebration. Trust me — once you try this recipe, you’ll want to make brioche a regular thing too. Happy baking, my friend!
Print
Homemade Classic French Brioche Recipe
- Prep Time: 45 minutes
- Cook Time: 35 minutes
- Total Time: 8 hours 30 minutes
- Yield: 10 slices (1 loaf)
- Category: Bread
- Method: Baking
- Cuisine: French
Description
Classic French Brioche recipe with a rich, buttery crumb and delicate crust. This enriched dough bread is soft, fluffy, and subtly sweet, perfect for breakfast or dessert, made using a stand mixer and baked in the oven for the perfect golden finish.
Ingredients
Dough Ingredients
- 2 1/2 tsp instant/rapid rise dried yeast
- 4 tbsp warm full fat milk
- 2 cups plain/all purpose flour
- 3 1/2 tbsp caster/superfine sugar
- 1/2 cup eggs (2 1/2 eggs), lightly whisked, at room temperature
- 1 tsp cooking/kosher salt (not table salt)
- 150g / 10.5 tbsp unsalted butter, cut into 1.25 / 1/2″ pieces, softened (not melting)
Other
- Oil spray (neutral flavored – canola, vegetable, not olive oil)
- 1/2 leftover egg, lightly whisked (for egg wash)
Instructions
- Bloom yeast: In a small bowl, mix 1 tsp sugar, yeast and warm milk together. Cover with cling wrap and set aside in a warm place for 10 minutes or until foamy.
- Make dough: In the bowl of a stand mixer fitted with a dough hook, combine the flour, eggs, salt, remaining sugar and the foamy yeast mixture. Mix on speed 1 until ingredients combine.
- Mixing Part 1: Continue mixing on speed 1 for 5 minutes then increase to speed 2 for 10 minutes. This long mixing helps develop gluten despite the high fat content.
- Slowly add butter: With the mixer running on speed 2, gradually add softened butter cubes over 90 seconds to 2 minutes, allowing partial incorporation.
- Incorporate butter: Keep mixing on speed 2 for about 1 minute until butter is fully mixed in and dough becomes pasty and sticky.
- Mixing Part 2: Continue mixing on speed 2 for 20 more minutes, scraping down the bowl sides occasionally. The dough should form a soft, elastic ball that passes the windowpane test.
- First rise: Shape dough into a ball, place in the mixer bowl, cover with cling wrap and leave in a warm spot for 2 hours or until doubled in size.
- Divide and shape: Punch down the dough and turn it onto a floured surface. Fold dough inward 6 times, shape into a log and cut into 3 equal balls (~225g each).
- Chill dough: Place dough balls on oil-sprayed parchment in a deep container, cover and refrigerate for 1.5 hours to firm and smoothen the dough.
- Braid: Roll each dough ball into 14″ logs, braid the three logs, tuck ends under and place in a well-oiled 8.5×4.3″ loaf pan. Cover with oiled cling wrap.
- Second rise: Allow dough to rise in a warm place for 3 hours or until just over doubled in size.
- Preheat oven: Preheat oven to 200°C (390°F) or 180°C fan when dough is nearly ready. Position rack in the lower third.
- Egg wash: Gently brush the brioche surface with leftover whisked egg.
- Bake uncovered: Bake brioche uncovered for 15 minutes until deep golden brown.
- Bake covered: Remove from oven, loosely cover with foil, then bake additional 20 minutes until internal temperature reaches 88°C (190°F).
- Cool: Immediately remove brioche from pan and cool on a wire rack for at least 45 minutes before slicing or tearing.
- Serve: Serve warm with butter and jam or toast slices as desired.
Notes
- Yeast: Instant yeast is recommended and blooming it gives a higher rise and softer bread. If no foam appears during blooming, yeast is inactive and should be replaced.
- Milk: Use full-fat milk for best texture.
- Flour: All purpose/plain flour yields a softer crumb than bread flour.
- Sugar: Caster/superfine sugar blends better but granulated white sugar is acceptable.
- Eggs: Use 2 1/2 eggs to measure 1/2 cup whisked eggs; leftover 1/2 egg is used for egg wash.
- Salt: Use cooking/kosher salt; reduce quantity if using fine table salt.
- Butter: Softened but not melting, ideally 20–22°C (68–71.5°F).
- Mixing Time: Long kneading develops gluten despite high fat content; dough should pass windowpane test for elasticity.
- Adding Butter: Add gradually to ensure incorporation and prevent greasy dough.
- Windowpane Test: Stretch a walnut-size dough piece to thin translucent sheet without breaking to check gluten development.
- Dough Consistency: Adjust flour or milk slightly if dough too sticky or crumbly.
- Chilling dough: Optional but improves handling and surface smoothness.
- Second Rise: Dough will rise about 1cm above loaf pan rim.
- Baking Temperature: Internal baked temperature of 88°C (190°F) is ideal for enriched dough like brioche.
- Storage: Freeze brioche for up to 3 months; reheat wrapped in foil at 180°C (350°F) for 10–15 minutes.
- Alternate Method: Food processor method available for dough mixing.
Nutrition
- Serving Size: 1 slice (1/16 loaf)
- Calories: 225 kcal
- Sugar: 4 g
- Sodium: 150 mg
- Fat: 12 g
- Saturated Fat: 7 g
- Unsaturated Fat: 4 g
- Trans Fat: 0 g
- Carbohydrates: 25 g
- Fiber: 1 g
- Protein: 5 g
- Cholesterol: 55 mg

