

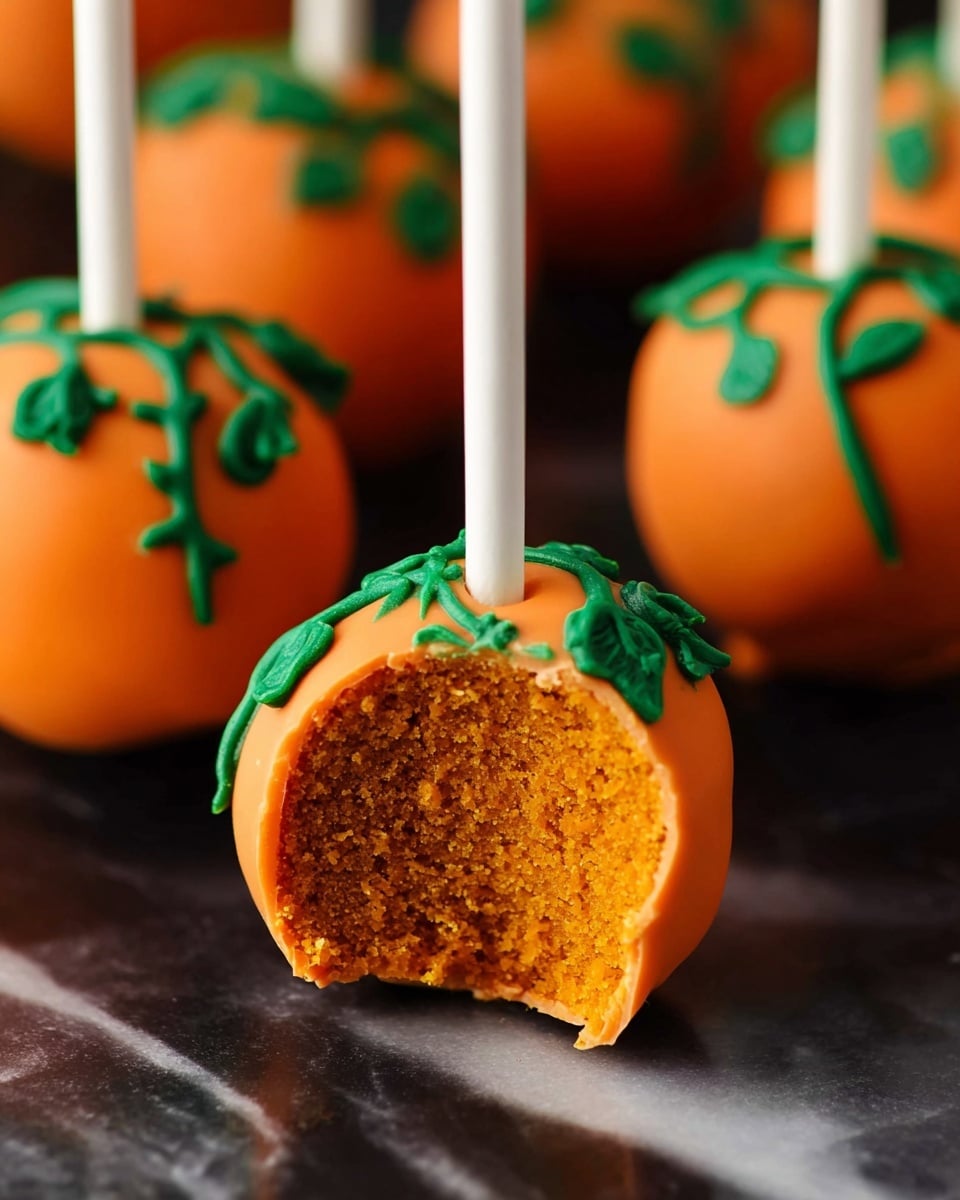
If you’re looking for a cozy, festive treat that’s as fun to make as it is to eat, you’re going to adore this Pumpkin Spice Cake Balls Recipe. Imagine bite-sized pumpkin-spiced goodness wrapped in a smooth candy coating, perfect for fall parties or everyday indulgence. When I first tried this recipe, I was blown away by how easy it was to get that rich pumpkin flavor and tender cake texture in such a playful form. Stick with me—I’ll walk you through every step so your cake balls come out perfect every time!
Why You’ll Love This Recipe
- Super Easy to Make: You don’t need fancy equipment or complicated steps—just basic mixing and some chilling time.
- Perfect Pumpkin Flavor: The combination of pumpkin purée and warming spices hits just the right cozy note every bite.
- Fun for All Ages: Kids love helping roll the balls and decorate, and adults can’t stop eating them.
- Great for Gifting: These cake balls make adorable edible gifts for friends, neighbors, and coworkers.

Ingredients You’ll Need
The magic behind these pumpkin spice cake balls starts with pantry-friendly ingredients that combine effortlessly. You’ll find that the canned pumpkin and warming spices create a moist, flavorful base, while the cream cheese frosting keeps everything perfectly tender. Here’s a quick rundown of each ingredient and why it matters.
- Yellow Cake Mix or Spice Cake Mix: Using spice cake mix can deepen the warm flavors, but yellow cake mix works beautifully too—just skip adding cinnamon if you go with spice cake mix.
- Whipped Cream Cheese Frosting: This adds the perfect creamy tang and moisture that turns the crumbled cake into a dough-like mixture ideal for rolling.
- Water, Vegetable or Canola Oil, and Eggs: Standard cake mix wet ingredients that keep the cake moist and tender.
- Libby’s Canned Pumpkin Purée: Makes the cake wonderfully moist and adds that classic pumpkin taste we crave in fall desserts.
- Ground Cinnamon and Pumpkin Pie Spice: These spices give the cake balls their signature cozy autumn aroma and flavor.
- Orange Candy Melts: For dipping and creating the pumpkin look—white almond bark with orange food coloring works great if you prefer.
- Green Frosting: To pipe the pumpkin vines and leaves that complete the look.
- Lollipop Sticks: For easy dipping and making these into cake pops.
Variations
One of the things I love about this Pumpkin Spice Cake Balls Recipe is how easy it is to tweak for different tastes or occasions. Whether you want to shift the spice profile, make it gluten-free, or spruce up the decoration, there’s plenty of room to make it your own.
- Spice Swap: I sometimes swap pumpkin pie spice for allspice or add a tiny pinch of cloves for deeper complexity—feel free to experiment based on what you like.
- Flavor Boost: Add a handful of finely chopped nuts or mini chocolate chips mixed into the cake-frosting dough for texture contrast.
- Diet-Friendly: Use a gluten-free cake mix to accommodate dietary needs without losing the signature flavor.
- Colorful Coatings: Instead of orange candy melts, try white with edible glitter or drizzle with white chocolate for a snowy effect that’s perfect for autumn weddings or baby showers.
How to Make Pumpkin Spice Cake Balls Recipe
Step 1: Mix Your Pumpkin Spice Cake Batter
Start by preheating your oven to 325°F and greasing a 13″ x 9″ pan. In a large bowl, combine the cake mix, water, oil, eggs, pumpkin purée, cinnamon, and pumpkin pie spice until smooth and lump-free. I like to mix just until everything is combined—overmixing can toughen the cake. Pour this velvety batter into your pan and bake for about 22 to 24 minutes. You’ll know it’s done when the top springs back with a light touch or a toothpick inserted in the center comes out clean.
Step 2: Crumble and Combine with Frosting
After cooling completely, crumble the cake into a large bowl. Add the can of whipped cream cheese frosting and stir to combine. This is the part where the texture matters—a smooth, cookie dough-like consistency is what you’re aiming for. If it’s too dry and crumbly, add a bit more frosting. If it’s too wet, sprinkle in some more cake crumbs. Getting this balance right helps the balls hold their shape perfectly.
Step 3: Shape, Chill, and Prep for Dipping
Use a small cookie scoop or your hands to form even-sized balls, then place them on parchment paper. Pop these into the freezer for an hour or chill them in the fridge for 2 hours to firm up. This chilling step is a game changer—it prevents cracks and keeps your cake balls sturdy during dipping.
Step 4: Insert Sticks and Dip in Candy Melts
Warm the candy melts gently in the microwave. Dip the tips of your lollipop sticks into the melted candy, then carefully insert each stick halfway into every chilled cake ball. The melted candy acts like glue to keep those sticks in place—trust me, I learned this the hard way before! Return the sticks back to the freezer while you melt the rest of the candy melts.
One by one, dip each cake ball into the melted orange candy, letting the excess drip off. If you notice any cracks or the cake balls loosen from the sticks, pop them back into the freezer for a bit to firm up. If your candy melts thicken while dipping, stir in a spoonful of vegetable oil to smooth it out.
Step 5: Decorate Your Pumpkin Cake Balls
Once coated and hardened, use a piping bag or a resealable bag with a tiny corner snipped to pipe green frosting vines and leaves on each cake ball to transform them into little pumpkins. You’ll love how this final step adds charm and whimsy.
Pro Tips for Making Pumpkin Spice Cake Balls Recipe
- Perfect Frosting Ratio: I found that using one can of whipped cream cheese frosting makes the mixture just right—like dough you can roll without it cracking or being sticky.
- Dip Lollipop Sticks in Candy First: Dipping the sticks before inserting them keeps them snug and prevents frustrating detachment during dipping.
- Keep Your Cake Balls Cold While Dipping: If they start to soften or crack, pop them back in the freezer for 10-15 minutes to firm up again for smooth, even coating.
- Thin Out Thick Candy Melts: Adding a tablespoon or two of vegetable oil thins candy melts and helps you get that beautiful, smooth finish.
How to Serve Pumpkin Spice Cake Balls Recipe
Garnishes
I usually keep the garnishes simple with the green frosting vines—it’s charming and straightforward. But for a little extra fun, you can sprinkle edible glitter, tiny candy seeds, or a dusting of cinnamon right before the candy coating sets for that extra festive flair.
Side Dishes
These cake balls are best enjoyed on their own as a sweet bite, but if you want to serve them at a fall-themed gathering, they pair beautifully alongside hot apple cider, chai tea, or a creamy pumpkin latte. It’s like having fall’s best flavors all in one sitting.
Creative Ways to Present
For a party, I love arranging these pumpkin cake balls upright in a pumpkin-shaped foam block covered with tissue paper or faux leaves. Another fun idea is to place them in autumnal cupcake liners on a tiered dessert stand, or tie little ribbons around the sticks for gifting.
Make Ahead and Storage
Storing Leftovers
I keep leftover pumpkin spice cake balls in an airtight container in the fridge. They stay moist and fresh for up to 5 days—just bring them to room temperature for about 10 minutes before serving for the best texture and flavor.
Freezing
These cake balls freeze wonderfully! After dipping and decorating, I set them on a parchment-lined tray, freeze until firm, then transfer them to a freezer-safe container. They keep for up to 3 months. When you’re ready to enjoy, thaw overnight in the fridge.
Reheating
Since these are more of a chilled treat, I recommend enjoying them cold or at room temp. If you want them softer, let them sit on the counter for 20 minutes. Avoid microwaving as the candy coating may melt.
FAQs
-
Can I use a different cake mix for this recipe?
Absolutely! Both yellow and spice cake mixes work well. If you choose spice cake, you might want to skip adding extra cinnamon to avoid over-spicing.
-
What if my cake balls crack during dipping?
This usually means they need to be chilled longer. Pop them back into the fridge or freezer until firm before dipping again to prevent cracks and keep a smooth coating.
-
Can I make these cake balls without lollipop sticks?
Yes, you can make traditional cake balls without sticks. Just roll them slightly larger and place them on parchment paper to chill before dipping and serving as bite-sized treats.
-
How do I prevent the candy melts from getting too thick?
If your candy melts thicken during use, add a tablespoon or two of vegetable oil or shortening and stir well. This loosens the melts and makes dipping easier.
Final Thoughts
This Pumpkin Spice Cake Balls Recipe holds a special place in my kitchen because it captures all the cozy fall vibes in just one little bite. It’s perfect for sharing with friends or sneaking one (or two) with your afternoon coffee. Plus, it’s forgiving enough for beginners but fun enough to impress guests. I can’t recommend giving these a try enough—you’ll be hooked after your first batch, just like me!
Print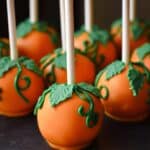
Pumpkin Spice Cake Balls Recipe
- Prep Time: 30 minutes
- Cook Time: 24 minutes
- Total Time: 1 hour 54 minutes
- Yield: 55 Cake Balls
- Category: Dessert
- Method: Baking
- Cuisine: American
Description
Delight in these festive Pumpkin Spice Cake Balls, a perfect bite-sized treat combining moist pumpkin-spiced cake with creamy cream cheese frosting, dipped in vibrant orange candy melts and decorated with green frosting vines. Ideal for fall celebrations and Halloween parties, these easy-to-make cake balls offer a sweet and spiced flavor with a delightful textural contrast.
Ingredients
Cake Batter
- 1 Box Yellow Cake Mix or Spice Cake Mix (omit cinnamon if using spice cake mix)
- 1 cup Water
- ½ cup Vegetable or Canola Oil
- 3 Large Eggs
- 1 cup Libby’s Canned Pumpkin Purée
- 1 teaspoon Ground Cinnamon
- 1 teaspoon Pumpkin Pie Spice
Frosting
- 1 Can Whipped Cream Cheese Frosting
Coating and Decoration
- 24 ounces Orange Candy Melts (or white almond bark with orange food coloring or icing gel)
- 1 Tube Green Frosting
- Lollipop Sticks
Instructions
- Preheat and Prepare: Preheat your oven to 325℉ (163℃). Lightly grease a 13″ x 9″ baking pan with nonstick cooking spray to ensure the cake releases easily after baking.
- Make the Batter: In a large mixing bowl, combine the cake mix, water, vegetable oil, eggs, pumpkin purée, ground cinnamon, and pumpkin pie spice. Mix thoroughly until the batter is smooth and free of lumps.
- Bake the Cake: Pour the batter evenly into the prepared baking pan. Bake in the preheated oven for 22-24 minutes, or until the top springs back when lightly touched or a toothpick inserted into the center comes out clean.
- Cool and Crumble: Allow the cake to cool completely. Once cooled, crumble the cake into fine crumbs in a large bowl.
- Add Frosting: Add the entire can of whipped cream cheese frosting to the crumbled cake and mix well. The mixture should resemble the consistency of cookie dough—moist and pliable enough to hold its shape without cracking.
- Form Cake Balls: Use a small cookie scoop or spoon to portion the mixture and roll it gently between your palms to form evenly sized balls. Place the formed balls on a parchment-lined baking sheet.
- Chill the Balls: Freeze the cake balls for 1 hour or refrigerate for 2 hours until firm enough to handle.
- Prepare Candy Melt Sticks: Melt about ½ cup of the orange candy melts in the microwave according to package instructions. Dip the tip of each lollipop stick about ½ inch into the melted candy and insert it halfway into each chilled cake ball. If the balls crack or are too soft, return them to the freezer to firm up.
- Dip Cake Balls: Place the cake balls with sticks back in the freezer while melting the remaining candy melts. Once melted, dip each cake ball fully into the candy melts, allowing excess coating to drip off. If balls loosen or fall off sticks, chill again in the freezer to firm.
- Decorate: Once the candy coating has hardened, use green frosting in a piping bag or resealable bag with a small corner cut to pipe vines and leaves onto each cake ball, creating a pumpkin effect.
Notes
- Ensure the right cake-to-frosting ratio for a dough-like consistency that holds shape without cracking or being too dry.
- Dip lollipop sticks first in melted candy coating to help secure them firmly in the cake balls.
- Chill cake balls with sticks before dipping to prevent them from falling off during coating.
- If the candy melts are too thick, thin by adding 1-2 tablespoons of shortening or vegetable oil for smoother dipping.
- Work in batches to keep candy melts melted and cake balls firm.
Nutrition
- Serving Size: 1 Cake Ball
- Calories: 150
- Sugar: 16g
- Sodium: 170mg
- Fat: 7g
- Saturated Fat: 3g
- Unsaturated Fat: 3g
- Trans Fat: 0g
- Carbohydrates: 21g
- Fiber: 1g
- Protein: 2g
- Cholesterol: 25mg


