
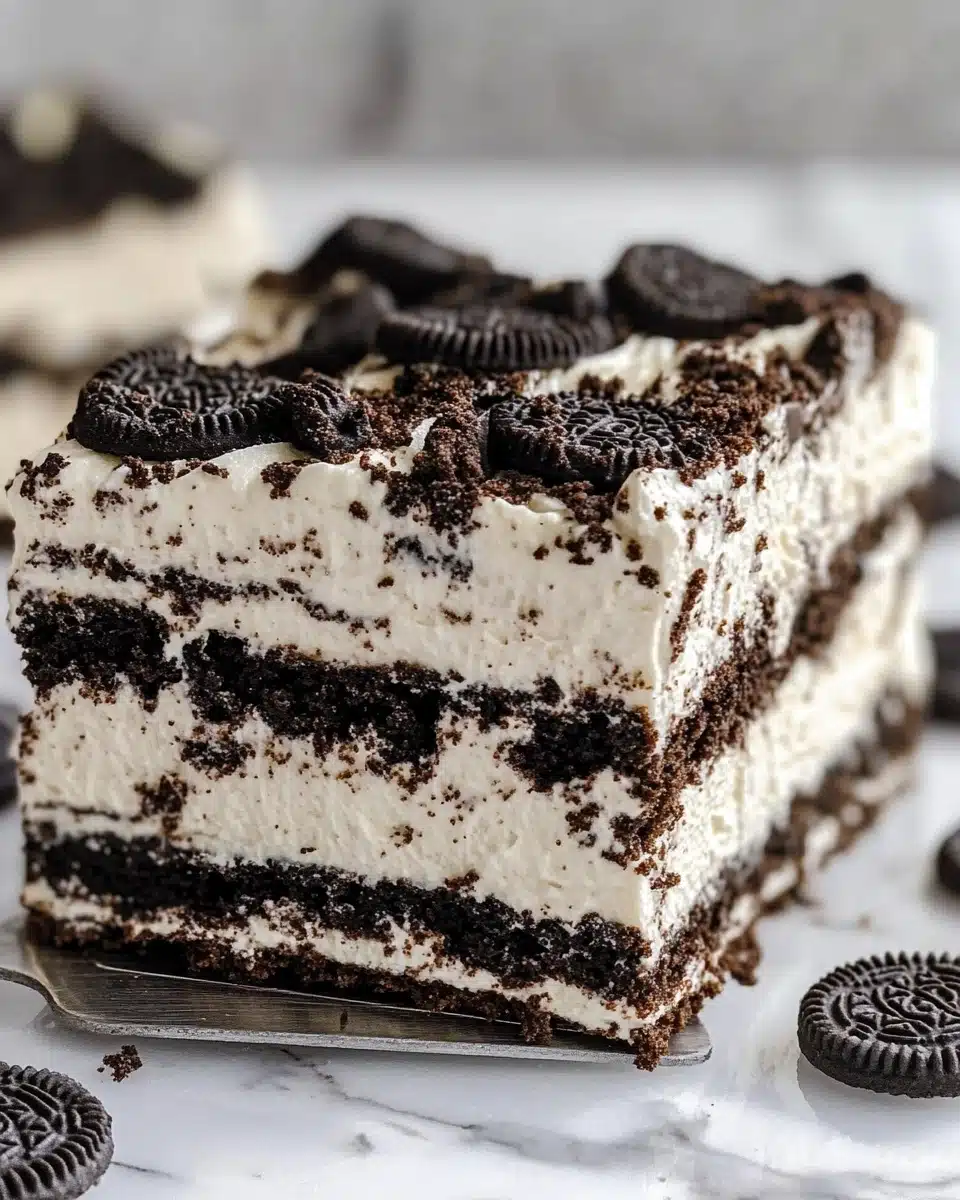
This dreamy Oreo Icebox Cake is my go-to no-bake dessert for every celebration or just when I want to indulge my inner child! Layer upon irresistible layer of chocolatey Oreos and billowy homemade whipped cream meld together overnight for a chilled treat that tastes like pure nostalgia with a creamy twist.
Why You’ll Love This Recipe
- No-Bake Wonder: Oreo Icebox Cake is a hassle-free, oven-free crowd-pleaser that’s perfect for warm days or last-minute dessert emergencies.
- Creamy & Dreamy: The homemade whipped cream brings an airy, melt-in-your-mouth texture you just won’t get with store-bought substitutes.
- Kid (and Adult) Favorite: Every bite is studded with classic Oreo cookies, guaranteeing smiles all around—no matter your age!
- Perfect for Make-Ahead: This treat only gets better as it chills, making it ideal for parties, potlucks, or planning ahead.

Ingredients You’ll Need
The magic of Oreo Icebox Cake is in its simplicity—just five ingredients, but every one brings something essential to the table. Don’t be fooled by the short list: each element adds a little color, texture, or indulgence to this effortless dessert!
- Heavy Whipping Cream (2 cups): This is the secret to luscious, cloud-like layers. Use the real thing for the most stable, rich whipped cream—no shortcuts here!
- Powdered Sugar (1 cup): Sweetens the cream just enough without making it heavy, plus it helps stabilize the mixture so your layers stay gorgeous and sliceable.
- Vanilla Extract (1 tablespoon): Pure vanilla deepens the flavor and gives your cream irresistible bakery vibes—skip the imitation if you want maximum flavor.
- Whole Oreos (30 cookies): These are the sturdy foundation and fun texture in every layer. If you need to, snip a few in half to fit snugly in each row.
- Crushed or Chopped Oreos (about 12 cookies): For that picture-perfect crunchy topping—save these for just before serving to keep things irresistibly fresh and crumbly.
Variations
Once you master the classic Oreo Icebox Cake, let your imagination run wild! You can easily adapt this crowd-pleasing recipe to fit your cravings, dietary needs, or whatever treats you have hiding in your pantry.
- Chocolate Lovers’ Dream: Swap the classic Oreos for Double Stuf or Chocolate Creme Oreos, and drizzle fudge sauce between layers for an ultra-rich upgrade.
- Dairy-Free Delight: Use non-dairy whipping cream and check your Oreos for vegan certification to make a treat everyone at the table can share.
- Funfetti Twist: Fold rainbow sprinkles into the whipped cream for birthday parties or just a little extra cheer in every bite.
- Berry Burst: Tuck sliced strawberries or raspberries between the Oreo layers for fresh pops of tartness against the creamy richness.
How to Make Oreo Icebox Cake
Step 1: Make the Whipped Cream
Grab your coldest mixing bowl (bonus points if it’s been chilling in the freezer!) and add the heavy whipping cream, powdered sugar, and vanilla extract. With a stand mixer or hand mixer, whip first on low—no splatters, please—then crank up the speed as it thickens and beat until you see stiff, glossy peaks. The cream should hold its shape when you lift the beater—this usually takes 7 to 8 minutes, but keep a watchful eye!
Step 2: Build the First Layer
In your favorite 8×8-inch baking dish, line the bottom with a tight layer of whole Oreos. Don’t be afraid to snap a few cookies in half to fill in any gaps. Press until you have a solid cookie “floor”—think of this as the base for all the goodness to come!
Step 3: Whipped Cream Magic
Scoop half of your freshly whipped cream onto the Oreo layer, spreading gently to cover every nook and cranny. Take your time—the smoother the top, the neater your layers will look when you slice into the cake!
Step 4: Repeat and Finish
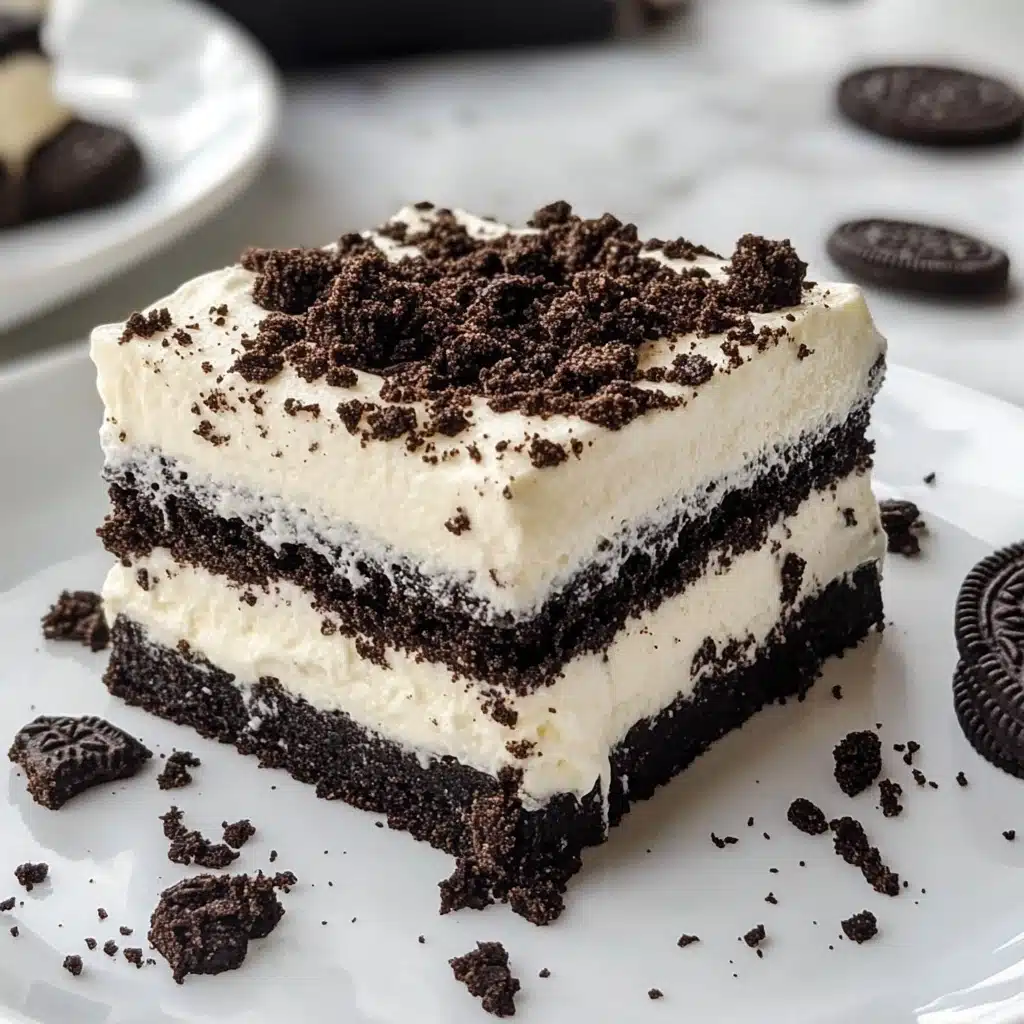
Add another snug layer of Oreos over the cream, then finish by spreading the remaining whipped cream all the way to the edges. This double-stack gives you those signature layers that everyone loves in Oreo Icebox Cake.
Step 5: Chill and Top
Cover your cake tightly with plastic wrap or a lid and pop it in the fridge to chill for at least 8 hours—overnight if you can stand the wait! The magic happens here, as the cookies soften into an irresistible cakey texture. Right before serving, sprinkle the top generously with crushed or chopped Oreos for that final festive touch.
Pro Tips for Making Oreo Icebox Cake
- Super-Chilled Tools: For the fluffiest whipped cream, freeze your bowl and beaters for 30 minutes before starting—cold utensils help cream whip up faster and higher!
- Mind Your Peaks: Stop whipping as soon as you reach stiff peaks—overbeating can turn your cream grainy, and we’re after pillowy perfection.
- Cookie Fitting: If you have gaps in your cookie layers, don’t stress—break Oreos in half to patch the spaces, ensuring every slice is perfectly layered.
- Save the Topping for Last: Always sprinkle the crushed Oreos on just before serving so they stay delightfully crunchy rather than softening in the fridge.
How to Serve Oreo Icebox Cake
Garnishes
Before presenting your Oreo Icebox Cake, give it a celebration-worthy finish! Scatter a mountain of crushed Oreos on top, or go extra with a drizzle of chocolate syrup, a few chocolate curls, or even piped rosettes of reserved whipped cream. A handful of mini Oreos nestled on top makes it absolutely irresistible—especially to little ones.
Side Dishes
Pair a decadent slice with a scoop of vanilla or coffee ice cream for a dreamy dessert duo. For something refreshing, offer a big bowl of summer berries or fruit salad on the side—anything a little tart and juicy is the perfect contrast to the creamy richness!
Creative Ways to Present
For parties, try assembling Oreo Icebox Cake in individual mason jars or dessert glasses for a show-stopper effect—layer in minis for a cute, portable treat! You can also make a towering trifle if you double the recipe, or cut slices into tidy squares and arrange them on a cake stand decorated with extra cookies and chocolate shavings.
Make Ahead and Storage
Storing Leftovers
Oreo Icebox Cake is a superstar at keeping its texture! Just cover leftovers with plastic wrap or a tight-fitting lid, and keep them refrigerated. It’ll stay perfectly soft and creamy for up to 3-4 days (if you can make it last that long!).
Freezing
Want to get ahead? You can freeze Oreo Icebox Cake for up to a month. Wrap it tightly in both plastic and foil. Thaw overnight in the fridge for that classic soft “cake” bite, or enjoy it slightly frozen for a firmer, ice cream-like texture—totally delicious!
Reheating
No reheating needed! Oreo Icebox Cake is at its best straight from the fridge, cold and creamy. If it’s frozen, just thaw as described above—then dig in and enjoy.
FAQs
-
Can I use store-bought whipped topping instead of homemade whipped cream?
While you can use Cool Whip or another whipped topping in a pinch, I strongly recommend making your own whipped cream for Oreo Icebox Cake. Homemade whipped cream thickens and stabilizes beautifully, creating a cleaner slice and better texture, while store-bought toppings tend to deflate and become runny over time.
-
How long does my Oreo Icebox Cake need to chill?
Your cake should chill for at least 8 hours (overnight is best). This gives the cookies time to soften and soak up the cream, transforming from crisp to perfectly cake-like—no shortcuts, trust me!
-
Can I make Oreo Icebox Cake gluten-free or vegan?
Absolutely! Choose gluten-free chocolate sandwich cookies and swap in a non-dairy whipping cream (like coconut or soy-based) to make a version everyone can enjoy. Always double-check labels to ensure your cookies and cream meet your dietary needs.
-
Why did my cake turn out runny?
If your Oreo Icebox Cake is runny, it’s usually because the whipped cream wasn’t beaten to stiff peaks, or it was made with a topping that’s too soft. For the sturdiest result, use full-fat heavy cream, beat until peaks hold their shape, and chill the cake thoroughly for the best sliceable texture.
Final Thoughts
If you’re looking for a surefire way to win friends and influence dessert lovers, you’ve got to make Oreo Icebox Cake. It’s unbelievably easy, endlessly adaptable, and guaranteed to deliver smiles—and maybe just a few joyful gasps—every time you bring it to the table. Give it a try, and don’t forget the extra Oreos for snacking while you assemble!
Print
Oreo Icebox Cake Recipe
- Prep Time: 20 minutes
- Cook Time: 0 minutes
- Total Time: 8 hours 20 minutes
- Yield: 9 servings
- Category: Dessert
- Method: No-Bake
- Cuisine: American
- Diet: Vegetarian
Description
This Oreo Icebox Cake is a decadent no-bake dessert that’s perfect for any occasion. Layers of creamy whipped cream and Oreo cookies come together to create a rich and indulgent treat that will satisfy any sweet tooth.
Ingredients
Whipped Cream:
- 2 cups heavy whipping cream
- 1 cup powdered sugar
- 1 tablespoon vanilla extract
Oreo Layers:
- 30 whole Oreos
- 12 crushed/chopped Oreos
Instructions
- Prepare the Whipped Cream: In a large mixing bowl, beat heavy whipping cream, powdered sugar, and vanilla extract until stiff peaks form, about 7-8 minutes.
- Assemble the Cake: Layer an 8×8 pan with whole Oreos, half of the whipped cream, another layer of Oreos, and the remaining whipped cream. Refrigerate for at least 8 hours.
- Finish and Serve: Top the cake with crushed/chopped Oreos before serving.
Notes
- Oreos: A standard pack of Oreos with 45 cookies is sufficient for this recipe.
- Tip: Use homemade whipped cream for best results, not Cool Whip.
- For optimal flavor, use pure vanilla extract.
- Homemade Whipped Cream: Chill the bowl and beaters before whipping for faster results.
- Serving: Add chopped Oreos and optional chocolate syrup before serving.
Nutrition
- Serving Size: 1 slice
- Calories: 380
- Sugar: 23g
- Sodium: 200mg
- Fat: 28g
- Saturated Fat: 16g
- Unsaturated Fat: 9g
- Trans Fat: 0g
- Carbohydrates: 32g
- Fiber: 1g
- Protein: 3g
- Cholesterol: 80mg


